
Do you need to add a mega menu in your WordPress web site?
Mega Menus mean you can prepare dozens and even lots of of hyperlinks into user-friendly columns and rows. You may then add wealthy content material like photographs and movies, to make your mega menus much more useful.
On this article, we are going to present you how one can add a mega menu to your WordPress web site, step-by-step.
Why Add a Mega Menu on Your WordPress Web site?
WordPress comes with a drag-and-drop builder you need to use to create a dropdown menu, header menu, and extra. There are even plugins that mean you can create customized navigation menus in WordPress themes.
In case your web site has a number of content material then you might have to create a mega menu as a substitute. These mega menus mean you can add multi-column dropdowns to the WordPress navigation.
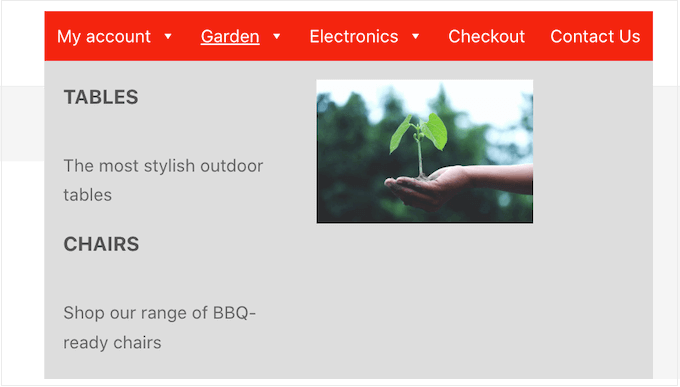
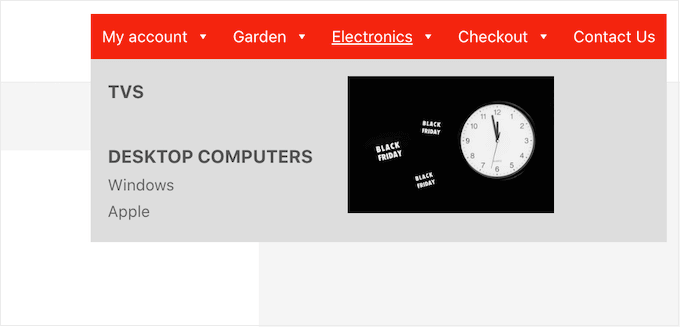
You need to use mega menus to arrange your content material underneath totally different headings and subheadings, so guests can discover precisely the web page they’re searching for. For instance, if you happen to create a web based market you then would possibly prepare all of your product classes and subcategories in a mega menu.
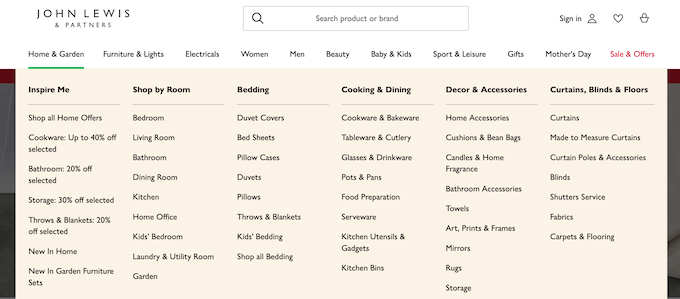
This helps consumers discover the precise product class they need, and make a purchase order.
Mega menus may also present wealthy content material to your guests, equivalent to movies, textual content, search, and up to date posts.
Many web sites use photographs, too, as a result of they make mega menus simpler to scan. Even if you happen to’re exhibiting dozens of menu objects, dividing them into columns after which including a related picture will help guests discover precisely the content material they’re searching for in seconds.
That mentioned, let’s see how one can simply add a mega menu to your WordPress web site.
Tips on how to Create a Mega Menu for Your WordPress Web site
The best manner so as to add a mega menu in your WordPress web site is through the use of Max Mega Menu. This plugin permits you to add wealthy content material to your mega menus, together with photographs, textual content, galleries, and extra.
On this manner, you’ll be able to create extra participating and useful menus.
You may also type each a part of the mega menu by including totally different colours, altering the font measurement, and utilizing totally different icons.
First, you’ll want to put in and activate the plugin. When you need assistance, then please see our information on learn how to set up a WordPress plugin.
Allow Mega Menus on Your WordPress Web site
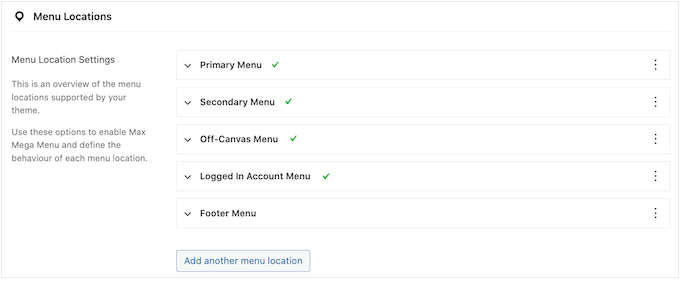
Upon activation, go to Mega Menu » Menu Places to see all of the totally different areas the place you’ll be able to add a mega menu.
You may even see totally different choices relying in your WordPress theme.
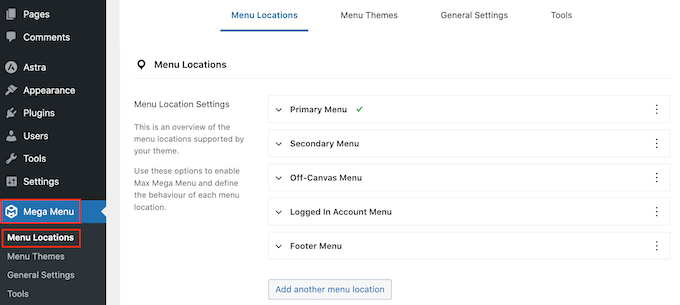
To begin, you’ll have to allow mega menus in each location the place you need to use them.
To do that, merely click on to develop a location after which examine its ‘Enabled’ field.
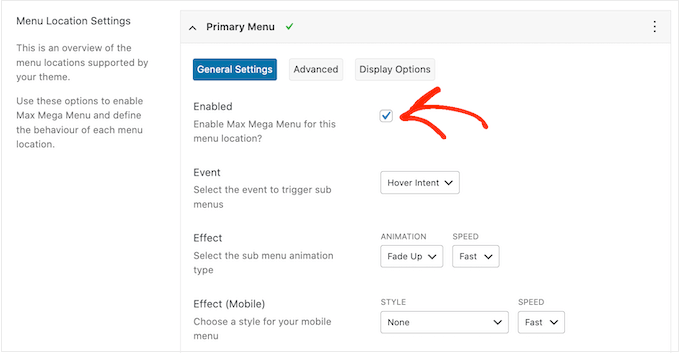
After that, you’ll be able to change the ‘Occasion’ that’ll open the mega menu.
The default setting is ‘Hover intent,’ which suggests the customer should hover their mouse over the mega menu for a couple of seconds. This works effectively for many WordPress web sites, however you may also open the ‘Impact’ dropdown and select ‘Hover’ or ‘Click on’ as a substitute.
When you select ‘Click on’ then the customer might want to click on to discover the mega menu. This may be helpful if you happen to’re nervous guests would possibly set off the menu by chance, which might be irritating.
In the meantime, ‘Hover’ will open your mega menu as quickly because the customer strikes their mouse over it. This may encourage guests to discover totally different areas of your web site, so you might need to use ‘Hover’ on touchdown pages or your web site’s homepage.
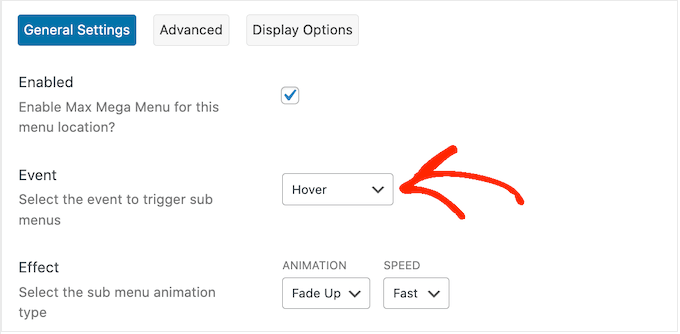
After making this determination, you’ll be able to change how the menu opens utilizing the ‘Impact’ settings.
Max Mega Menu has totally different animations you’ll be able to strive, together with fade and slide up. You may also change the animation’s velocity. By attempting totally different animations, you’ll be able to create a mega menu that grabs the customer’s consideration.
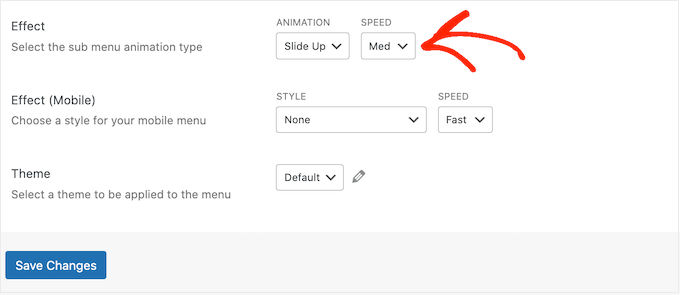
When you don’t need to use any animations, merely open the primary dropdown and choose ‘None.’
By default, Mega Menu doesn’t use animations on cellular units to stop efficiency points. If you wish to create a novel animation for cellular guests, then you need to use the settings within the ‘Impact (Cellular)’ space.
If you wish to take a look at your mega menus on cellular, then take a look at our information on learn how to view the cellular model of WordPress websites from desktop.
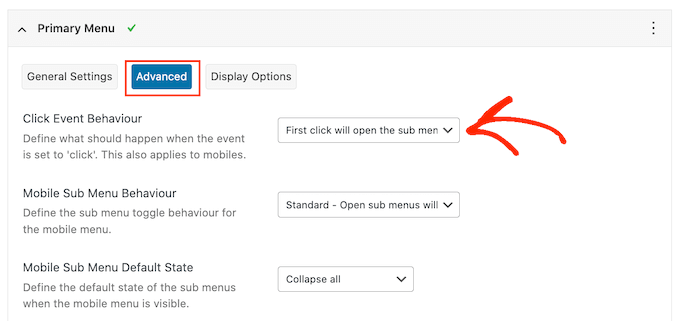
Additionally, if you happen to set the ‘Occasion’ dropdown to ‘click on,’ then be sure to choose the ‘Superior’ tab subsequent.
Right here, you need to use ‘Click on Occasion Habits’ to outline what occurs when the customer clicks your mega menu. For instance, the second click on would possibly shut the menu or open a brand new hyperlink.
There are extra settings you’ll be able to look by means of, however this must be sufficient for many WordPress blogs and web sites.
Whenever you’re proud of how the plugin is configured, click on on ‘Save Modifications.’
To allow mega menus for extra areas, merely observe the identical course of described above.
Customise How the Mega Menus Seems on Your Web site
The subsequent step is configuring how the mega menus will look in your web site.
You are able to do this by deciding on the ‘Menu Themes’ tab to the left of the display screen.
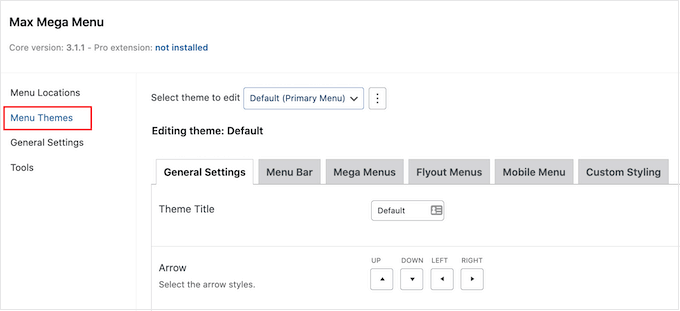
On this display screen, you’ll be able to change the course of the arrow icons, use a unique line peak, and add a shadow.
Whenever you’re glad along with your settings, don’t neglect to click on on ‘Save Modifications.’
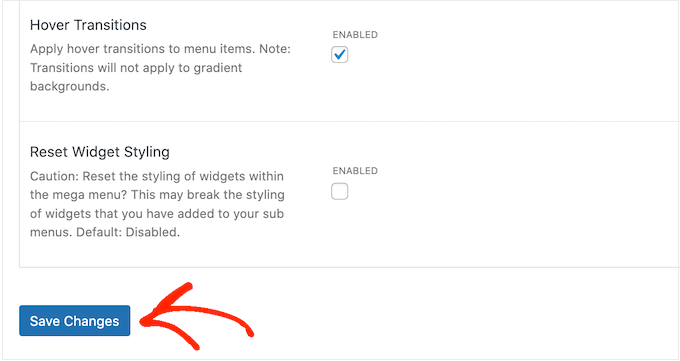
If you wish to take away these modifications at any level, then merely examine the ‘Reset Widget Styling’ field after which click on on ‘Save Modifications.’
Subsequent, you’ll be able to customise the menu bar, which is the bar guests see when the menu is in its default, collapsed state.
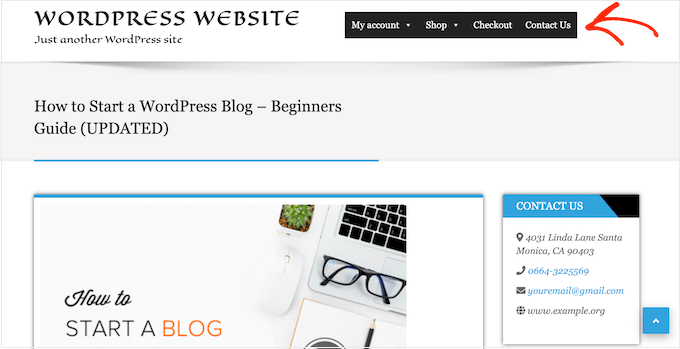
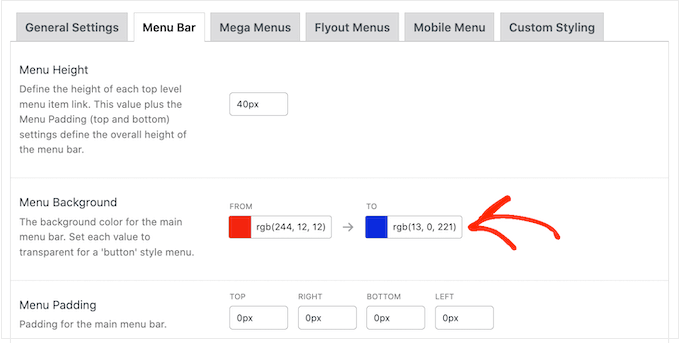
To make these modifications, click on on the ‘Menu Bar’ tab after which use the settings to vary its background colour, padding, border radius, and extra.
You may even create a colour gradient by deciding on two totally different colours within the ‘Menu Background’ part.
When you scroll down, then you’ll be able to change how the top-level menu seems.
That is the primary row of things, which is seen when the mega menu is in its collapsed state.
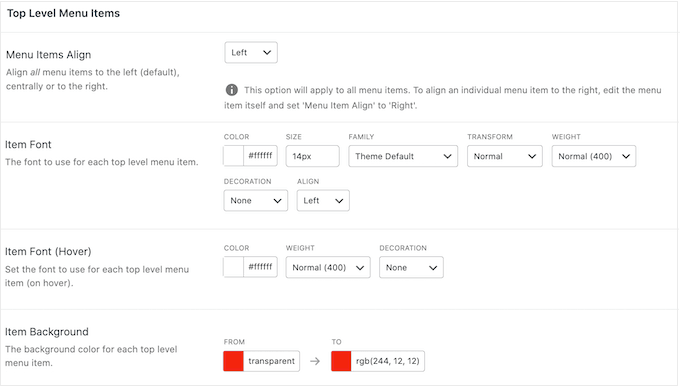
Since they’re so vital, you would possibly need to make the top-level menu objects stand out.
For instance, within the following picture, we’re utilizing a unique background colour.
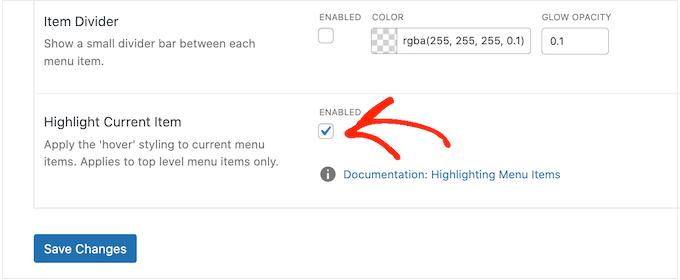
Within the ‘Hover State’ part you’ll be able to spotlight the currently-selected top-level menu merchandise.
For instance, within the following picture, we’re utilizing an underline impact.
This will help the customer see the place they’re within the menu, which makes it significantly helpful for websites that have to have massive mega menus.
When you do add a hover state, then scroll to the underside of the display screen and examine the ‘Spotlight Present Merchandise’ field.
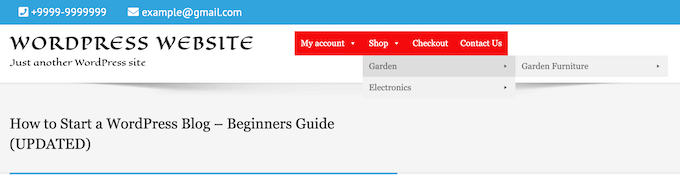
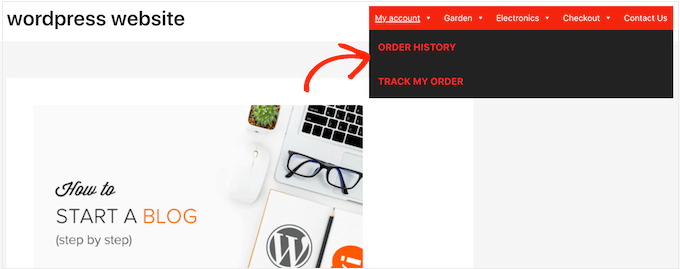
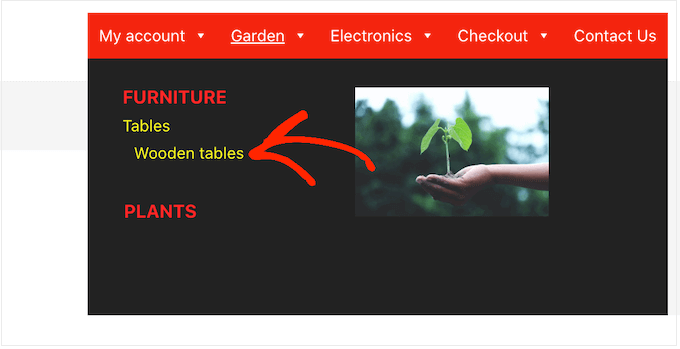
After that, you’ll be able to change how the submenu seems.
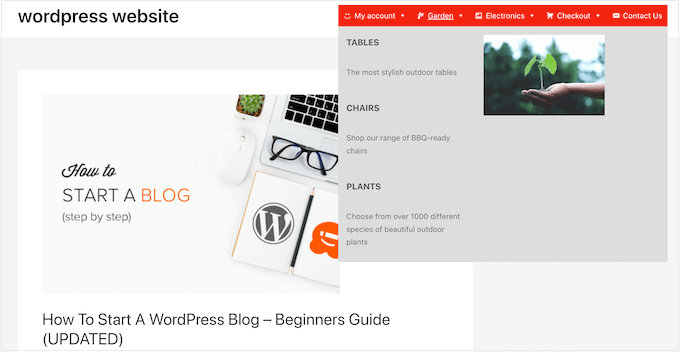
That is the menu that seems underneath a top-level father or mother, as you’ll be able to see within the following picture.
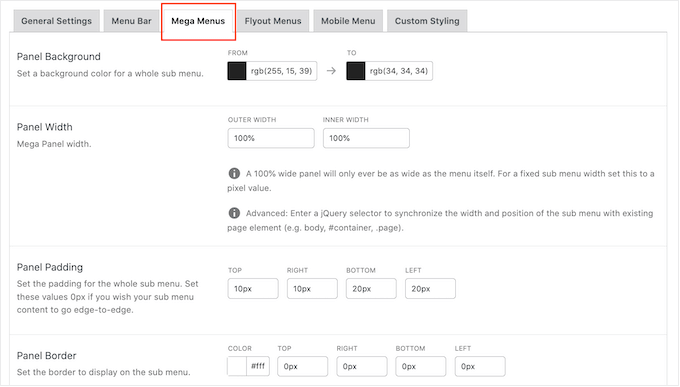
To customise the submenu, click on on the ‘Mega Menus’ tab.
Now you can use these settings to vary the submenu’s background colour, enhance the radius to create curved corners, add padding, and extra.
You add content material to your mega menus utilizing widgets. For instance, you would possibly add a Gallery widget and show your hottest WooCommerce merchandise, or embed a tag cloud contained in the mega menu. These widgets can present further data, or encourage guests to click on on sure menu objects.
You may customise how these widgets will look by scrolling to the ‘Widgets’ part. For instance, you would possibly change the colour of the widget’s title, enhance the font measurement, add padding, and modify the alignment.
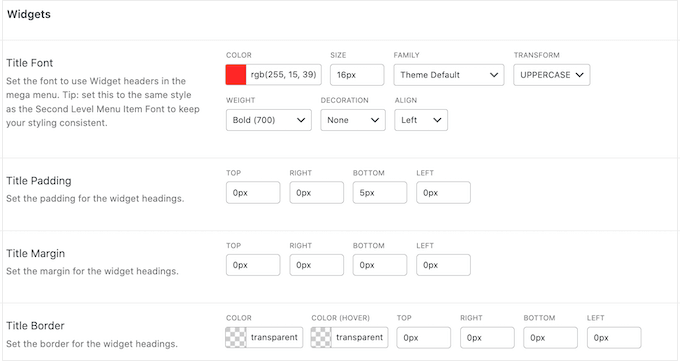
On this display screen, you may also customise how the second-level menu objects and third-level menu objects will look in your web site. These are the youngsters of the top-level menu objects.
When constructing your menus, it’s attainable so as to add 4 or much more ranges to create a nested mega menu. When you do that, then WordPress will merely use the third-level styling for all the next ranges.
You may see this in motion within the following picture. The second stage has purple textual content, and each the third and fourth ranges use the identical yellow textual content.
Whenever you’re proud of how the menu is ready up, don’t neglect to click on on ‘Save Modifications.’
Tips on how to Add a Mega Menu on Your WordPress Web site
When you’ve completed customizing the mega menu utilizing Max Mega Menu, it’s time so as to add it to your web site.
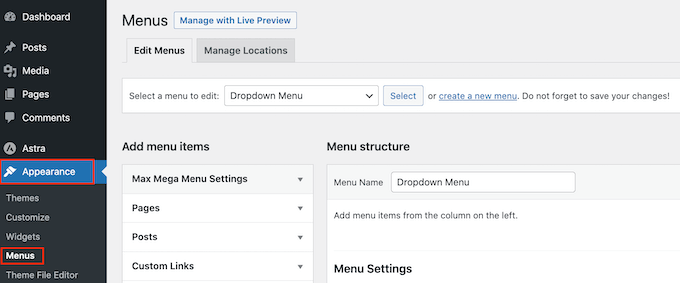
Merely head over to Look » Menus.
If you wish to flip an current menu right into a mega menu, then open the ‘Choose a menu to edit’ dropdown and select it from the record. Simply bear in mind the menu you select should be assigned to a location the place you’ve enabled the mega menu function.
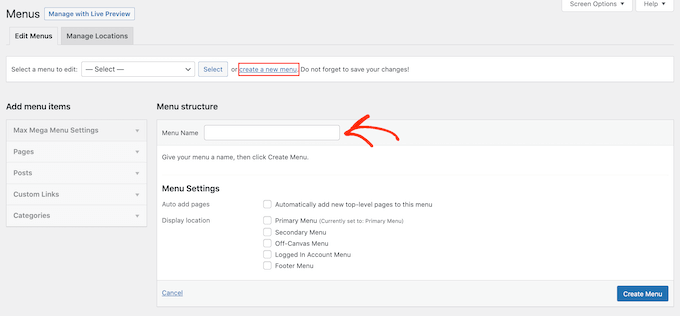
If you wish to begin from scratch, then click on on ‘Create a brand new menu’ after which kind in a title to your new mega menu.
You may then choose the placement you need to use, and click on on ‘Create Menu.’ As soon as once more, this should be a location the place you’ve enabled mega menus.
Add Content material to Your WordPress Menu
After that, add all of the pages, posts, and some other content material you need to embody within the menu. For step-by-step directions, please see our newbie’s information on learn how to add a navigation menu in WordPress.
Subsequent, you’ll want to rearrange your objects into dad and mom and submenus. To create a submenu, drag an merchandise beneath the father or mother, after which drag it barely to the correct earlier than releasing it.

To create a number of ranges, merely preserve dragging objects to the correct so they seem indented beneath each other. That is much like making a dropdown menu in WordPress.
Irrespective of whether or not you’re creating a brand new menu or updating an outdated one, at this level you’ll have all of the objects you need to embody within the mega menu.
Allow the Mega Menu Function
With that executed, click on to develop the ‘Max Mega Menu Settings’ and examine the field subsequent to ‘Allow.’
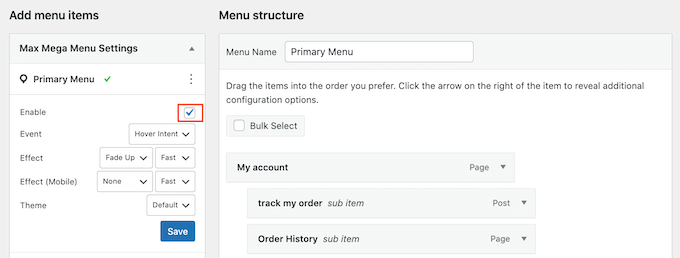
On this field, you may also override the default mega menu settings. This lets you create distinctive mega menus for various areas of your web site, so go forward and make any modifications.
After that, click on on ‘Save.’
Create the Mega Menu Format
Now, hover your mouse over the primary top-level merchandise and also you’ll see a brand new ‘Mega Menu’ button. Go forward and provides the button a click on.
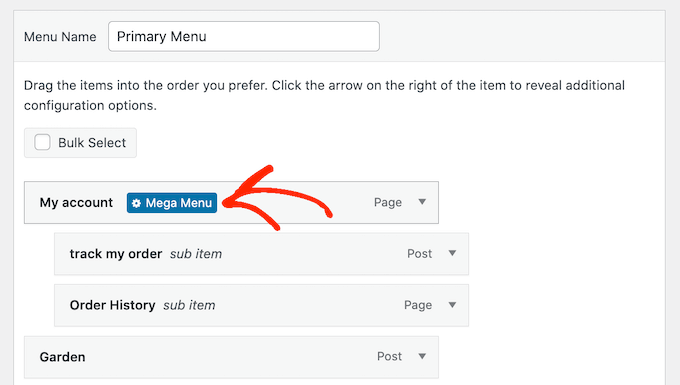
You’ll now see all of the settings for this top-level merchandise.
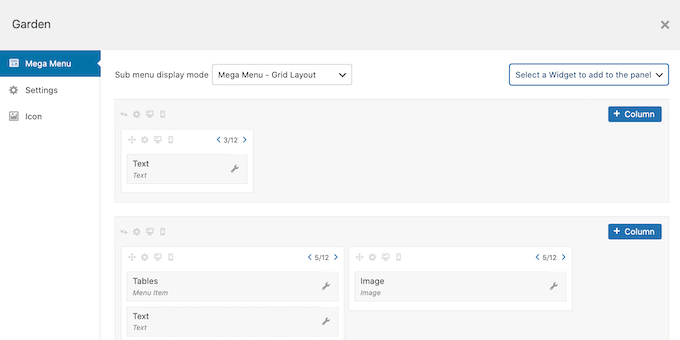
By default, Max Mega Menu will use the flyout type, the place the submenus ‘flyout’ from the aspect. To create a mega menu as a substitute, open the ‘Sub menu show mode’ dropdown and select both ‘Customary Format’ or ‘Grid Format.’
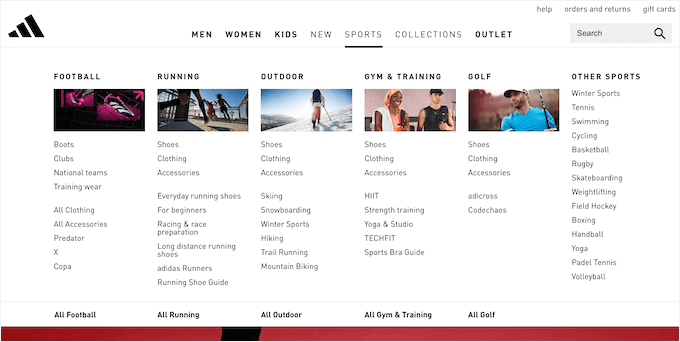
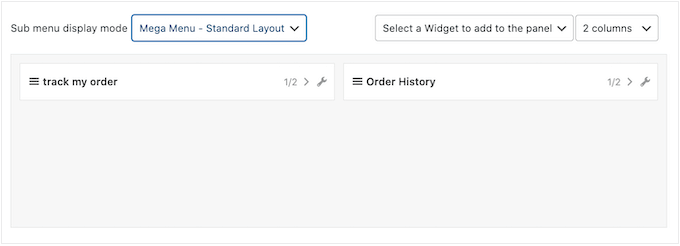
Customary structure exhibits all of the submenus in columns.
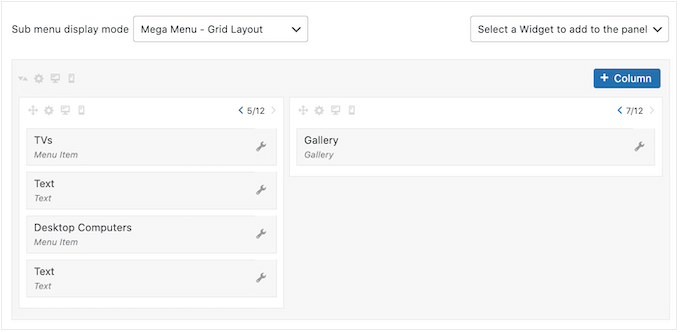
In the meantime, grid structure permits you to set up submenu objects into columns and rows.
That is preferrred if you wish to present a number of content material, or have a really particular structure in thoughts.
After deciding on the usual or grid structure, you’ll see all of the submenus assigned to this father or mother.
Now, you’ll be able to go forward and alter how this stuff are organized within the mega menu.
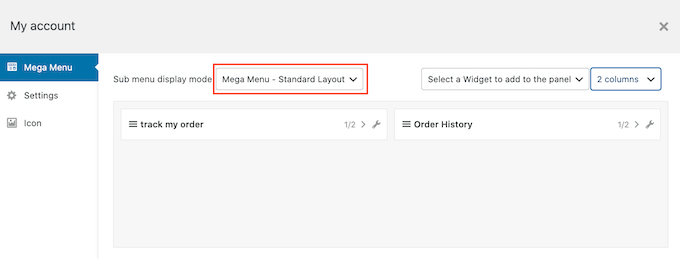
When you’re utilizing the usual structure, then you’ll be able to change the variety of columns utilizing the dropdown menu within the high proper nook.
When you’re utilizing a grid structure, then you’ll be able to add columns and rows utilizing the ‘+Column’ and ‘+Row’ buttons.
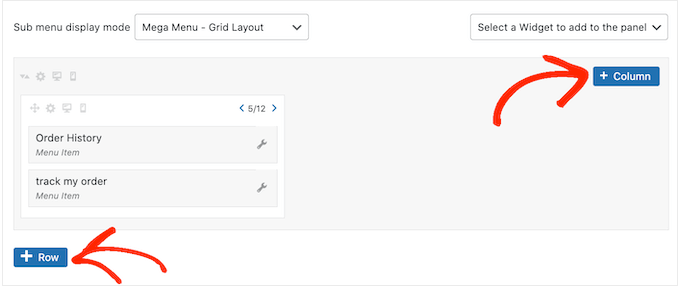
Whenever you’re proud of the structure, you’ll be able to prepare the submenu objects into totally different columns and rows utilizing drag and drop.
After that, it’s time to vary how a lot house every merchandise takes up within the column. Max Mega Menu exhibits the present measurement as a fraction of the entire out there width.
For instance, within the following picture, each columns take up half the out there house.
To make an merchandise greater or smaller, merely click on on its arrow buttons to extend or lower the fraction.
Create a Cellular-Pleasant Mega Menu (Grid Format Solely)
By default, Max Mega Menu will present the identical content material on desktop and cellular units. This could be a downside with grid layouts, as smartphones and tablets usually have smaller screens, and scrolling horizontally might be tough.
When you’re utilizing the grid structure, then you’ll be able to create totally different mega menus for cellular units. For instance, you would possibly use fewer columns so customers don’t must scroll horizontally.
You may disguise complete columns or rows utilizing the ‘Hidden on cellular’ icon, which seems like a small cell phone.
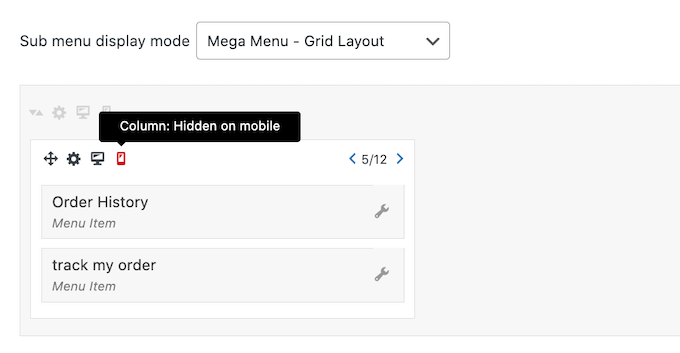
Merely toggle the icon on and off, to cover and present totally different content material on desktop and cellular.
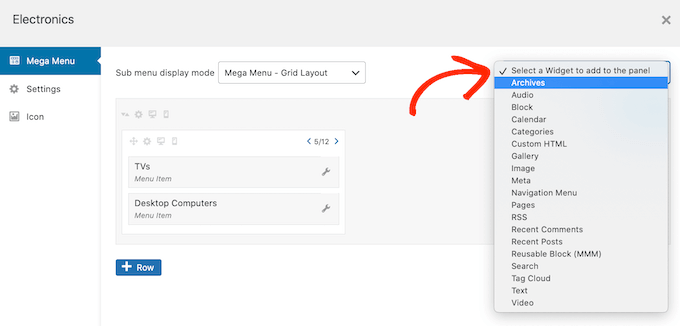
Add Wealthy Content material with Mega Menu Widgets
With that executed, you can begin including widgets to the mega menu. This lets you present further content material within the submenu, equivalent to WordPress galleries, textual content, movies, latest feedback, and extra.
For instance, you would possibly use photographs to advertise a sale in your on-line retailer, or spotlight your newest merchandise.
So as to add a widget, merely click on to open the ‘Choose a widget….’ dropdown.
Now you can select a widget from the record.
WordPress will add the widget to a column or row routinely, however you’ll be able to transfer it to a brand new location utilizing drag and drop.
To configure the widget, go forward and click on on its little wrench icon.
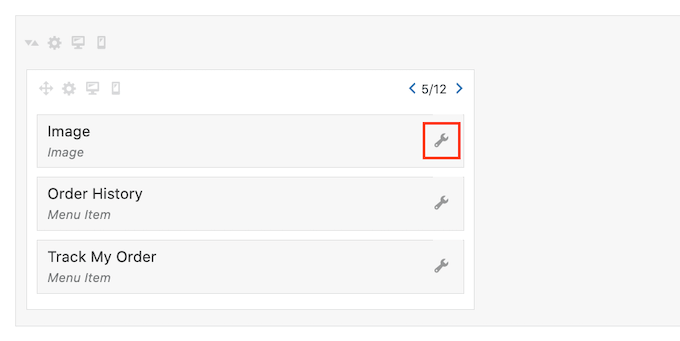
This opens a popup the place you’ll be able to add content material to the widget and alter its settings.
You’ll see totally different choices relying on the type of widget you’re creating.
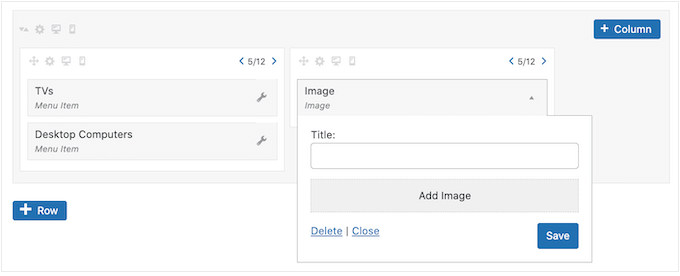
For instance, if you happen to added an Picture widget, then you’ll be able to click on on ‘Add Picture’ and both select an image from the media library or add a file out of your laptop.
When you add a ‘Textual content’ widget you then’ll see a small editor the place you’ll be able to kind in your textual content.
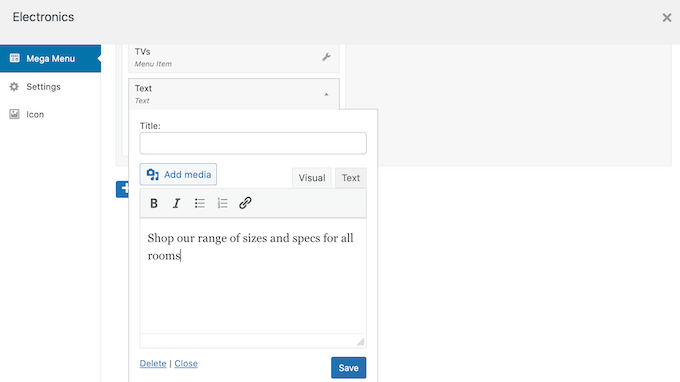
All widgets have a ‘Title’ subject the place you’ll be able to add textual content that will probably be displayed above the widget.
Whenever you’re completed, click on on ‘Save’ to retailer your modifications after which choose ‘Shut.’ So as to add extra widgets to the mega menu, merely observe the identical course of described above.
Evaluation the Default Mega Menu Settings
Subsequent, simply click on on the ‘Settings’ tab.
Right here, you need to use checkboxes to cover or present totally different content material within the submenu.
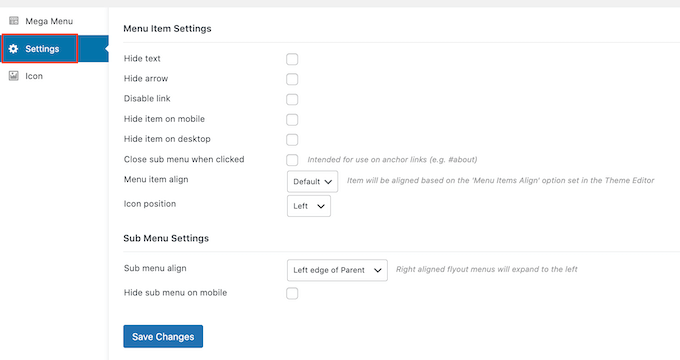
You may also disguise or present the submenu on cellular units and desktop, and alter the alignment so the submenu opens to the left or proper of the top-level father or mother.
When you make any modifications to the default settings, then don’t neglect to click on on ‘Save Modifications.’
Add Picture Icons to the WordPress Mega Menu
Picture icons assist guests perceive what a menu merchandise is about, with out even having to learn the navigation label. That is significantly helpful for giant menus the place a customer could favor to scan the content material shortly slightly than studying every navigation label.
You need to use icons to make a very powerful content material stand out. For instance, you would possibly encourage guests to finish their buy by including a cart icon to the ‘Checkout’ menu.
So as to add picture icons to your navigation menu, click on on the ‘Icon’ tab.
Now you can select any dashicon from the built-in library. When you improve to Max Mega Menu professional, you then’ll even have entry to different icon fonts, Genericons and FontAwesome, or you’ll be able to select a file out of your WordPress media library.
End Configuring the Mega Menu on Your WordPress Web site
After working your manner by means of all these settings, you’ll be able to shut the popup window to return to the primary Look » Menus web page.
Now you can repeat this course of for every top-level father or mother.
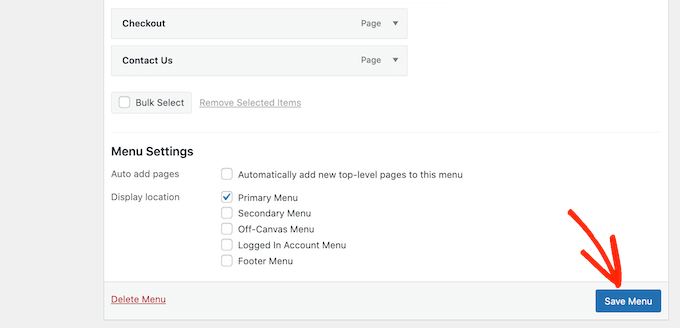
Whenever you’re proud of how the mega menu is ready up, click on on the Save Menu button to make it stay.
Now, merely go to your web site to see the mega menu in motion.
We hope this text helped you learn to add a mega menu in your WordPress web site. You may also undergo our information on the perfect drag and drop WordPress web page builders and learn how to enhance your weblog visitors.
When you favored this text, then please subscribe to our YouTube Channel for WordPress video tutorials. You may also discover us on Twitter and Fb.
The submit Tips on how to Add a Mega Menu on Your WordPress Web site (Step by Step) first appeared on WPBeginner.

