
Do you wish to add an Amazon-like magnifying zoom for photos in WordPress?
Including a zoom characteristic will enable customers to see particulars that they might not see in a normal-sized picture.
On this article, we’ll present you the right way to simply add magnifying zoom for photos in WordPress.
Why Add a Magnifying Zoom for Photographs?
Including a magnifying zoom characteristic in your WordPress web site will enable guests to view the intricate particulars of the pictures clearly.
In case you have a pictures web site, then including a magnifying characteristic will enable customers to zoom in in your pictures to view the finer particulars.
Equally, in the event you run a web based retailer, then your clients will be capable of zoom in on product photos.
Many large eCommerce web sites already use magnifying zoom for product photos. It permits clients to look at the product and creates a greater purchasing expertise in your retailer.
That being stated, let’s see how one can simply add a magnifying zoom for photos in WordPress.
The best way to Add a Magnifying Zoom For Photographs in WordPress
First, it’s good to set up and activate the WP Picture Zoom plugin. For extra particulars, please see our step-by-step information on the right way to set up a WordPress plugin.
Upon activation, it’s good to head over to the WP Picture Zoom » Zoom Settings web page from the WordPress admin sidebar.
Subsequent, it’s good to configure the zoom impact settings by switching to the ‘Zoom Settings’ tab and select a lens form that you simply wish to use.
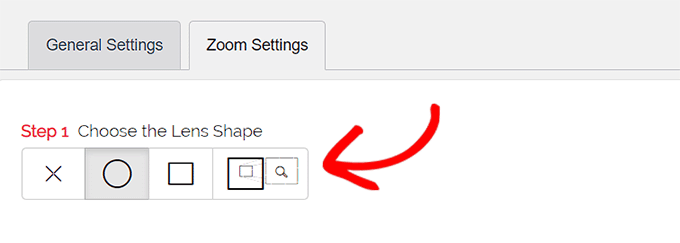
You possibly can select from circle, sq., and zoom window lens shapes. You possibly can even select a ‘No Lens’ (⨯) choice in the event you don’t wish to use a form for magnifying impact.
After selecting your most popular lens, it’s good to scroll right down to the following step the place you possibly can preview a picture with the chosen lens to see the way it works. The plugin has a preview picture that you should use to check your modifications.

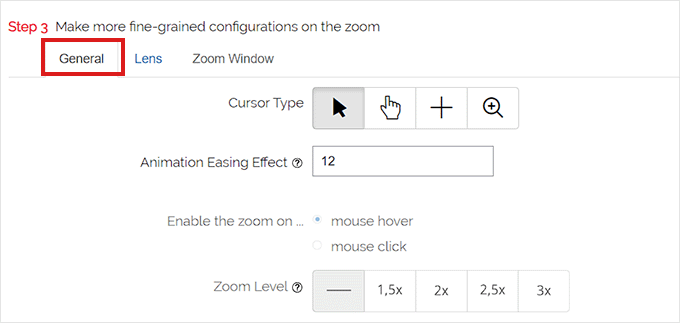
Subsequent, it’s good to swap to the ‘Normal’ tab.
From right here, you possibly can choose a cursor kind, set an animation impact, allow the zoom on mouse hover or mouse click on, and outline a zoom stage.
If you would like much more choices, among the options are solely obtainable for the professional model of the WP Picture Zoom plugin.
After making your decisions accordingly, merely go to the ‘Lens’ tab from the highest.
Now you can configure settings like lens measurement, lens colour, lens border choices, and extra in the event you chosen the ‘circle’ or ‘sq.’ lens in Step 1.

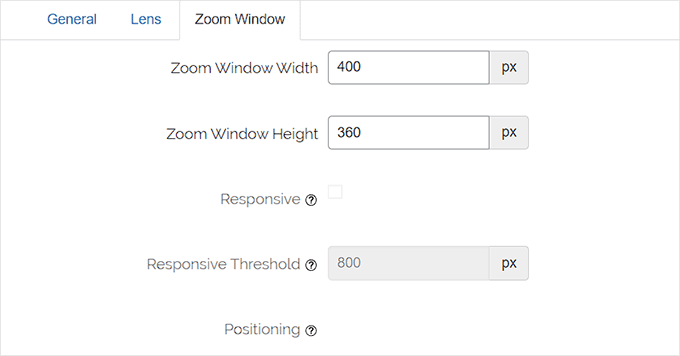
Should you chosen the Zoom Window Lens, then it’s good to swap to the ‘Zoom Window’ configuration tab.
From right here, you possibly can change the width and top of the zoom window, positioning, distance from the primary picture, border colours, and extra.
Subsequent, it’s good to merely click on the ‘Save Modifications’ to retailer your settings.
After that, all you need to do is configure a couple of basic settings.

Configure Normal Plugin Settings
Subsequent, it’s good to swap to the Normal Settings tab underneath the plugin settings.
From right here, now you can allow options like zoom on WooCommerce product photos, thumbnails, cellular units, attachment pages, product class pages, and extra.
All it’s good to do is just examine the bins subsequent to those choices.

You may also take away the lightbox impact, so customers can easily zoom photos.
Nevertheless, you would wish the Professional model of the plugin for this characteristic.

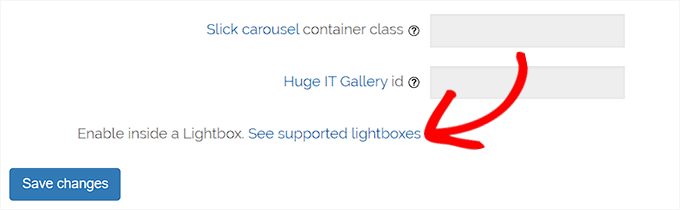
If you’re not going to take away the lightbox for photos, then it’s good to scroll right down to the ‘Allow inside a Lightbox’ choice and examine the field subsequent to it.
Notice: You possibly can see supported lightboxes to be sure that the zoom works wonderful inside a lightbox in your web site.
As soon as you might be executed adjusting the settings, don’t neglect to click on on the ‘Save Modifications’ button to retailer your settings.
Magnifying zoom will now be enabled for WooCommerce merchandise.
You possibly can go go to your on-line retailer to examine our zoom characteristic.

Nevertheless, if you wish to allow zoom for photos on WordPress posts and pages, it’s good to observe the step beneath.
Step 3. Allow Magnifying Zoom for Photographs in Block Editor
By default, the magnifying zoom just isn’t enabled for photos in your posts and pages. It’s essential do it manually after including a picture to your content material.
First, it’s good to open a submit you wish to edit within the block editor.
Subsequent, it’s good to add a picture to that submit from the media library or your pc.
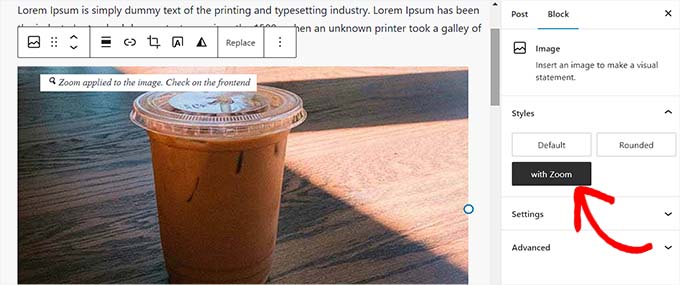
When you do this, merely click on on the picture to open up its’ Block Settings panel on the best nook of the display.
From right here, merely go to the ‘Types’ tab and click on on the ‘With Zoom’ button to use magnifying zoom to your picture.
After that, merely click on the ‘Replace’ or ‘Publish’ button on the high to retailer your settings.
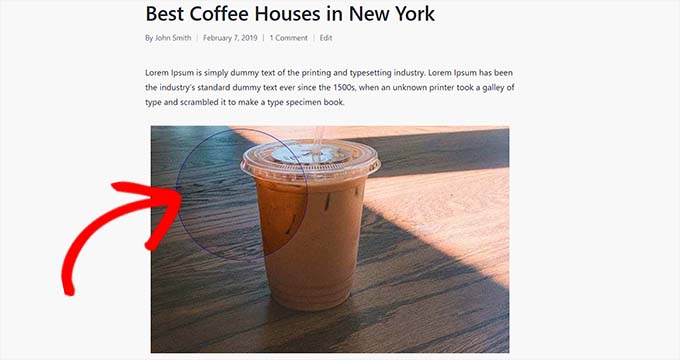
The zoom characteristic will appear to be this in your web site:
Notice: You will want to repeat this step every time you wish to add the zoom impact to a person picture.
We suggest utilizing high-quality photos for the zoom characteristic to look nice. Excessive-quality photos are usually bigger in file measurement and take longer to load which is able to have an effect on your web site pace and efficiency.
To unravel this subject, it’s good to optimize your photos for the net earlier than importing them to WordPress.
We hope this text helped you learn to add magnifying zoom for photos in WordPress. You might also wish to see our information on the right way to optimize photos for engines like google and our high picks for the perfect picture compression plugins.
Should you favored this text, then please subscribe to our YouTube Channel for WordPress video tutorials. You may also discover us on Twitter and Fb.
The submit The best way to Add Magnifying Zoom for Photographs in WordPress first appeared on WPBeginner.

