

Do you wish to change block top and width in WordPress?
By default, WordPress makes it straightforward to create lovely content material layouts in your posts and pages utilizing blocks. Nevertheless, generally you might wish to resize blocks to make them look higher.
On this article, we are going to present you simply change block top and width in WordPress.
Why Change Block Top and Width in WordPress?
The block editor lets you add content material to your WordPress web site utilizing completely different blocks, together with headings, paragraphs, photographs, movies, audio, and extra.
Nevertheless, generally you might wish to change the width or top of a selected block to enhance its look or the format of the general content material.
Adjusting block sizes also can be sure that your content material is responsive and shows correctly on all units, together with telephones, tablets, and laptops.
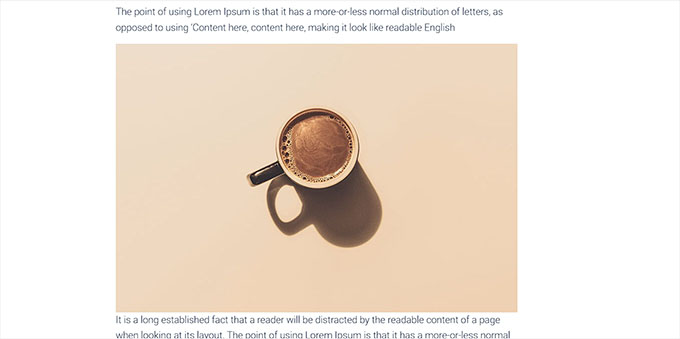
For instance, you might have uploaded a picture within the content material editor, however it’s too giant and makes the web page look unappealing.
Or, you may wish to change the scale of the heading block to align it higher with the content material.
By adjusting the width and top of the blocks, you can also make your posts and pages look extra aesthetically pleasing.
That being mentioned, let’s see how one can simply change block top and width in WordPress.
Technique 1: Change the Block Top and Width Utilizing Block Settings
For this technique, we are going to present you change a block’s top and width utilizing the default settings provided by WordPress.
Presently, WordPress doesn’t supply the identical resizing choices for the entire blocks. Nevertheless, the block editor offers some ways to resize the peak and width of various blocks.
Let’s begin with the Picture block in WordPress.
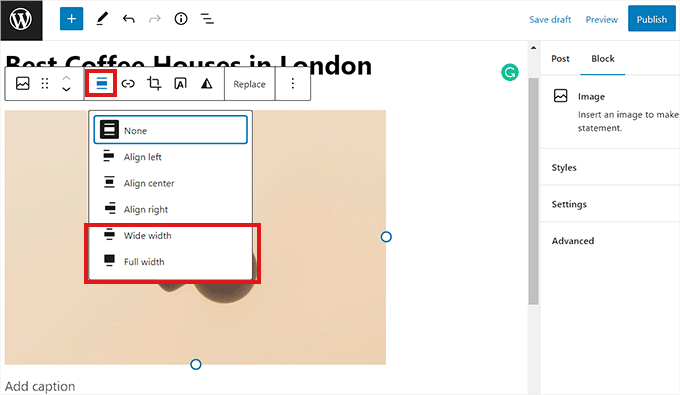
First, you may change the alignment of the Picture block by clicking on the ‘Align’ button within the toolbar above the block.
Right here, selecting the ‘Extensive Width’ possibility will make the block the identical width because the container.
Or, the ‘Full Width’ alignment possibility will make the block your entire width of the web page.
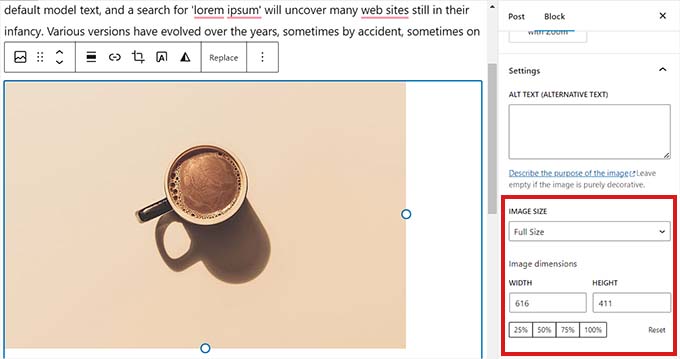
You can even resize a block by going to the ‘Block Settings’ panel on the best and scrolling right down to the ‘Settings’ part. From right here, you may resize a block from the ‘Picture Dimension’ dropdown menu.
You can even alter the block’s width and top by typing the popular pixel measurement into the ‘Width’ and ‘Top’ bins within the ‘Picture dimensions’ part.
Under that, it’s also possible to alter the block’s measurement by proportion.
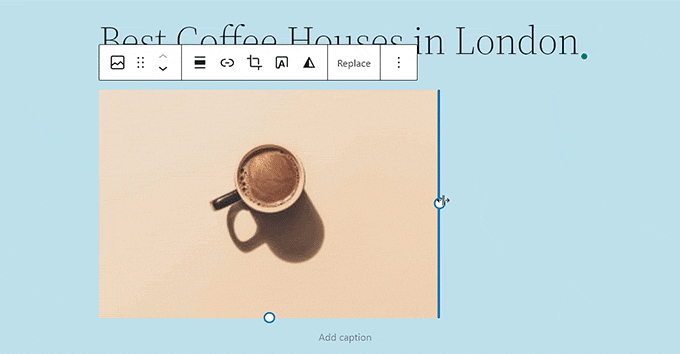
One other technique to resize an Picture block is by clicking on the picture itself to convey up a blue border with round anchors.
Then, merely drag these anchors to alter the peak and width of the picture block.
As soon as you’re completed, click on on the ‘Replace’ or ‘Publish’ button to retailer your settings.
Technique 2: Change the Block Top and Width Utilizing the Columns Block
If the block you wish to resize doesn’t include alignment buttons or resize settings, then this technique is for you.
For this technique, we are going to place our block contained in the Columns block. It acts as a container the place you may add blocks in every column. Then, you may resize these blocks by adjusting the peak and width of the columns.
First, you will have to click on on the ‘Add Block’ (+) button within the high left nook of the display screen.
From right here, merely find and add the Columns block to the content material editor. Then, you’ll be requested to decide on a variation.
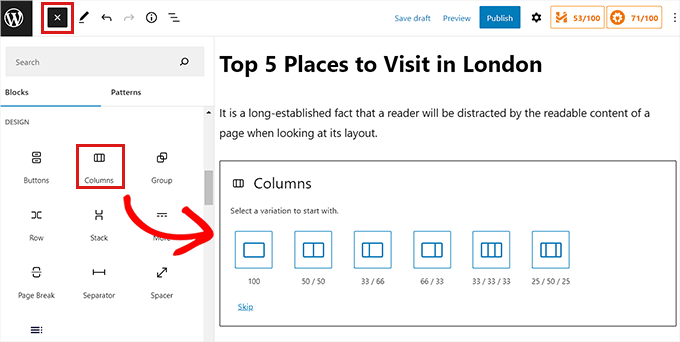
After that, the column format shall be displayed on the display screen, and now you can add the block you need by clicking on the ‘Add Block (+)’ button inside a column.
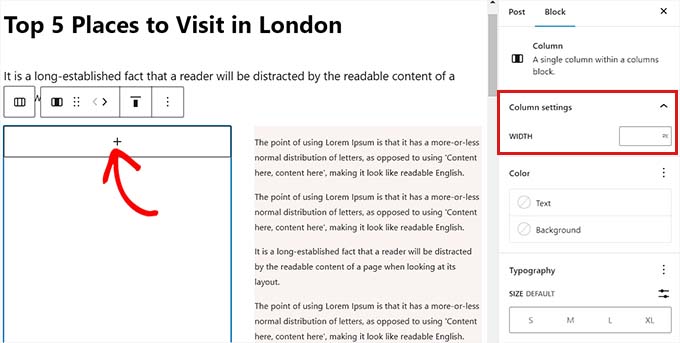
As soon as the block has been added, you may resize it by utilizing the ‘Column settings’ situated in the best panel.
As soon as you’re completed, merely click on the ‘Publish’ button to retailer your adjustments.
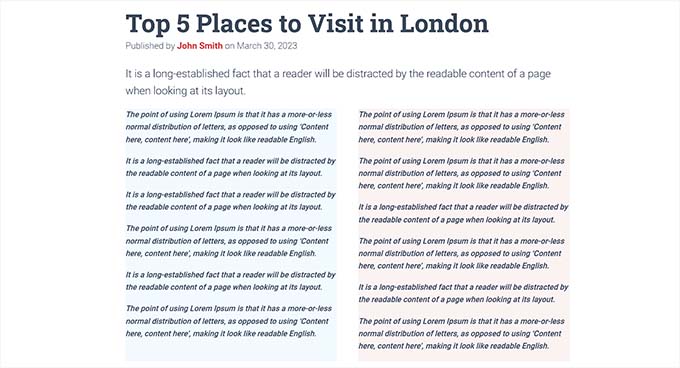
That is how the content material regarded on our demo web site after resizing and aligning two paragraph blocks inside a two-column block.
Technique 3: Change the Block Top and Width Utilizing the Group Block
You can even alter the width and top of blocks utilizing the Group block. It means that you can group completely different blocks and magnificence them collectively.
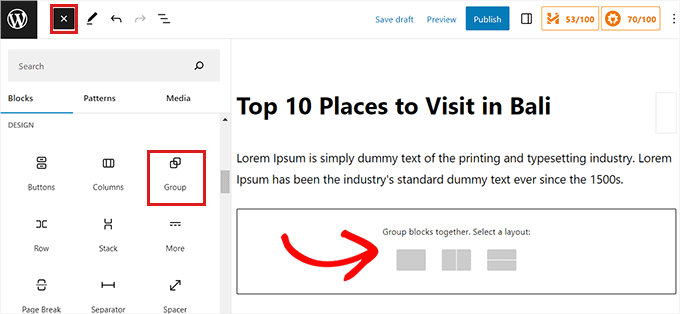
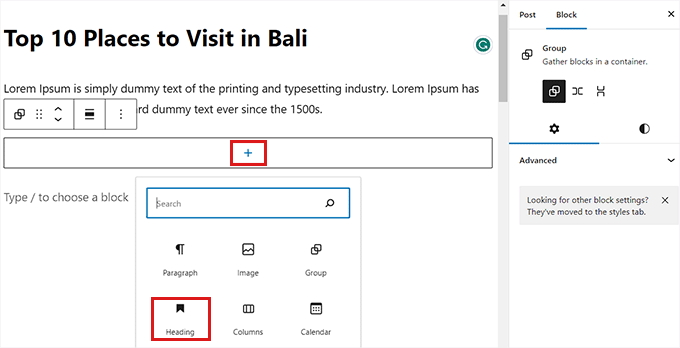
First, you will have to click on on the ‘Add Block’ (+) button on the high. Subsequent, you could find and add the Group block to the content material editor.
When you do this, the Group block will show three completely different format choices that you may select from. For this tutorial, we are going to use the ‘Group’ format.
After that, the ‘Add Block’ button shall be displayed on the display screen. Now you can add any block you need.
On this tutorial, we shall be including and resizing a Heading block, a Paragraph block, and an Picture block.
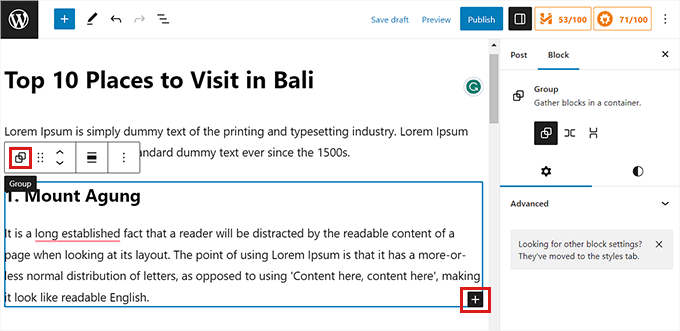
So as to add a number of blocks to the Group, you could click on on the ‘Choose Group’ button from the block toolbar.
As soon as the Group is chosen, merely click on on the ‘Add Block’ button (+) on the backside.
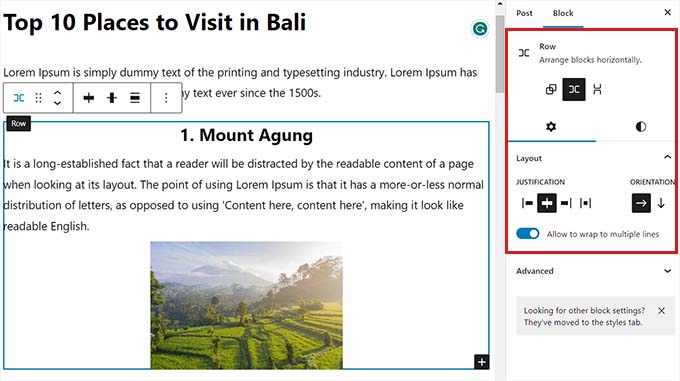
Clicking on the ‘Choose Group’ button additionally opens up the block settings in the best column. From right here, you may simply alter the format, justification, and orientation of all of the blocks.
Altering the format will even change the completely different block sizes. You may configure these settings till you’re proud of the outcome.
As soon as you’re completed, click on on the ‘Replace’ or ‘Publish’ button to retailer your settings.
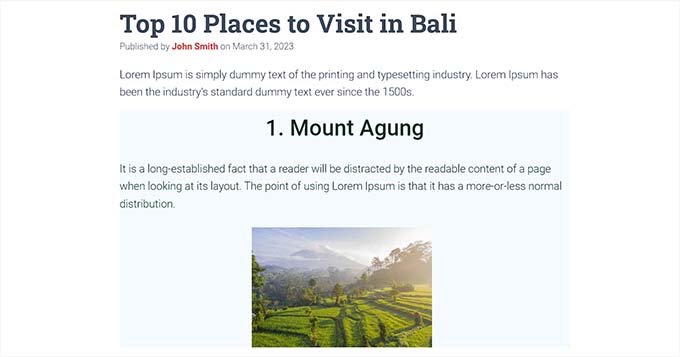
That is how the Group block regarded on our demo web site.
Technique 4: Change the Block Top Utilizing the Cowl Block
This resizing technique is for you if you wish to use the Cowl block. It lets you show textual content and different content material on high of a picture or video.
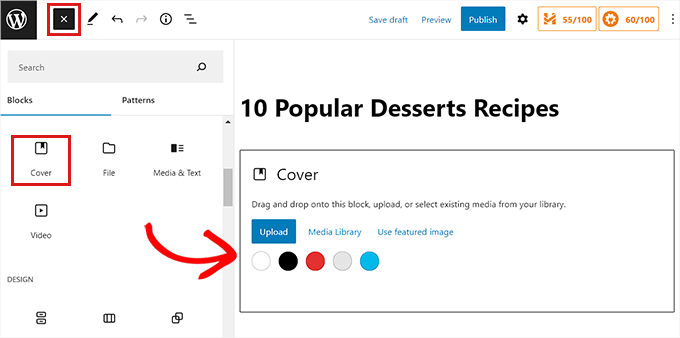
First, you will have to click on on the ‘Add Block’ (+) button on the high and discover the Cowl block.
After getting completed that, you’ll be requested to decide on a coloration or add a picture from the WordPress media library. This picture or coloration shall be used because the background for the Cowl block.
Subsequent, merely drag and drop any block you need into the Cowl block.
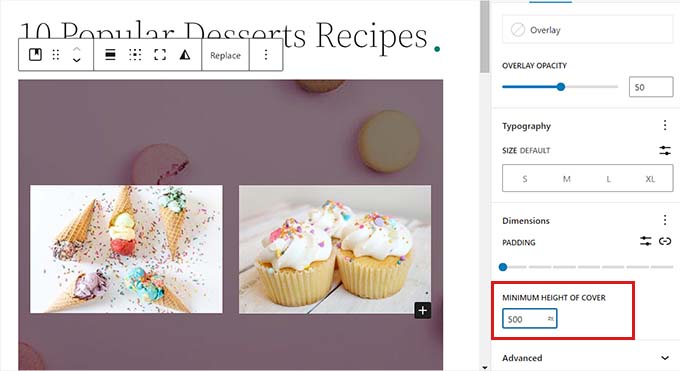
After that, it’s good to click on on the Cowl block to open up its block settings in the best column.
From right here, scroll right down to the ‘Dimensions’ panel, the place you may alter the peak of the Cowl block utilizing pixels.
Lastly, don’t neglect to click on on the ‘Save Modifications’ button to retailer your settings.
For extra detailed directions on use the Cowl block, you might wish to see our newbie’s information on Cowl Picture vs. Featured Picture within the WordPress block editor.
Bonus: Create Stunning Pages Utilizing Superior Blocks in SeedProd
You may simply create lovely and aesthetically-pleasing pages utilizing the SeedProd plugin.
It’s the greatest WordPress web page builder in the marketplace that means that you can create touchdown pages utilizing blocks. These blocks are additionally tremendous straightforward to customise and resize in keeping with your wants.
First, you will have to put in and activate the SeedProd plugin. For extra particulars, you may learn our information on set up a WordPress plugin.
Be aware: SeedProd additionally provides a free model, however we shall be utilizing the premium model for this tutorial.
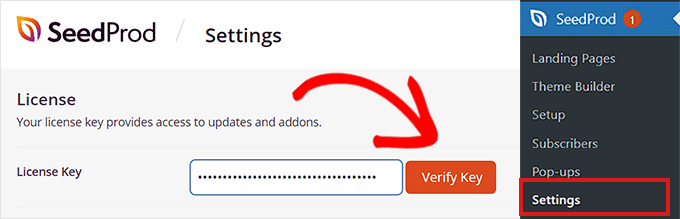
Upon activation, you could go to the SeedProd » Settings web page out of your WordPress dashboard and enter the license key within the ‘License Key’ field.
You will discover the license key in your account web page on the SeedProd web site.
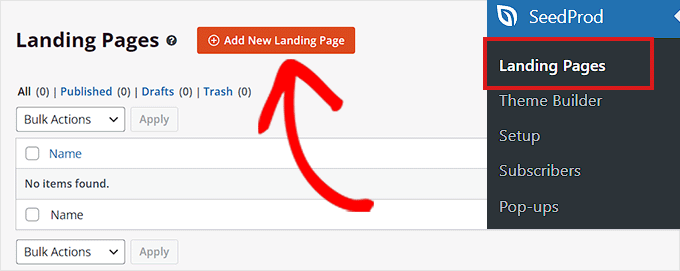
Subsequent, it’s good to go to the SeedProd » Touchdown Pages display screen from the admin sidebar to start out making a touchdown web page.
From right here, simply click on on the ‘Add New Touchdown Web page’ button.
You’ll now be taken to the ‘Select a New Web page Template’ web page. SeedProd provides many pre-made templates that you may decide from.
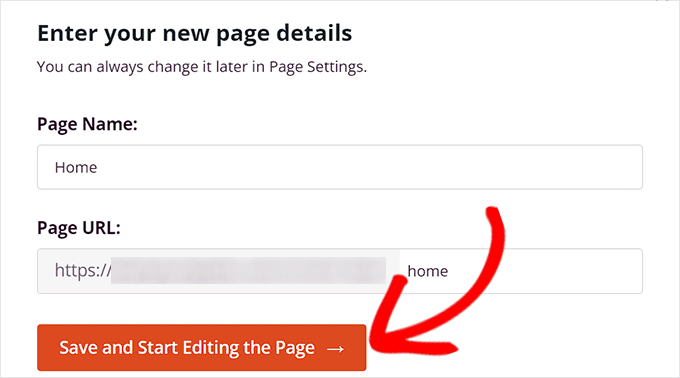
After you will have chosen a template, you’ll be requested to supply a reputation and URL in your touchdown web page.
Upon including these particulars, merely click on on the ‘Save and Begin Modifying the Web page’ button to proceed.
This can launch SeedProd’s drag-and-drop web page builder, the place now you can begin enhancing your web page.
For extra detailed directions, please see our information on create a touchdown web page with WordPress.
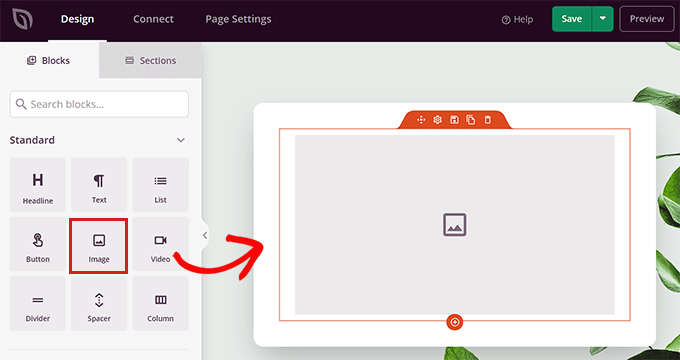
For this tutorial, we shall be including and resizing an Picture block and a Button block.
First, you will have to tug the Picture block from the block panel on the left and drop it anyplace you want on the web page.
Subsequent, merely click on on the Picture block to open its block settings within the left column. From right here, you may add a picture out of your media library.
Subsequent, you may change the block’s top and width utilizing pixels or percentages.
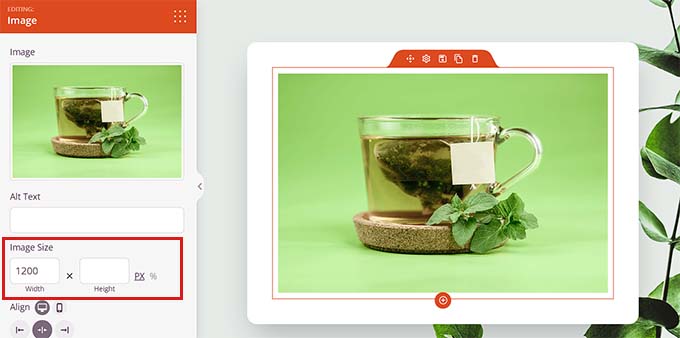
You can even alter the picture measurement and place by switching to the ‘Superior’ tab on the high of the settings panel.
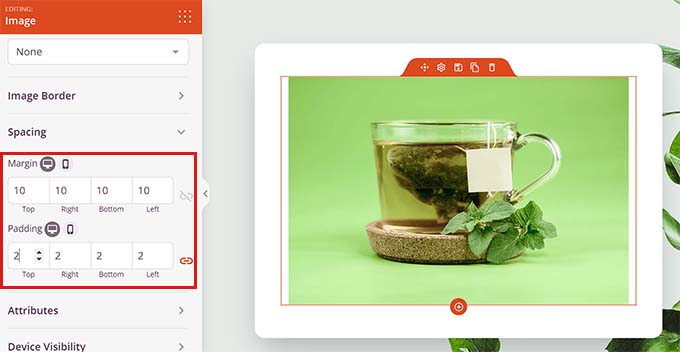
Then, simply click on on the Spacing panel to increase its settings.
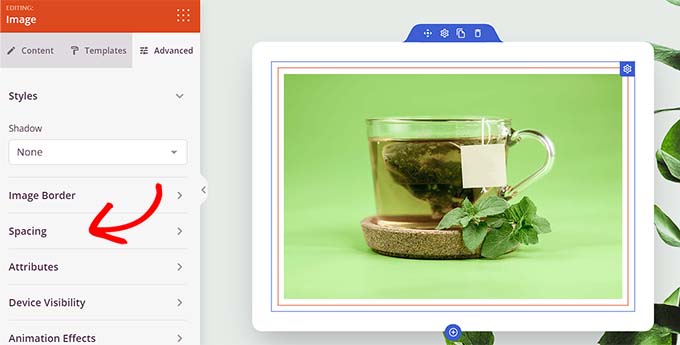
Right here, merely add values to regulate the block’s margin and padding in keeping with your wants.
You may alter the margin and padding for the highest, backside, left, and proper areas of the block.
With Seedprod, it’s also possible to add a Spacer block between two completely different blocks to place some area between them.
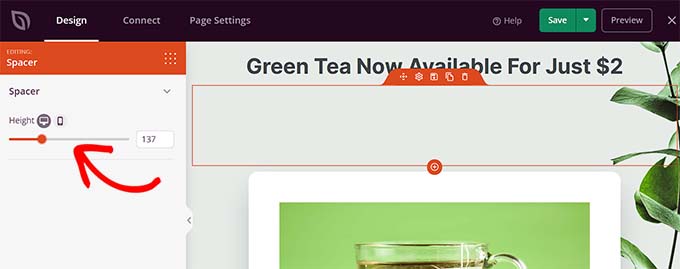
First, you will have to find and add the ‘Spacer’ block from the left column. Then, click on on it to open its settings.
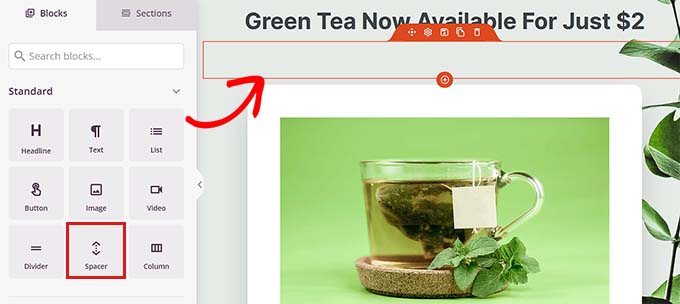
Now, you may management the peak of the spacer utilizing the ‘Top’ slider.
The spacer block may also help you create a clutter-free web site.
You can even change the width and top of different blocks in the identical method, together with the Video, Heading, and Button blocks.
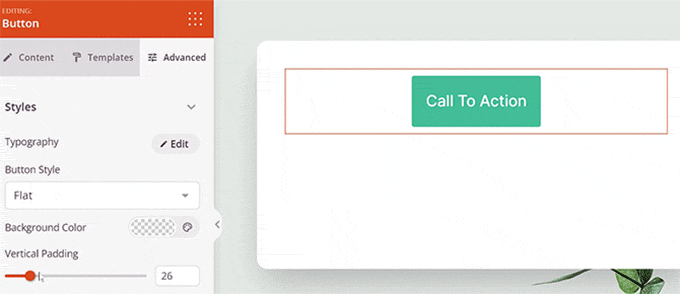
Merely discover the Button block within the left column and drag it onto your web page.
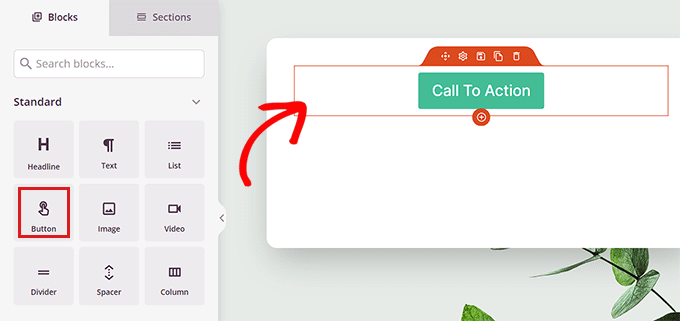
Subsequent, you will have to click on on the Button to open up its block settings.
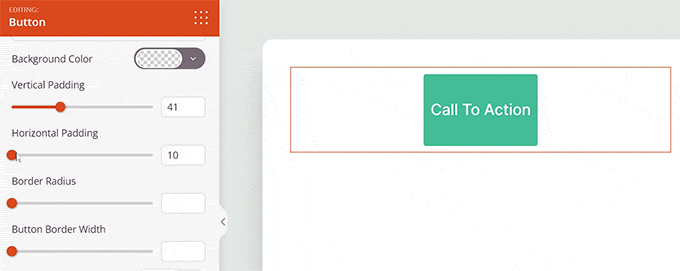
From right here, swap to the ‘Superior’ tab from the highest. You may change the peak of the block by dragging the ‘Vertical Padding’ slider.
To alter the width, drag the ‘Horizontal Padding’ slider within the left column.
As soon as you’re completed, don’t neglect to click on on the ‘Save’ button.
We hope this text helped you learn to change block width and top in WordPress. You may additionally wish to see our article on add and align photographs within the WordPress block editor and our high picks for the must-have WordPress plugins to develop your web site.
In case you favored this text, then please subscribe to our YouTube Channel for WordPress video tutorials. You can even discover us on Twitter and Fb.
The put up The best way to Change Block Top and Width in WordPress first appeared on WPBeginner.

