
Do you need to change margins in WordPress?
Margins are one of the essential design components that may considerably enhance person expertise and the aesthetic enchantment of any design. They add spacing between components in order that your content material is readable and every thing is well identifiable.
On this newbie’s information, we’ll present you the way to add and alter margins in WordPress. We’ll present you numerous strategies to vary margins in numerous areas of your WordPress web site.
What are Margins in WordPress and Internet Design?
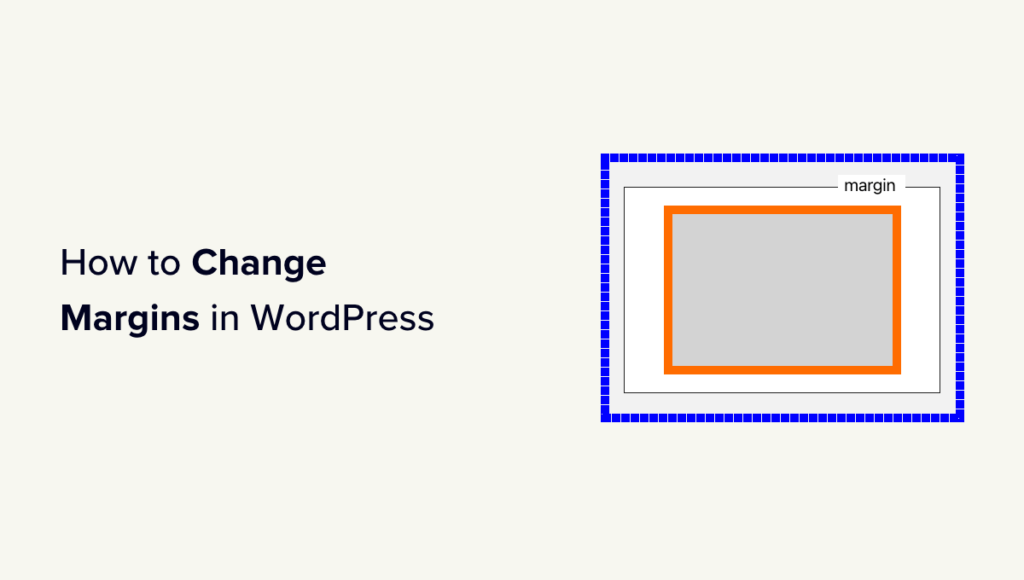
Margins are the area added round an online web page or different components inside an online web page.
Consider a typical internet web page as an empty piece of paper. Margins are the white or clean area across the edges of the paper.

The aim of utilizing margins is to make sure that components inside an online web page don’t look squished collectively.
Equally, margins can be utilized round totally different components contained in the web page format.
As an illustration, you’ll be able to change margins round photographs so they don’t seem to be too near the textual content or add a margin to depart area between your content material space and the sidebar.
On this article, we’re going to cowl a whole lot of floor. Click on the hyperlinks under to leap to any part you’d like.
What’s the Distinction Between Margin and Padding?
Margin and padding are each used so as to add white area in internet design. Nevertheless, they’re used very otherwise.
Margins add empty area exterior a component, and padding provides empty area inside it.

Margins are used so as to add area exterior a component. They assist you to guarantee there may be loads of area between components on an online web page.
Examples:
1. Including margins to extend area between a picture and textual content in an article.

2. Adjusting margins so as to add area between sections, just like the header and content material space.

Padding, nonetheless, is used so as to add cushion area between content material and the sides of a field or component.
Examples:
1. Adjusting padding to extend cushion area in your call-to-action buttons.

2. Growing Padding in a Textual content Column

Each padding and margins are broadly utilized in internet design.
Utilizing empty areas provides respiratory room to any design, which makes it extra user-friendly and stylish.
Why You Could Have to Add or Change Margins in WordPress?
Margins are an important facet of internet design. They make your web site look nice and straightforward to make use of in your customers.
WordPress themes deal with the design facet of your WordPress web site. Most of them already do a wonderful job of setting CSS guidelines to make sure loads of white area utilizing margins throughout your theme’s format.

Nevertheless, often, it’s possible you’ll want so as to add margins to regulate issues.
As an illustration, it’s possible you’ll not just like the margin round your navigation menus or need to add extra margin round your call-to-action buttons.
Equally, it’s possible you’ll generally really feel that objects are too shut to one another or too far aside.
In that case, you will want to vary margins in WordPress by your self.
The best way to Add Margins in WordPress?
There are many methods so as to add margins in WordPress.
Relying on the place you need to add margin and the choices accessible in your WordPress theme, you’ll want to decide on a way that works for you.
Let’s begin with the default built-in choices in WordPress itself, as they’re the simplest for novices.
Including Margins in WordPress Utilizing The Full Website Editor
Should you use a block-based theme with full web site editor help, you should utilize the built-in web site editor to vary margins wherever in your WordPress web site.
First, it is advisable go to the Look » Editor to launch the positioning editor.

As soon as inside the positioning editor, click on to decide on a template from the left column or click on wherever on the preview window.
Subsequent, click on on the realm or component the place you need to change margins. In the proper column, you will notice the choice to regulate margins beneath the Fashion tab.

As you alter the margins, the editor will spotlight the margin space.
You may also select so as to add margins to the highest, backside, proper, or left aspect.
Word: The margin choice will not be accessible for all blocks within the web site editor. Should you can not see the margin choice for a component, attempt an alternate technique under.
Including Margins in The Block Editor
If you’re engaged on a weblog submit or a web page, you’ll use the block editor.
Block editor in WordPress permits you to add and alter margins for numerous blocks.
Merely click on on the block the place you need to add/alter margins. Below the block settings, swap to the Fashion tab and scroll right down to the Dimensions or Margins choice.

Word: The margin choice will not be accessible for all blocks within the content material editor. Should you can not see the margin choice for a component, attempt an alternate technique under.
Including Margins in WordPress Utilizing SeedProd
SeedProd is the perfect WordPress web page builder plugin in the marketplace. It permits you to create customized pages in your web site simply. You possibly can even use it to create a customized WordPress theme from scratch.

SeedProd’s intuitive drag-and-drop web page builder permits you to alter margins for any component contained in the editor simply.
First, it is advisable set up and activate the SeedProd plugin. For extra particulars, see our tutorial on the way to set up a WordPress plugin.
Subsequent, it is advisable go to the SeedProd » Touchdown Pages after which click on on the Add New Touchdown Web page button.

After that, you may be requested to decide on a template in your web page.
SeedProd comes with dozens of ready-made templates that you should utilize as a place to begin, or you can begin with a clean template.

Click on to decide on your template, after which present a reputation in your touchdown web page.
This can launch SeedProd’s web page builder.
You’ll see a stay preview of your web page on the proper aspect. And components you’ll be able to add to your web page within the left column.

You possibly can level and click on on any merchandise on the web page to edit it.
Clicking on a component will choose it, and also you’ll see its choices within the left column. From right here, swap to the Superior tab and click on the Spacing choice.

You possibly can change margins and padding for the chosen component from right here.
When you end enhancing your web page, don’t overlook to click on the Save and Publish button on the prime proper nook.

After that, you’ll be able to go to your web site to see the adjustments in motion.
Change Margins Utilizing Thrive Architect
Thrive Architect is without doubt one of the finest WordPress web page builder instruments that permits you to use a drag-and-drop interface to design WordPress pages.
It comes with over 200+ templates you should utilize as a starter level. Plus, you can too use it to edit your WordPress posts and pages, borrowing the format and magnificence of your current WordPress theme.

To put in Thrive Architect, you’ll first have to log into your account on the Thrive Themes web site.
From there, it is advisable obtain and set up the Thrive Product Supervisor plugin. For extra particulars, see our tutorial on the way to set up a WordPress plugin.

Upon activation, it is advisable go to the Thrive Product Supervisor web page.
Click on the ‘Log into my account’ button to attach WordPress to your Thrive Themes account.

As soon as related, you’ll see the checklist of obtainable Thrive Themes merchandise beneath your account.
Go forward and click on on the ‘Set up Product’ checkbox beneath Thrive Architect, after which click on on the ‘Set up chosen merchandise’ button on the backside.

Thrive Product Supervisor will now set up the Thrive Architect plugin for you.
After that, you’ll be able to edit or create a brand new WordPress submit or web page and click on on the Edit with Thrive Architect button.

Thrive Architect will ask you to decide on a template if it’s a new web page.
You need to use your theme template to create a Regular Web page or a Pre-built Touchdown Web page template.

Should you select a Pre-built Touchdown Web page choice, then the plugin will present you a bunch of templates to select from.
Merely click on to pick out the one which resembles what you need to create.

Whether or not it’s a regular web page (utilizing your theme’s types) or a touchdown web page, Thrive Architect’s web page builder would have the identical options.
You’ll see a stay preview of your web page with a toolbar on the proper and a settings panel to the left.

You possibly can level on click on on a component to pick out it. Or click on on the add [+] button within the toolbar so as to add a brand new component.
When you click on to pick out and edit a component, its settings will seem within the left column.
From right here, click on the Format & Place tab to vary the margins and padding.

You’ll see a visible illustration of margin and padding.
Take your mouse over to any aspect of the margin and drag the deal with to extend or lower the margin.

You possibly can repeat the method to vary margins on any of the 4 sides.
As soon as you’re achieved, don’t overlook to click on on the Save Work button after which choose Save and Exit to Submit Editor choice.

Now you can click on on the Publish or Save button to avoid wasting your WordPress submit or web page.
Altering Margins in WordPress Utilizing CSS Code
This technique requires you so as to add CSS code to your WordPress theme. You’ll additionally want a really fundamental understanding of HTML and CSS.
Nevertheless, this technique provides you extra flexibility as you’ll be able to manually select the realm the place you need to add or alter the margins.
Including and Altering Margins Utilizing Customized CSS in WordPress Theme
WordPress permits you to save customized CSS in your WordPress theme choices. Nevertheless, relying in your WordPress theme, there are a number of methods to try this.
Earlier than you add or change margins utilizing CSS, it’s possible you’ll want to seek out out which component it is advisable goal together with your CSS code.
As an illustration, if you wish to change margins across the physique of the web page, then you should utilize the next code:
The simplest strategy to discover which component to focus on is through the use of the Examine software in your browser.
Open your web site in a brand new browser tab and take the mouse over to the component that you just need to change margins round. After that, proper and choose Examine from the browser menu.

This can break up your browser display, and you will notice the HTML code and CSS behind the web page.
You possibly can transfer your mouse over the code, and your browser will spotlight the realm affected by it.

Within the code, you’ll be able to see the HTML component or CSS class it is advisable goal together with your customized CSS.
You possibly can even attempt your margins right here to preview the way it will look.

Nevertheless, these adjustments will not be saved in your theme and can disappear once you reload or shut the browser tab.
Let’s undergo other ways it can save you this tradition CSS in WordPress.
Utilizing Customized CSS to Change Margins in Website Editor
If you’re utilizing a block theme with full web site editor help. Then, right here is how one can add customized CSS to your theme.
First, go to the Look » Editor web page to launch the positioning editor after which swap to the Types panel.

On the backside of the Types panel, click on on the Further CSS tab.
This can carry up a textual content editor the place you’ll be able to add your customized CSS code. Your CSS code will instantly apply, and it is possible for you to to see the adjustments seem on display.

As soon as you’re happy with the adjustments, don’t overlook to click on on the Save button to retailer your adjustments.
Including Margins with CSS in Theme Customizer
If you’re utilizing a traditional theme (with out web site editor help), then it can save you your Customized CSS within the theme customizer.
Go to the Look » Customise web page to launch the theme customizer.

The customizer will present totally different choices relying in your WordPress theme.
It is advisable click on on the Further CSS tab to increase it.

The tab will slide to point out you a easy field the place you’ll be able to add your customized CSS.
As quickly as you add a sound CSS rule, it is possible for you to to see it utilized in your web site’s stay preview pane.

As soon as you’re happy with the adjustments, click on on the Publish button to retailer your adjustments.
Change Margins with Customized CSS Code Utilizing WPCode
The simplest means so as to add Customized CSS code in WordPress is through the use of the WPCode plugin.
It’s the finest WordPress code snippets plugin that permits you to add any CSS/HTML/PHP/JavaScript code to your WordPress web site with out breaking it.

The benefit of utilizing WPCode is that you just received’t lose your CSS adjustments when switching your WordPress theme.
Word: There may be additionally a free model of WPCode that you should utilize.
The very first thing it is advisable do is set up and activate the WPCode plugin. For extra particulars, see our tutorial on the way to set up a WordPress plugin.
Upon activation, go to the Code Snippets » + Add New web page.
Take the mouse over to the ‘Add Your Customized Code (New Snippet)’ choice within the code snippets library, and click on the ‘Use snippet’ button.

Subsequent, on the prime of the web page, add a title in your customized CSS snippet. This may be something that helps you establish the code.
After that, write down or paste your customized CSS into the ‘Code Preview’ field and set the ‘Code Sort’ by selecting the ‘CSS Snippet’ choice from the dropdown menu.

As an illustration, if you wish to add or change the margins across the total internet web page physique, then you should utilize the next CSS code:
Subsequent, scroll right down to the ‘Insertion’ part and choose the ‘Auto-Insert’ technique to execute the code throughout your total WordPress web site.
Should you solely need to execute the code on sure pages or posts, you’ll be able to select the ‘Shortcode’ technique.

Now, it is advisable return to the highest of the web page and toggle the swap to ‘Energetic’.
Lastly, click on on the ‘Save Snippet’ button to retailer your adjustments.

Now you can go to your web site to see your customized CSS in motion.
We hope this text helped you learn to add or change margins in WordPress. You might also need to see our full WordPress theme growth cheat sheet or check out our information on customizing WordPress themes.
Should you favored this text, then please subscribe to our YouTube Channel for WordPress video tutorials. You may also discover us on Twitter and Fb.

