
Do you wish to create a customized WordPress block on your web site?
Whereas WordPress comes with a variety of fundamental blocks for creating content material, you may want one thing extra particular on your web site.
On this article, we’ll present you two methods to create customized Gutenberg blocks on your WordPress web site.
Why Create a Customized WordPress Block?
WordPress comes with an intuitive block editor that means that you can simply construct your posts and pages by including content material and format parts as blocks.
By default, WordPress ships with a number of commonly-used blocks. WordPress plugins might also add their very own blocks that you need to use.
Nevertheless, typically you could wish to create your personal customized block to do one thing particular in your WordPress web site as a result of you possibly can’t discover a blocks plugin that works for you.
With customized blocks, you possibly can add distinctive options and performance to your web site that might not be accessible in pre-built blocks. This may help automate processes or make content material creation on your WordPress weblog extra environment friendly.
For instance, you could possibly create a customized block to show testimonials after which simply insert and handle that block with none coding data.
Having mentioned that, let’s see easy methods to simply create a totally customized block in WordPress.
For this tutorial, we might be exhibiting you two strategies to create a customized block. You should utilize the short hyperlinks under to leap to the tactic of your alternative:
Methodology 1: Create Customized Blocks for WordPress Utilizing WPCode (Beneficial)
If you’re a newbie and inexperienced with coding, then this technique is for you.
WPCode is one of the best WordPress code snippets plugin in the marketplace that makes it tremendous straightforward and secure so as to add customized code to your web site.
It comes with the block snippets function that means that you can simply create customized blocks on your WordPress web site with out writing any code.
First, you want to set up and activate the WPCode plugin. For detailed directions, you could wish to see our newbie’s information on easy methods to set up a WordPress plugin.
Notice: WPCode additionally gives a free model that you need to use so as to add customized code to your web site. Nevertheless, you’ll need the Professional model of the plugin to unlock the customized block snippets function.
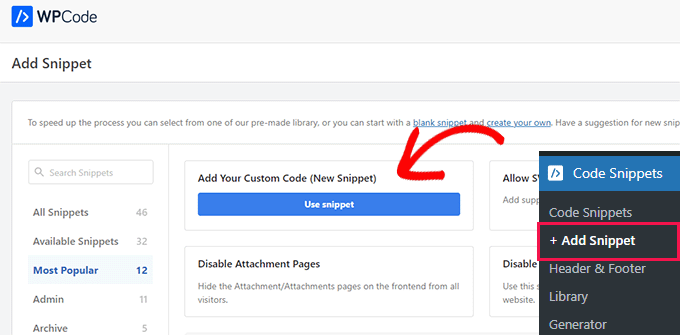
Upon activation, you want to head over to the Code Snippets » + Add Snippet web page from the WordPress admin sidebar.
As soon as you’re there, click on the ‘Use Snippet’ button underneath the ‘Add Your Customized Code (New Snippet)’ choice.
It will take you to the ‘Create Customized Snippet’ web page, the place you can begin by typing a reputation for the customized block that you’re about to create.
After you have finished that, simply choose the ‘Blocks Snippet’ choice from the ‘Code Sort’ dropdown menu in the suitable nook of the display.
It will show the ‘Edit with Block Editor’ button within the ‘Code Preview’ field.
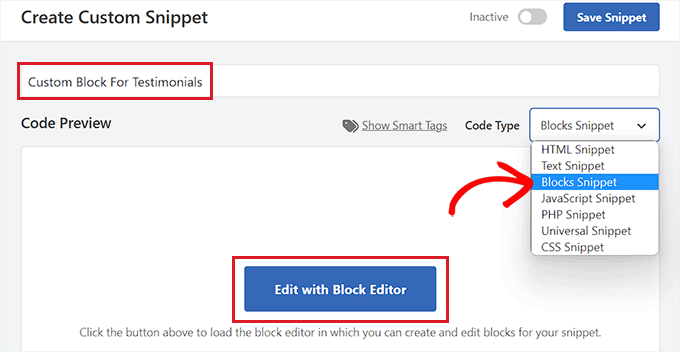
Merely click on on this button to launch the block editor.
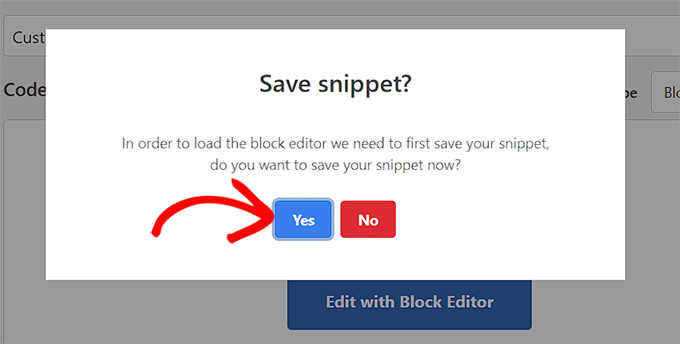
Now, a immediate will seem in your display asking you to save lots of the code snippet to load it within the block editor. Simply click on on the ‘Sure’ button to maneuver forward.
Now that you’re within the block editor, you possibly can simply create a customized block utilizing the pre-made blocks accessible within the block menu.
For this tutorial, we might be making a customized block for including testimonials in your web site.
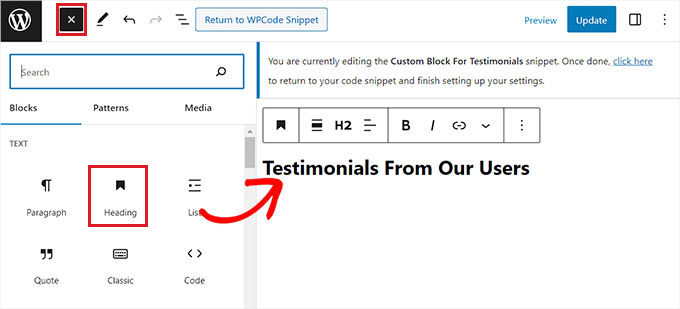
First, you want to click on the ‘+’ button within the high left nook of the display to open up the block menu.
From right here, drag and drop the Heading block into the block editor interface and identify it ‘Testimonials’.
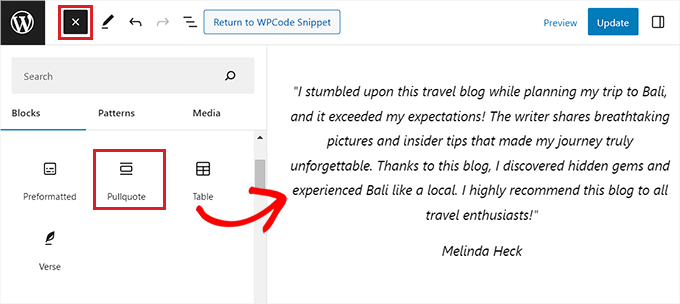
Subsequent, you need to use the paragraph, pull-quote, or quote blocks so as to add testimonials from totally different purchasers in your web site.
You possibly can even use the picture, web site emblem, social icons, or web site tagline blocks to additional customise your Testimonials block.
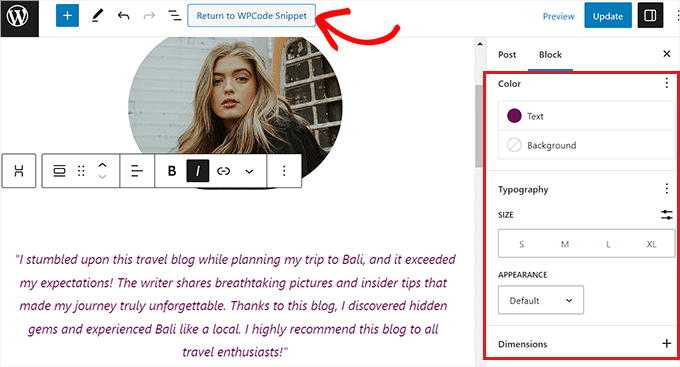
You can even customise the scale, textual content coloration, or background coloration of your testimonials from the block panel on the suitable facet of the display.
As soon as you’re finished, don’t overlook to click on the ‘Replace’ button on the high to retailer your customized block settings.
Subsequent, simply click on on the ‘Return to WPCode Snippet’ button on the high to be redirected to the ‘Edit Snippet’ web page.
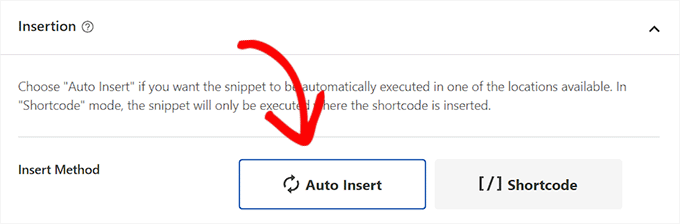
As soon as you’re there, scroll all the way down to the ‘Insertion’ part and select the ‘Auto Insert’ mode.
Upon activation of the code snippet, your customized block might be mechanically added to the place you select to insert it in your web site.
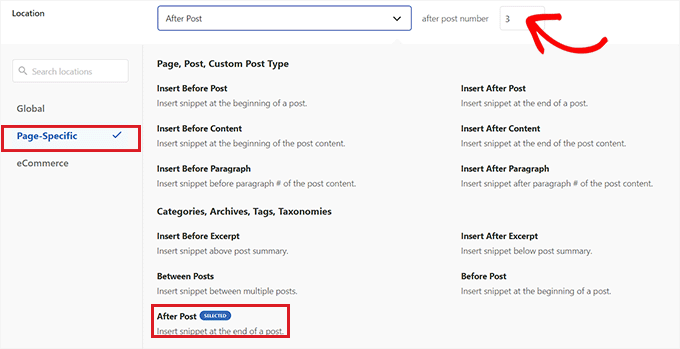
Subsequent, it’s a must to configure the placement of the customized block you created.
To do that, merely click on the ‘Location’ dropdown menu within the ‘Insertion’ part and change to the ‘Web page-Particular’ tab. From right here, now you can select the ‘Insert After Submit’ choice if you wish to present your Testimonials block after the publish ends.
When you try this, you can too configure the variety of posts after which the testimonial block ought to seem. For instance, in the event you kind within the quantity 3, then the Testimonials block will seem in each third publish.
You can even show the block in between totally different paragraphs, after publish excerpts, and extra.
Nevertheless, in the event you don’t discover the block location that you’re on the lookout for, then you can too create your personal conditional logic rule so as to add the customized block to your most popular place.
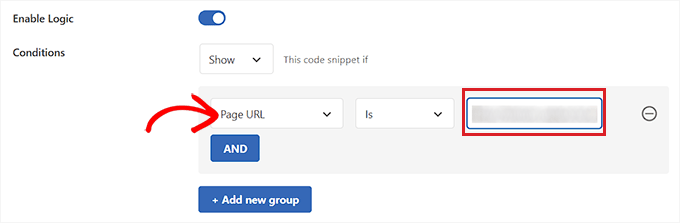
To do that, scroll all the way down to the ‘Good Conditional Logic’ part and toggle on the ‘Allow Logic’ change.
Subsequent, you need to click on the ‘Add New Group’ button to begin making a conditional logic rule.

For instance, in the event you solely wish to present the customized block you created on a selected web page or publish, then you’ll have to choose the ‘Web page URL’ choice from the dropdown menu on the suitable.
After that, you possibly can go away the dropdown menu within the center as it’s after which add the URL of the WordPress web page/publish of your alternative into the sector on the left.
You can even configure your conditional logic rule to solely show the customized block on a selected web page, logged-in customers, on WooCommerce retailer pages, Simple Digital Downloads pages, particular dates, and extra.
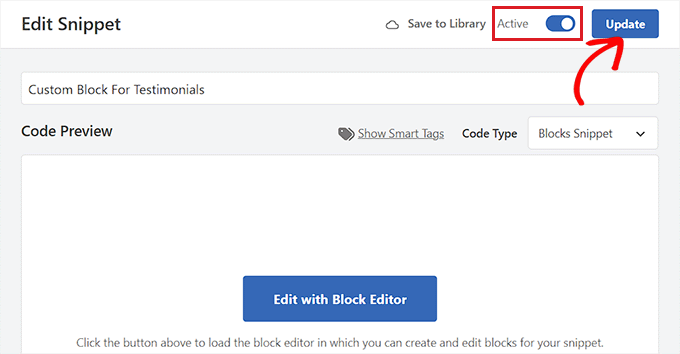
As soon as you’re finished, scroll again to the highest of the web page and toggle the ‘Inactive’ change to ‘Lively’. Then, click on the ‘Replace’ button to retailer your settings.
Your customized block will now be mechanically added to all of the places that you simply chosen for the block snippet.
Understand that the customized block you created gained’t be displayed as an choice within the block menu of the Gutenberg editor.
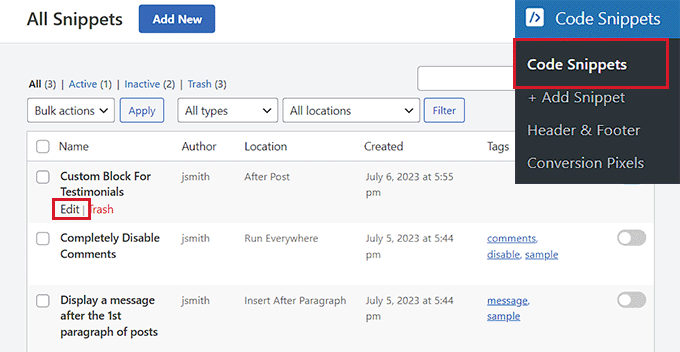
You’ll have to configure the block settings by visiting the Code Snippets web page from the WordPress dashboard and clicking the ‘Edit’ hyperlink underneath the block snippet.
It will open the ‘Edit Snippet’ web page, the place you possibly can customise the block or change its location and conditional logic guidelines simply.
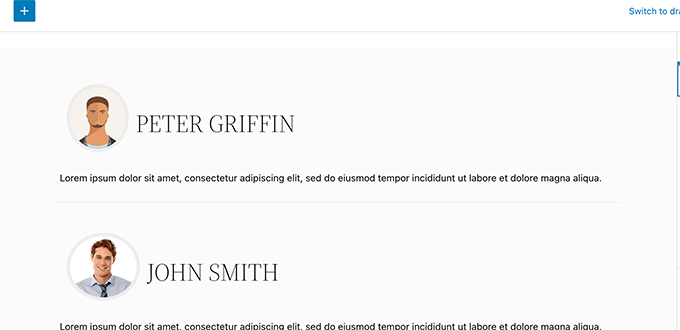
Now go to your web site to view the customized block that you simply created in motion.
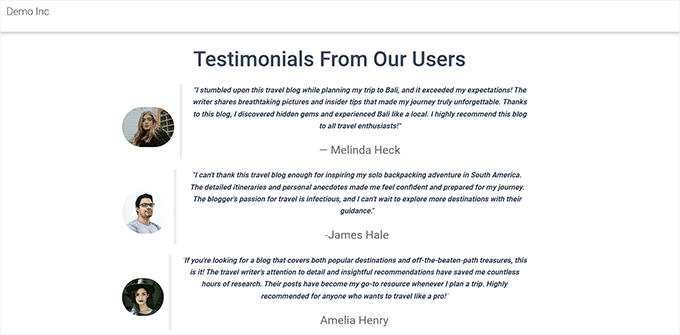
Right here is our customized Testimonials block on our demo web site.
Methodology 2: Create Customized Blocks for WordPress Utilizing Genesis Customized Code Plugin (Free)
If you’re an intermediate consumer and on the lookout for a free resolution, then this technique is for you. Understand that you’ll need to be acquainted with HTML and CSS to comply with the directions on this technique.
First, you want to set up and activate the Genesis Customized Blocks plugin. For extra particulars, see our step-by-step information on easy methods to set up a WordPress plugin.
Made by the folks behind WP Engine internet hosting, this plugin offers builders with straightforward instruments to shortly create customized blocks for his or her tasks.
For the sake of this tutorial, we’ll construct a Testimonials block.
Step 1: Create a Customized Block for WordPress
First, you want to head over to Customized Blocks » Add New web page from the left sidebar of your admin panel.
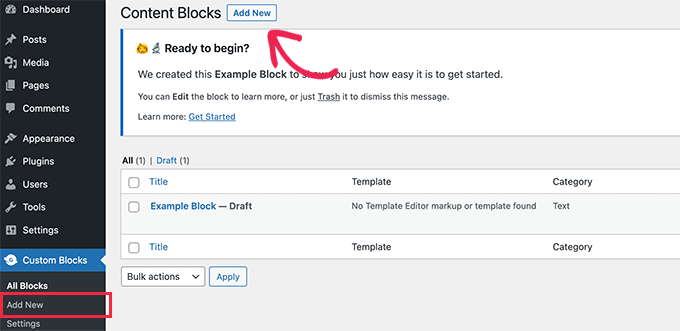
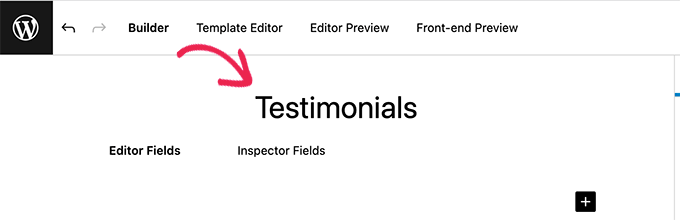
It will carry you to the Block Editor web page, the place you’ll be making a customized block on your WordPress web site.
From right here, you can begin by giving a reputation to your block.
Now on the suitable facet of the web page, you can see the block properties that you may configure.
Right here you possibly can select an icon on your block, add a class, and add key phrases.
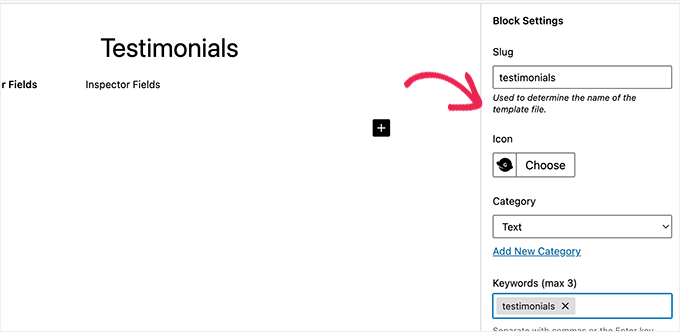
The slug might be auto-filled primarily based in your block’s identify, so that you don’t have to vary it. Nevertheless, you could write as much as 3 key phrases within the ‘Key phrases’ textual content discipline in order that your block may be simply discovered.
Now, it’s time so that you can add some fields to your block. You possibly can add various kinds of fields like textual content, numbers, e mail addresses, URLs, colours, photos, checkboxes, radio buttons, and extra.
We’ll add 3 fields to our customized Testimonials block: a picture discipline for the photograph of the reviewer, a textbox for the reviewer identify, and a textual content space discipline for the testimonial textual content.
Simply click on on the ‘+’ button to insert the primary discipline.
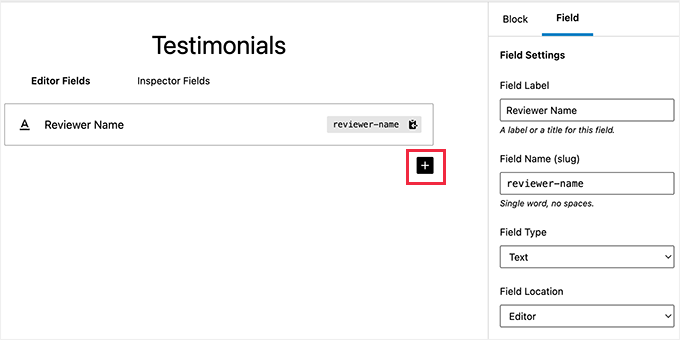
It will open up some choices for the sector in the suitable column. Let’s check out every of them.
Subject Label: You should utilize any identify of your alternative for the sector label. Let’s identify our first discipline ‘Reviewer Picture’.
Subject Title: The sector identify might be generated mechanically primarily based on the sector label. We’ll use this discipline identify within the subsequent step, so be certain that it’s distinctive for each discipline.
Subject Sort: Right here, you possibly can choose the kind of discipline. We would like our first discipline to be a picture, so we’ll decide ‘Picture’ from the dropdown menu.
Subject Location: You possibly can determine whether or not you wish to add the sector to the editor or the inspector.
Assist Textual content: You possibly can add some textual content to explain the sector. This isn’t required in case you are creating this block on your private use however could also be useful for multi-author blogs.
You may additionally see some further choices primarily based on the sector kind you select. For instance, if you choose a textual content discipline, then you’re going to get further choices like placeholder textual content and character restrict.
Following the above course of, let’s add 2 different fields for our Testimonials block by clicking the ‘+’ button.
In case you wish to reorder the fields, then you are able to do that by dragging them utilizing the deal with on the left facet of every discipline label. To edit or delete a specific discipline, you want to click on the sector label and edit the choices in the suitable column.
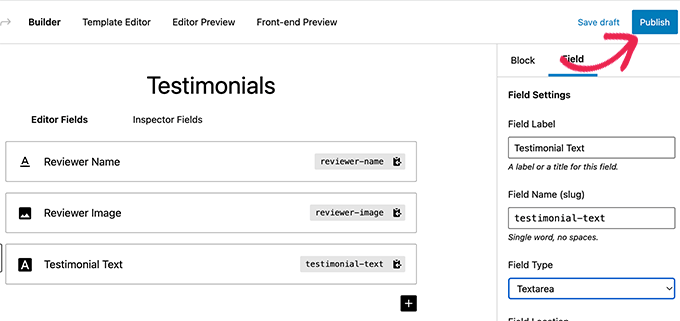
As soon as you’re finished, simply click on on the ‘Publish’ button on the suitable facet of the web page to save lots of your customized Gutenberg block.
Step 2: Create a Customized Block Template
Though you created the customized WordPress block within the final step, it gained’t work till you create a block template.
The block template determines precisely how the data entered into the block is displayed in your web site. You get to determine the way it appears through the use of HTML and CSS, and even PHP code if you want to run capabilities or do different superior issues with the information.
There are two methods to create a block template. In case your block output is in HTML/CSS, then you need to use the built-in template editor.
Alternatively, in case your block output requires some PHP to run within the background, then you’ll need to manually create a block template file and add it to your theme folder.
Methodology 1: Utilizing Constructed-in Template Editor
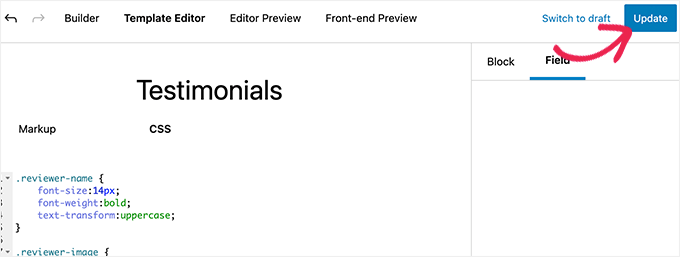
On the customized block edit display, merely change to the ‘Template Editor’ tab and enter your HTML underneath the markup tab.

You possibly can write your HTML and use double curly brackets to insert block discipline values.
As an illustration, we used the next HTML for the pattern block we created above:
<img src="{{reviewer-image}}" class="reviewer-image">
<h4 class="reviewer-name">{{reviewer-name}}</h4>
<div class="testimonial-text">{{testimonial-text}}</div>
</div>
After that, simply change to the ‘CSS’ tab to type your block output markup.
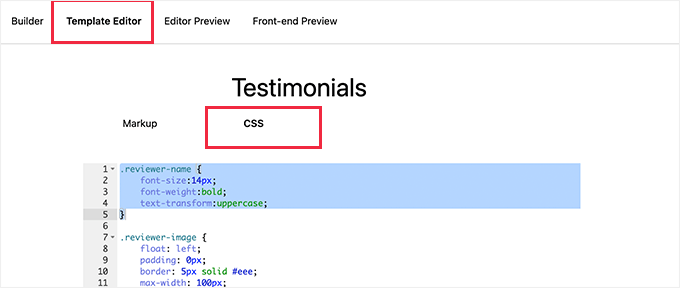
Right here is the pattern CSS we used for our customized block:
font-size:14px;
font-weight:daring;
text-transform:uppercase;
}
.reviewer-image {
float: left;
padding: 0px;
border: 5px strong #eee;
max-width: 100px;
max-height: 100px;
border-radius: 50%;
margin: 10px;
}
.testimonial-text {
font-size:14px;
}
.testimonial-item {
margin:10px;
border-bottom:1px strong #eee;
padding:10px;
}
Methodology 2: Manually Importing Customized Block Templates
This technique is beneficial if you want to use PHP to work together together with your customized block fields. You’ll mainly must add the editor template on to your theme.
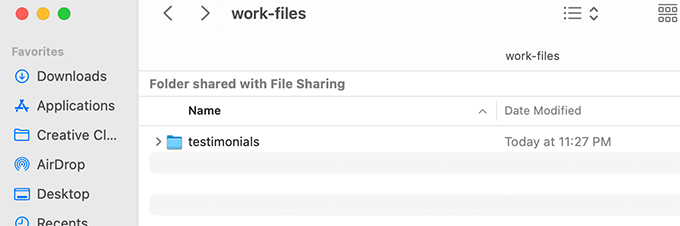
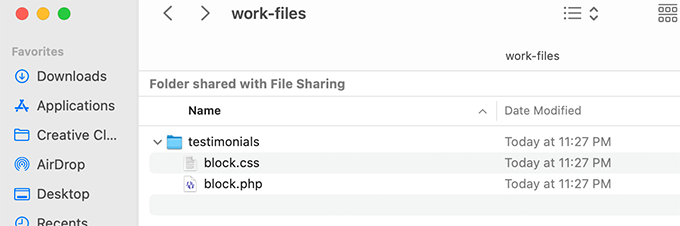
First, you want to create a folder in your pc and identify it utilizing your customized block identify slug.
As an illustration, our demo block is named Testimonials, so we’ll create a testimonials folder.
Subsequent, you want to create a file known as block.php utilizing a plain textual content editor. That is the place you’ll put the HTML / PHP a part of your block template.
Right here is the pattern template we used for our instance:
<img class="reviewer-image" src="<?php block_field( ‘reviewer-image’ ); ?>" alt="<?php block_field( ‘reviewer-name’ ); ?>" />
<h4 class="reviewer-name"><?php block_field( ‘reviewer-name’ ); ?></h4>
<div class="testimonial-text"><?php block_field( ‘testimonial-text’ ); ?></div>
</div>
Now you might have seen how we used the block_field() perform to fetch information from a block discipline.
Now we have wrapped our block fields within the HTML we wish to use to show the block. Now we have additionally added CSS lessons in order that we will type the block correctly.
Don’t overlook to save lots of the file contained in the folder you created earlier.
Subsequent, you want to create one other file utilizing the plain textual content editor in your pc and reserve it as block.css contained in the folder you created.
We’ll use this file so as to add CSS wanted to type our block show. Right here is the pattern CSS we used for this instance:
font-size:14px;
font-weight:daring;
text-transform:uppercase;
}
.reviewer-image {
float: left;
padding: 0px;
border: 5px strong #eee;
max-width: 100px;
max-height: 100px;
border-radius: 50%;
margin: 10px;
}
.testimonial-text {
font-size:14px;
}
.testimonial-item {
margin:10px;
border-bottom:1px strong #eee;
padding:10px;
}
Don’t overlook to save lots of your modifications.
Your block template folder will now have two template recordsdata inside it.
After that, you want to add your block folder to your web site utilizing an FTP consumer or the File Supervisor app inside your WordPress internet hosting account’s management panel.
As soon as related, navigate to the /wp-content/themes/your-current-theme/ folder.
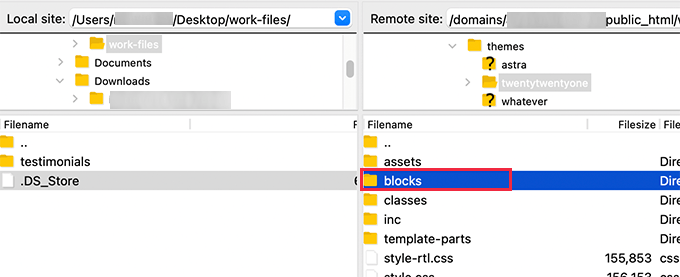
In case your theme folder doesn’t have a folder named ‘blocks’, then go forward and create a brand new listing and name it blocks.
Subsequent, it’s a must to add the folder you created in your pc to the blocks folder.
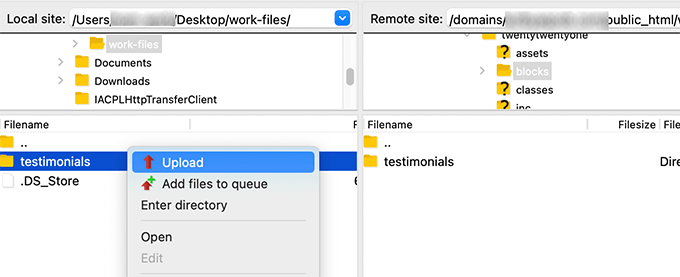
That’s all! You might have efficiently created handbook template recordsdata on your customized block.
Step 3: Preview Your Customized Block
Earlier than you possibly can preview your HTML/CSS, you’ll need to supply some check information that can be utilized to show a pattern output.
Contained in the WordPress admin space, edit your block and change to the ‘Editor Preview’ tab. Right here, you want to enter some dummy information.
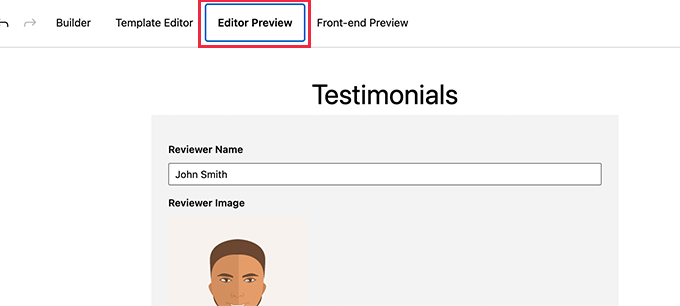
This information gained’t be part of your customized block and can solely be used for previewing the modifications you made utilizing HTML and CSS.
After you have added the information, don’t overlook to click on on the ‘Replace’ button to save lots of your modifications.
Should you don’t click on the ‘Replace’ button, then you definitely gained’t be capable of see the preview of your customized block.
Now you can change to the ‘Entrance-end Preview’ tab to see how your block will look on the entrance finish of your WordPress web site.
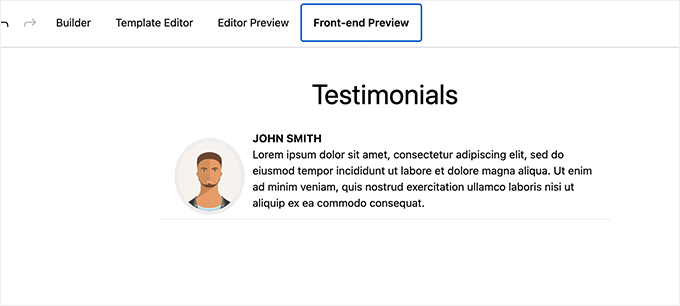
If all the pieces appears good to you, then you possibly can replace your block once more to save lots of any unsaved modifications.
Step 4: Utilizing Your Customized Block in WordPress
Now you can use your customized block in WordPress such as you would another block.
Merely edit any publish or web page the place you wish to use this block. Then, click on the ‘+’ button within the high left nook to open up the block menu.

From right here, discover your block by typing in its identify or key phrases after which add it to the web page/publish.
After you insert the customized block into the content material space, you will notice the block fields you created earlier.
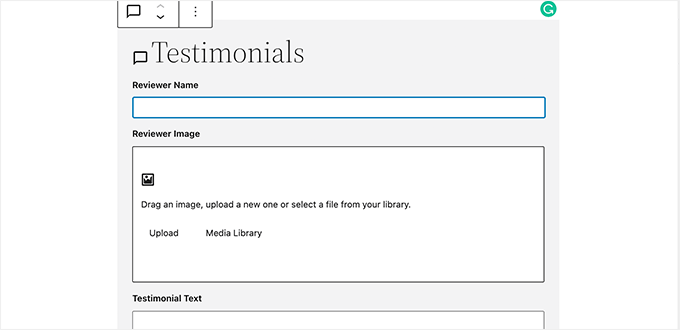
You possibly can fill out the block fields as wanted.
As you progress away from the customized WordPress block to a different one, the editor will mechanically present a stay preview of your block.
Now you can save your publish and web page and preview it to see your customized block in motion in your web site.
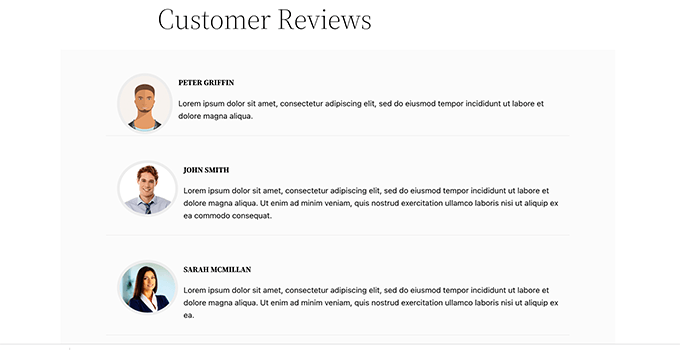
Right here’s how the Testimonials block appears on our check web site.
We hope this text helped you discover ways to simply create customized Gutenberg blocks on your WordPress web site. You may additionally wish to see our information on easy methods to create a customized WordPress theme from scratch or see our knowledgeable picks for one of the best block themes for full web site modifying.
Should you appreciated this text, then please subscribe to our YouTube Channel for WordPress video tutorials. You can even discover us on Twitter and Fb.
The publish How one can Create a Customized WordPress Block (Simple Approach) first appeared on WPBeginner.

