

Do you need to create a digital product market in WordPress?
A digital market is an internet site the place different folks can promote their photographs, art work, music, ebooks, spreadsheets, on-line programs, or different digital downloads. Fortunately, WordPress makes it simple to create a safe on-line market for a number of distributors.
On this article, we’ll present you learn how to simply create a digital product market utilizing WordPress with out hiring a developer.
What Platform Ought to You Use for Your Digital Product Market?
A digital product market is an internet site the place customers can signal as much as promote ebooks, pictures, movies, and different downloadable content material.
If you wish to create a digital market, you’ll first want to decide on your eCommerce platform. Some platforms are higher fitted to promoting bodily items than digital ones.
Plus, some don’t have the options you want for a multi-vendor market. Shifting to a distinct platform sooner or later will be exhausting and time-consuming.
Which means you need to be certain you’re selecting an answer with options that shield your digital downloads, together with correct licensing and subscriptions.
We advocate utilizing WordPress + Simple Digital Downloads.

WordPress is the finest web site builder available on the market, utilized by over 43% of all web sites on the web.
Now, it’s essential to know that there are two forms of WordPress software program, and also you don’t need to select the incorrect one.
First, there may be WordPress.com, which is a weblog internet hosting platform. Then, there may be WordPress.org, which is also referred to as self-hosted WordPress. For an in depth comparability, you’ll be able to see our information on the distinction between WordPress.com and WordPress.org.
It’s good to use the self-hosted WordPress.org platform as a result of it offers you full management over your web site. It offers full freedom to promote any kind of digital product by utilizing a plugin like Simple Digital Downloads.
Simple Digital Downloads (EDD) is the very best WordPress eCommerce plugin for promoting digital merchandise, and it has all of the options it’s essential arrange a multi-vendor market.
In truth, we use this plugin ourselves to promote a lot of our premium WordPress plugins, that are downloadable recordsdata restricted to members solely. Simple Digital Downloads additionally comes with license keys built-in.
In the event you simply need a web based retailer the place you’ll be able to promote digital merchandise your self, then please see our information on learn how to promote digital downloads on WordPress.
Nevertheless, on this article, we’ll present you learn how to arrange a multi-vendor market the place different folks can promote digital items in your WordPress web site.
That being stated, let’s take a look at learn how to simply arrange your WordPress digital market website with Simple Digital Downloads.
Step 1: Setting Up Your WordPress Web site
To begin promoting digital downloads with WordPress, you have to a area title, internet hosting, and an SSL certificates.
A site title is your web site’s deal with on the web. That is what guests will kind into their browsers to succeed in your web site, resembling ‘wpbeginner.com’.Webhosting is a service that can retailer your web site recordsdata and digital downloads. That can assist you out, we have now hand-picked a few of the finest WordPress internet hosting you can purchase.An SSL certificates is required to create a safe connection between your web site and customers to be able to settle for on-line funds.
Considered one of our prime really helpful internet hosting suppliers, SiteGround, affords managed WordPress internet hosting for Simple Digital Downloads. It comes with a free SSL certificates, EDD preinstalled, and optimization options. Plus, you get an enormous 73% off!
Mainly, you’ll be able to create and run your web site for lower than $5 per thirty days.
Let’s stroll by means of learn how to buy your area, internet hosting, and SSL certificates.
Go forward and open the SiteGround web site in a brand new tab to be able to comply with alongside. The very first thing it’s essential do is click on on the ‘Get Plan’ button.

After that, SiteGround will ask you to enter a site title to your web site. In the event you don’t have already got a reputation in thoughts, then you’ll be able to see our information on how to decide on the very best area title.
Lastly, you have to so as to add your account data.
Additionally, you will be capable of buy some elective extras. You’ll be able to all the time add these at a later date should you want them. In case you are not sure, then we advocate skipping this step.
After getting into your cost particulars, SiteGround will ship you an e mail with directions on learn how to log in to your internet hosting account. This can be a internet hosting management panel the place you’ll be able to handle your new web site.
Merely log in to your SiteGround account, and you will notice that SiteGround has already put in WordPress for you. It has additionally preinstalled Simple Digital Downloads.

You’ll be able to then click on on the ‘WordPress Admin’ button. It will take you to your WordPress website’s dashboard.
If, for some motive, you don’t need to use SiteGround, then you may also set up WordPress on different internet hosting firms like Bluehost, Hostinger, and WP Engine by following an analogous course of.
Step 2: Creating an On-line Retailer With Simple Digital Downloads
By default, WordPress doesn’t embody eCommerce performance out of the field, so you have to a plugin to promote digital downloads.
Plugins for WordPress websites are like apps to your telephone. They add every kind of various options and performance to your web site.
We might be utilizing the Simple Digital Downloads plugin so as to add the multi-vendor eCommerce options we want.
In the event you claimed our SiteGround EDD Internet hosting deal within the earlier step, then Simple Digital Downloads is already put in in your web site. You’ll be able to transfer on to the ‘Coming into Your Enterprise and Location Info’ part under.
However in case you are utilizing one other internet hosting supplier, then you definitely first want to put in and activate the Simple Digital Downloads plugin. For extra particulars, see our step-by-step information on learn how to set up a WordPress plugin.
Observe: Though you need to use the free Simple Digital Downloads plugin for promoting digital merchandise on-line, additionally, you will want a Skilled Cross or increased to show your web site right into a digital product market. Later on this tutorial, we’ll present you learn how to set this up.
Coming into Your Enterprise and Location Info
Upon activation, it’s essential go to the Downloads » Settings web page in your WordPress admin space. It will begin the Simple Digital Downloads setup wizard.
On the setup wizard’s first web page, you can be requested to enter your corporation title and placement.
You may surprise why your location is required in case you are not promoting bodily merchandise. It is because when a buyer makes a purchase order, Simple Digital Downloads will use the nation and state data to auto-fill some fields.
Additionally, your location could also be used to calculate gross sales tax.
So as to add your location, open the ‘Enterprise Nation’ dropdown menu. Now you can select the nation the place your corporation is predicated.
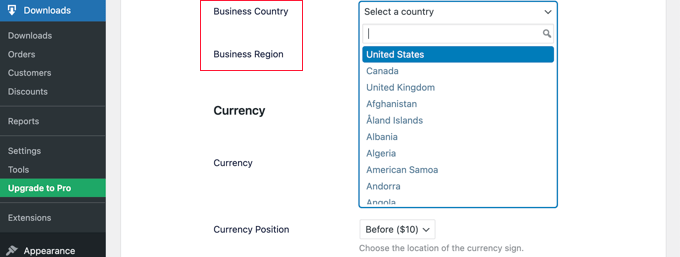
Subsequent, discover the ‘Enterprise Area’ subject. Right here you’ll be able to kind the state or province the place your retailer operates from.
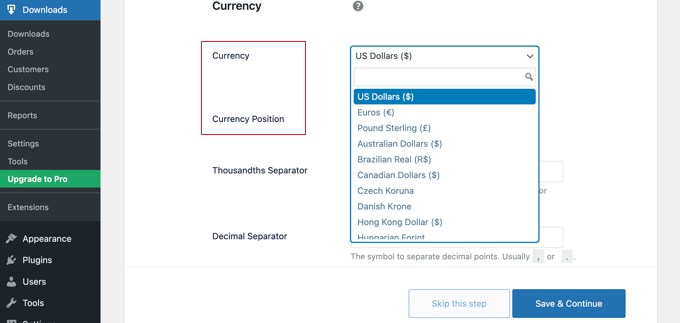
Relying in your location, you may additionally need to customise the forex used in your web site. By default, Simple Digital Downloads exhibits all your costs in US {dollars}. It additionally locations the greenback signal earlier than the value, so 5 {dollars} is proven as ‘$5.’
To vary the default forex settings, scroll right down to the Forex part and open the ‘Forex’ dropdown. Now you can select a brand new forex.
Simply remember that some cost gateways could not settle for each forex. In case you are undecided, then it’s a good suggestion to examine the web site to your chosen cost gateway. Most cost gateways have an inventory of the currencies that they assist.
As soon as you’re completed, you have to to click on on the ‘Save & Proceed’ button. It will carry you to the following web page, the place you’ll be able to arrange your cost strategies.
Setting Up Your Fee Strategies
If you wish to promote digital merchandise, then you have to a solution to accumulate on-line funds.
Stripe is without doubt one of the prime cost firms that doesn’t require going by means of an extended course of to enroll in a service provider account. They permit anybody with a reliable enterprise to simply accept bank card funds on-line.
To rapidly get began with Stripe, merely click on on the ‘Join with Stripe’ button.
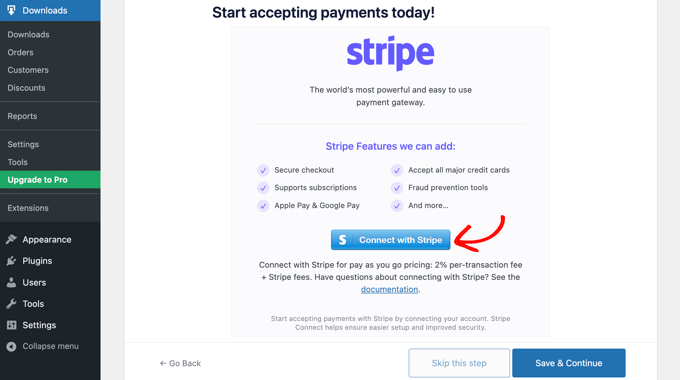
This opens a setup wizard, which is able to enable you join your web site to Stripe.
In the event you want, you’ll be able to add extra cost gateways later. Simply check out the choices on the Simple Digital Obtain extensions web page, resembling PayPal, Braintree, Authorize.web, and extra.
When you’re performed, simply click on the ‘Save & Proceed’ button on the backside of the display.
Configuring Your Receipts
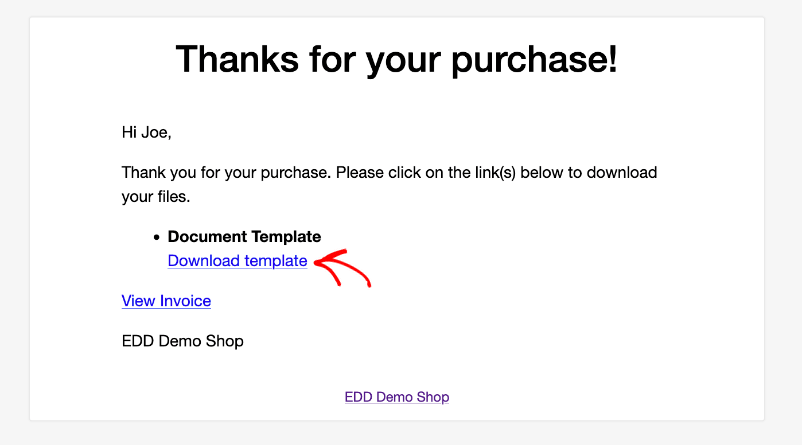
Each time somebody buys a digital obtain, Simple Digital Downloads will ship them an e mail.
This e mail has a hyperlink that the shopper can use to obtain the file they simply bought.
You’ll be able to configure that e mail by including your individual textual content and branding. Robust branding could make your corporation look extra skilled and encourage loyalty.
So as to add a brand to your emails, click on on the ‘Connect File’ button and add or select an present picture out of your WordPress media library.
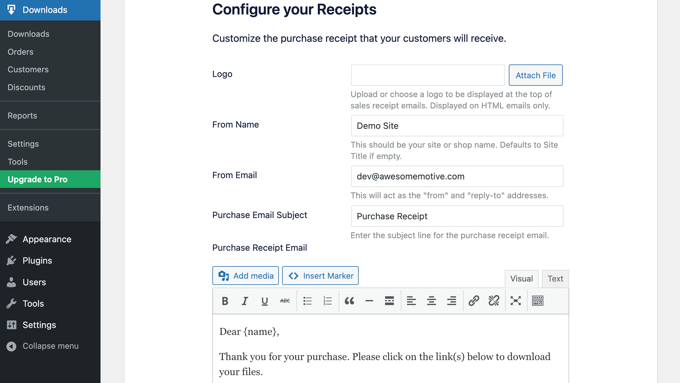
You can even add a ‘From Title.’ This title might be proven within the buyer’s inbox. You’ll want to use one thing that instantly lets clients know who you’re, resembling your web site’s title.
Additionally, you will want so as to add a ‘From E mail.’ This e mail will act because the ‘from’ and ‘reply-to’ deal with. Since clients could reply to your messages, you’ll want to use a skilled e mail deal with that you just examine ceaselessly.
As soon as you’re comfortable together with your e mail branding, you may prefer to edit the content material of the e-mail receipt. Understand that the default message will work effectively for many marketplaces.
As soon as you’re comfortable together with your adjustments, be sure that to click on the ‘Save & Proceed’ button.
Choosing Conversion and Optimization Instruments
The setup wizard will now supply to put in some free instruments to assist enhance conversions and optimize your digital retailer.
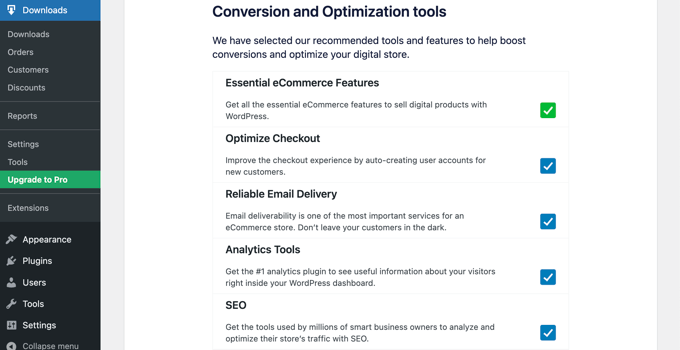
These instruments embody:
Auto Register is an Simple Digital Downloads extension that optimizes the checkout expertise by robotically creating person accounts for brand spanking new clients.WP Mail SMTP is a plugin that ensures that your emails are delivered reliably to your clients and received’t get misplaced or find yourself within the spam folder.MonsterInsights is the finest analytics resolution for WordPress that helps you see the place your guests are coming from and what they do in your web site.All in One search engine optimisation is the finest search engine optimisation plugin for WordPress and may also help you optimize your website for serps to get extra visitors and gross sales.
We advocate retaining all the bins checked. Nevertheless, you’ll be able to uncheck the bins of any instruments you don’t need to set up.
Additionally, you will discover a toggle button the place you’ll be able to assist enhance Simple Digital Downloads by sharing nameless utilization knowledge with the builders. You’ll be able to be taught extra in our information on giving permission for WordPress plugins to gather knowledge.
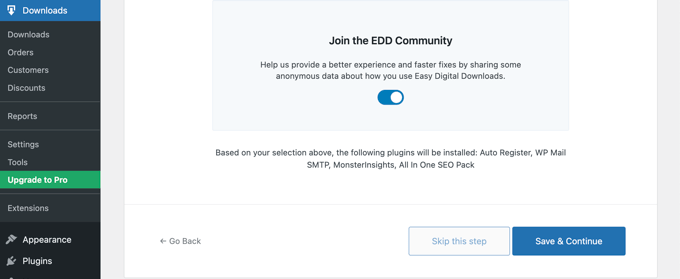
After getting made your choices, simply click on the ‘Save & Proceed’ button on the backside of the web page.
Including Your First Product
You at the moment are on the final web page of the Simple Digital Downloads setup wizard. Right here you’ll be able to add your first product to your web site.
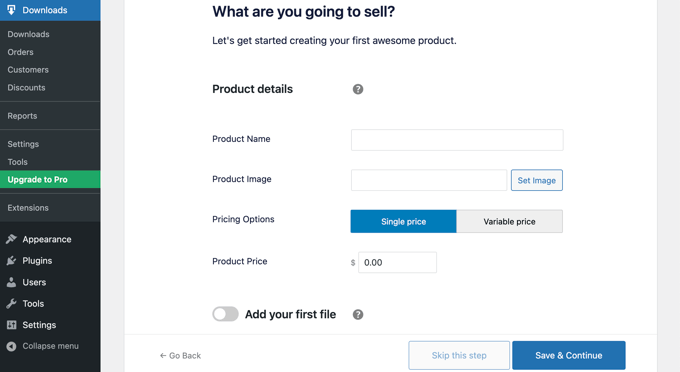
In case you are prepared so as to add a brand new product now, then you’ll be able to enter its particulars into the shape after which click on the ‘Save & Proceed button.
In any other case, be happy to click on the ‘Skip this step’ button to complete the Simple Digital Downloads setup wizard.
Congratulations, you’ve gotten now accomplished the preliminary setup of your on-line retailer. The subsequent step might be to show it right into a multi-vendor market.
Step 3: Turning Your On-line Retailer Right into a Multi-Vendor Market
Now that you’ve got created a web based retailer utilizing Simple Digital Downloads, you have to so as to add additional options to show it right into a multi-vendor market.
This consists of permitting others so as to add digital merchandise to your website, plus the power to separate the funds between your retailer and the seller. If software program might be bought in your website, then additionally, you will must handle license keys.
Buying a Skilled Cross
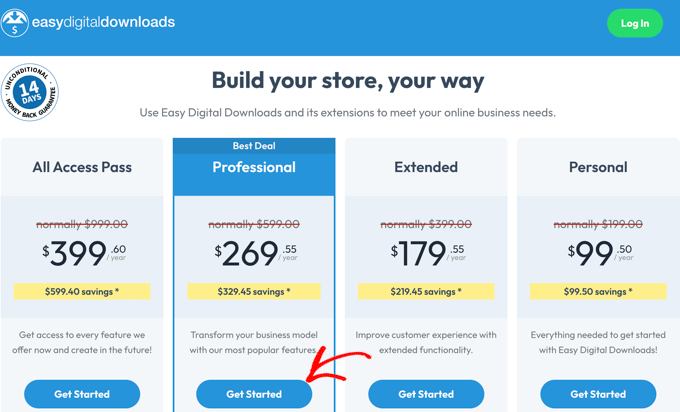
To do all of these items, you have to to buy a Skilled Cross or increased and set up the extensions you want. You should purchase the cross from the Simple Digital Downloads web site.
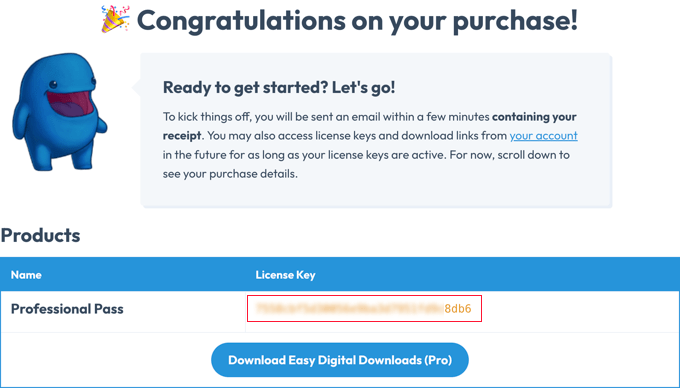
As soon as your buy has been accomplished, you can be taken to a affirmation web page that shows your license key.
You need to copy this key so you’ll be able to paste it into the Simple Digital Downloads plugin in your WordPress web site.
Now, merely return to your web site and navigate to the Downloads » Settings web page within the WordPress admin space.
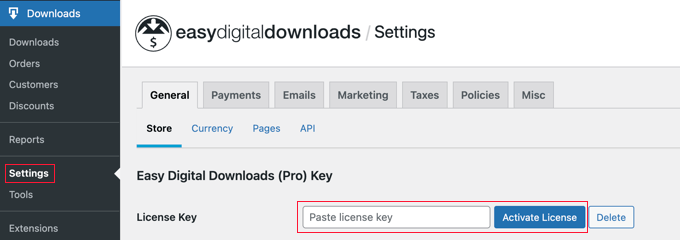
You need to paste the important thing into the ‘Paste license key’ subject. After that, you have to to click on the ‘Confirm License Key’ button.
On the following web page, merely click on the ‘Join and Set up Simple Digital Downloads (Professional)’ button to proceed.
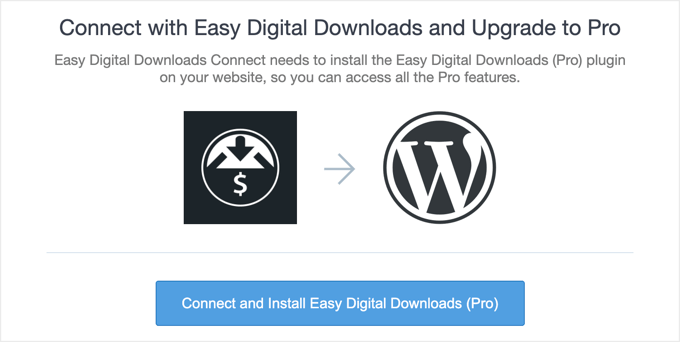
The plugin’s Professional options might be unlocked, and a’ Success’ message might be displayed.
When you click on the ‘OK’ button, you can be redirected again to the Simple Digital Downloads Settings web page.

Now you’re able to configure the Professional extensions to permit a number of distributors to promote digital merchandise in your web site.
Configuring the Frontend Submissions Extension
The primary Simple Digital Downloads extension it’s essential set up is Frontend Submissions. It will permit a number of distributors so as to add their digital merchandise to your website. It additionally allows you to approve their merchandise earlier than they turn out to be obtainable on the market.
Simply navigate to Downloads » Extensions and seek for Frontend Submissions.
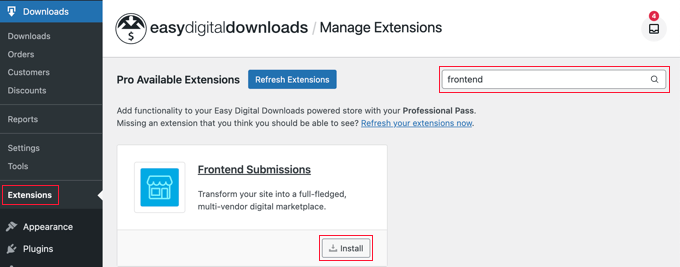
As soon as you discover it, merely click on the ‘Set up’ button. As soon as the extension is put in, it is going to be robotically activated.
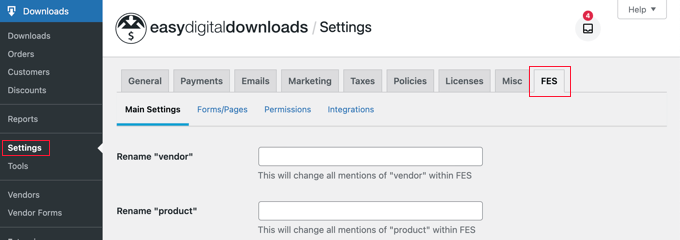
Now it’s essential navigate again to the Downloads » Settings web page after which click on on the ‘FES’ tab that has been added. Right here, you’ll be able to configure the Frontend Submissions extension.
The phrases’ vendor’ and ‘product’ will work for many digital product marketplaces. Nevertheless, should you want to use totally different phrases, then you’ll be able to kind them into the primary two fields on this web page.
Subsequent, you’ll be able to scroll right down to the Vendor Announcement subject. This would be the message your distributors see once they log in to your website and land on the Vendor Dashboard web page.
Merely kind the message you want them to see into the textual content field.
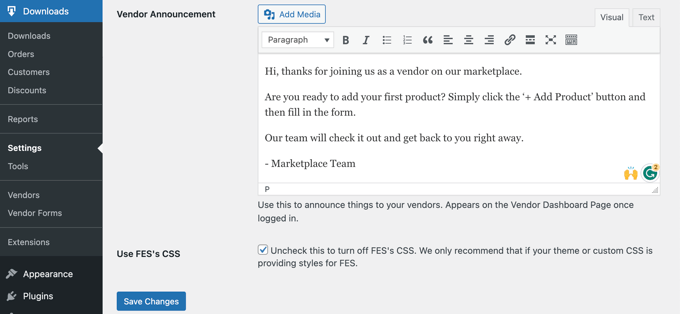
Ensure you click on the ‘Save Modifications’ button on the backside if you end up completed.
Configuring the Commissions Extension
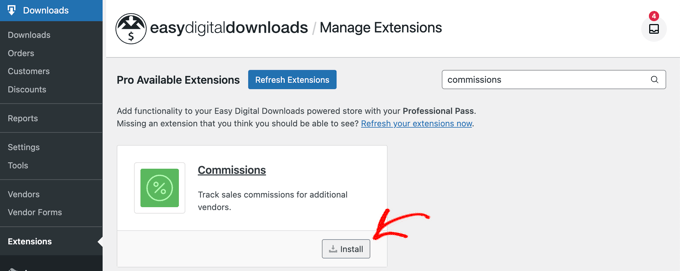
Subsequent, it’s essential set up a second Simple Digital Downloads extension. The Commissions extension will help you configure what share of every sale goes to the seller and what number goes to your retailer.
It’s good to navigate to Downloads » Extensions and set up the Commissions extension. As soon as the extension is put in, it is going to be robotically activated.
Now, it’s essential head again to the Downloads » Settings web page and click on on the Extensions tab. Within the ‘Commissions Settings’ part, one can find choices for the default share your distributors might be paid and extra.
The primary choice is the ‘Default charge’ that your distributors will make from a sale. The default is 60%, however you’ll be able to change this to any quantity you want.
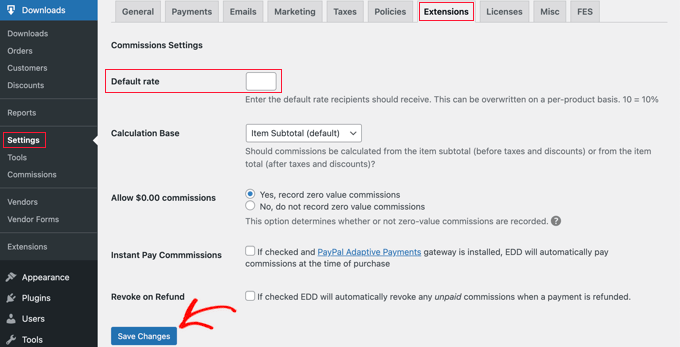
The default settings for the opposite choices will work for many digital marketplaces, so that you solely want to alter them you probably have a selected want.
After getting completed establishing the extension, don’t neglect to click on the ‘Save Modifications’ button on the backside of the display.
Tip: Be certain so as to add all the knowledge potential distributors must know to your web site. Don’t neglect to incorporate the fee charge the distributors might be incomes.
Elective: Configuring the Software program Licensing Extension
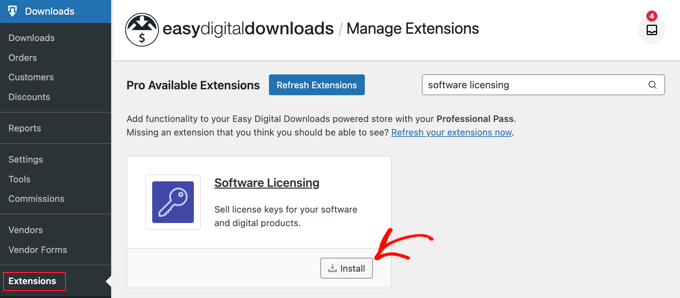
In case you are planning to permit customers to promote license keys for software program and different digital merchandise in your market, then additionally, you will want the Software program Licensing extension.
This may be put in from the Downloads » Extensions web page.
You’ll be able to arrange this extension by going to Downloads » Settings » Extensions.
Then, open the the Software program Licensing tab.
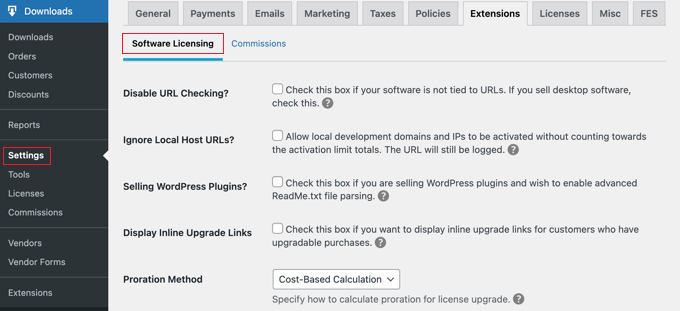
The choices you select will rely on the wants of your market and the forms of downloads being bought.
You’ll be able to be taught extra on the Software program Licensing web page of the Simple Digital Downloads web site.
Step 4: Customizing Your Digital Product Market Emails
Simple Digital Downloads consists of default emails for when your customers signal as much as turn out to be a vendor, make a sale, and extra.
Whereas the default messages will work effectively for many marketplaces, you may prefer to customise them to match your fashion and branding.
To do that, you have to to navigate to the Obtain » Settings web page and click on on the ‘Emails’ tab. You’ll discover hyperlinks alongside the highest for various kinds of emails, together with emails for ‘Fee Notifications’ and ‘Frontend Submissions’.
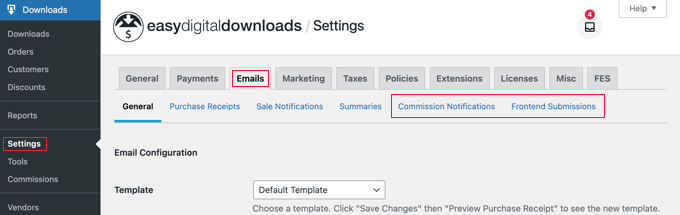
If you click on on the ‘Frontend Submissions’ hyperlink, you will notice an inventory of emails.
These embody ‘Vendor Utility’, ‘New Product’, ‘Edited Product’, ‘Utility Acquired’, and extra.
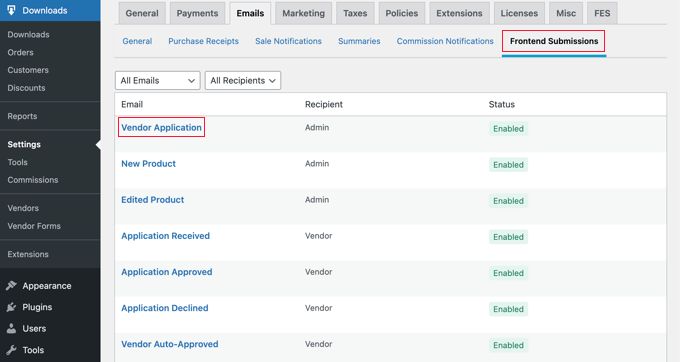
You’ll be able to customise every e mail by clicking on its title.
For instance, should you click on on ‘Vendor Utility’, then you’ll be able to customise the notification e mail you’ll obtain every time somebody applies to turn out to be a vendor.
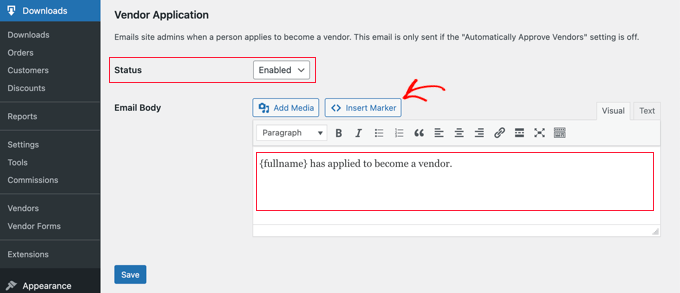
In the event you would relatively examine for brand spanking new vendor functions manually, then you’ll be able to choose ‘Disabled’ from the Standing dropdown.
Observe: By default, all vendor functions are robotically authorised, and the Vendor Utility e mail won’t be despatched. You’ll be able to change this setting by navigating to Downloads » Settings » FES » Permissions and unchecking the ‘Mechanically Approve Distributors?’ field.
Alternatively, you may like the e-mail to let you know extra details about the one that is making use of to turn out to be a vendor. You are able to do this by modifying the ‘E mail Physique’ subject.
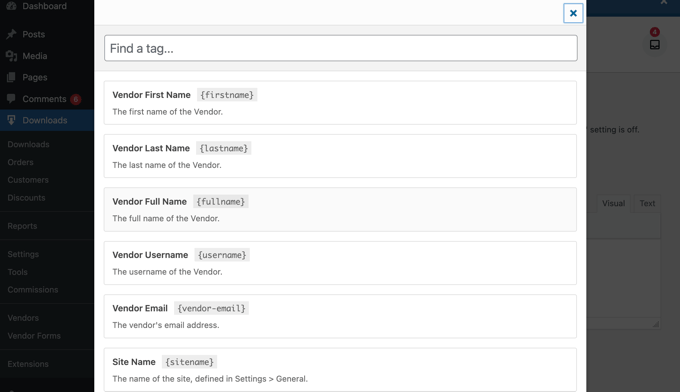
So as to add private details about the applicant, you should insert markers for his or her title, e mail deal with, website title, and extra. Merely click on the ‘Insert Marker’ button, and select the tags from the popup.
After getting completed customizing the e-mail, don’t neglect to click on the ‘Save’ button to retailer your settings.
You can even customise the e-mail your distributors will obtain once they have made a sale by clicking on the ‘Fee Notifications’ hyperlink on the prime of the web page.
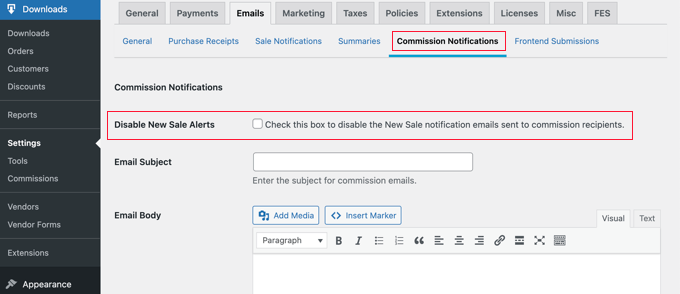
The e-mail physique is clean by default, that means the seller will obtain the default notification e mail.
The default fee notification e mail appears to be like like this.
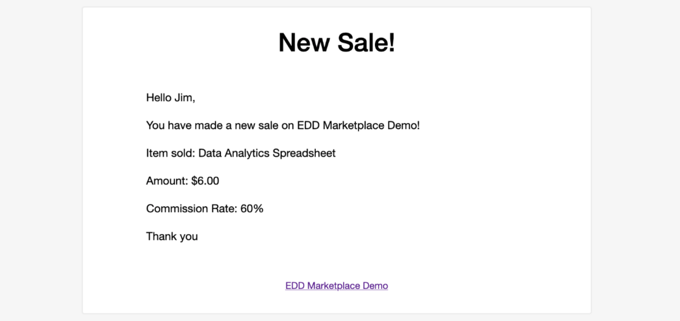
In the event you want to change the wording of the e-mail, then merely kind your content material into the ‘E mail Physique’ subject.
You’ll be able to customise the e-mail utilizing the template tags listed on the backside.

Ensure you click on the ‘Save Modifications’ button on the backside of the display to retailer any adjustments you’ve gotten made.
Step 5: Choosing and Customizing Your WordPress Theme
A WordPress theme controls the looks of your on-line market website, together with its structure, typography, shade, and different design components.
You may like to make use of the Vendd theme to your digital items market as a result of it’s designed for digital downloads. This free theme works along with Simple Digital Downloads to offer you quite a lot of choices and options to your on-line market.
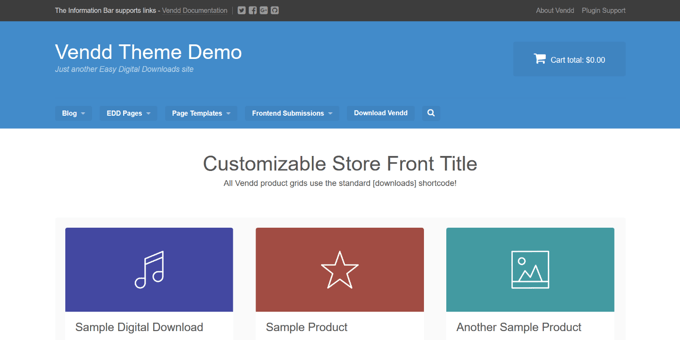
In the event you bought SiteGround EDD internet hosting as we really helpful earlier, then Vendd was put in and activated robotically once you put in WordPress.
In any other case, you have to to put in and customise the theme your self. For extra data, see our newbie’s information on learn how to set up a WordPress theme.
Nevertheless, there are millions of different WordPress themes obtainable. For instance, each the Astra theme and the Teaching Professional theme are absolutely suitable with EDD.
Another choice is to create your individual customized theme from scratch.
To create a customized theme, you have to SeedProd.
It’s the finest web site builder plugin available in the market and is utilized by over 1 million web sites. You should use SeedProd to create lovely layouts which can be professionally designed and optimized for conversions and gross sales.
SeedProd additionally comes with a lot of ready-made templates. These embody designs which can be good for selling your digital downloads.

For extra particulars, take a look at our information on learn how to create a customized WordPress theme (no coding wanted).
Step 6: Including the Vendor Dashboard Web page to the Navigation Menu
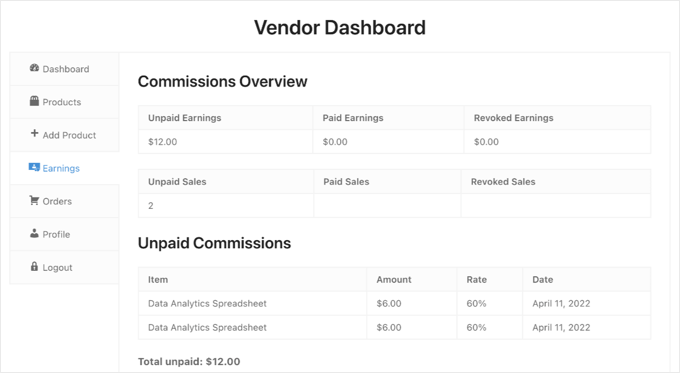
If you put in the Frontend Submissions extension, a brand new web page was created in your web site referred to as the Vendor Dashboard. This is a crucial web page that you really want distributors and potential distributors to search out simply.
When the person has not signed in to your web site, this web page will show a registration web page the place they’ll apply to turn out to be a vendor in your web site. It’ll additionally present a login kind the place your distributors can sign up.
As soon as a vendor has signed in, this web page would be the dashboard the place they’ll add new merchandise, view their earnings and orders, and extra.
You’ll be able to make it possible for the Vendor Dashboard is simple to search out by including the web page to your navigation menu.
Head over to Look » Menus and ensure the suitable menu is chosen on the prime of the display. After that, you need to search for the ‘Vendor Dashboard’ web page below Pages.

Now all it’s essential do is click on the ‘Add to Menu’ button, and the Vendor Dashboard might be added to the menu. You’ll be able to drag the menu merchandise up and down to put it the place you need within the record.
In the event you can’t discover Look » Menus within the admin sidebar, then you’re in all probability utilizing a block theme.
To discover ways to add the Vendor Dashboard web page to a block theme’s menu, see the ‘Including Navigation Menus in Full Website Editor’ part of our newbie’s information on learn how to add a navigation menu in WordPress.
We hope this tutorial helped you discover ways to create a digital product market in WordPress. You might also need to see our information on learn how to observe web site guests in your WordPress website and our skilled picks for the very best WordPress popup plugins.
In the event you favored this text, then please subscribe to our YouTube Channel for WordPress video tutorials. You can even discover us on Twitter and Fb.
The put up The best way to Create a Digital Product Market in WordPress first appeared on WPBeginner.

