

Do you need to add an alert bar to your WordPress web site?
An alert bar or notification bar is a good way to let guests find out about necessary updates, particular affords, new product launches, and extra.
On this article, we’ll present you find out how to create an alert bar in WordPress with 3 simple options.
Why Create an Alert Bar in WordPress?
An alert bar is a good way to let your guests find out about one thing necessary in your web site. That may very well be an ongoing gross sales occasion, an replace to your opening occasions, or adjustments to your companies.
It’s also possible to use an alert bar to inform guests a few particular deal, equivalent to a purchase one get one free provide. This can be a nice choice should you run an internet retailer.
Utilizing an alert bar is best than simply placing an announcement in your homepage. Your alert bar can seem prominently proper on the prime of each web page throughout your complete web site.
It’s simple to create an alert bar in WordPress. We’ll have a look at strategies utilizing the most effective notification bar plugins and a handbook technique utilizing HTML and CSS code. Merely click on the hyperlinks under to leap straight to every choice:
Methodology 1: Creating an Alert Bar Utilizing OptinMonster
OptinMonster is the most effective conversion optimization and lead era software program available on the market. It helps you exchange extra web site guests into subscribers and prospects.
OptinMonster affords a drag-and-drop marketing campaign builder. It comes with stunning lightbox popups, welcome mats, countdown timers, and different dynamic overlays that assist you enhance subscribers and gross sales in your web site.
It’s also possible to use OptinMonster to make an alert bar in your web site. Their pre-built templates make it very easy to create an alert bar that appears nice inside minutes.
First, you have to go to the OptinMonster web site and join an account. You’ll need a minimum of the Fundamental plan as a result of it contains the Floating Bar marketing campaign kind.

Subsequent, you have to set up and activate the OptinMonster WordPress plugin. For extra particulars, see our step-by-step information on find out how to set up a WordPress plugin.
This plugin helps you to join your WordPress web site to the OptinMonster software program.
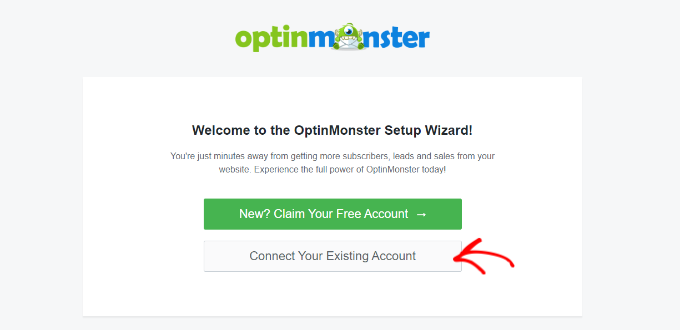
Upon activation, you will note the welcome display and the setup wizard. Go forward and click on the ‘Join Your Current Account’ button.
Subsequent, a brand new window will open the place you have to to attach your WordPress web site to OptinMonster.
Merely click on the ‘Hook up with WordPress’ button to maneuver forward.

Now you can comply with the on-screen prompts to attach your OptinMonster account.
Then, merely go to OptinMonster » Campaigns in your WordPress dashboard. Go forward and click on the ‘Create Your First Marketing campaign’ button.

It will open the OptinMonster marketing campaign builder.
From right here, you have to choose the ‘Floating Bar’ as your Marketing campaign Sort to create an alert bar.

Subsequent, you will note a alternative of marketing campaign templates. Choose a template that you simply need to use.
You simply have to deliver your mouse over it and click on the ‘Use Template’ button to pick it. We’re going to use the Coupon Code Promo template for our alert bar.
Subsequent, you may be requested to offer your template a reputation. After you have named your marketing campaign, simply click on the ‘Begin Constructing’ button.

Now, you will note the marketing campaign editor. That is the place you may design your alert bar.
OptinMonster affords completely different blocks that you could merely drag and drop onto the template. For example, you may add a picture, textual content, button, and extra to your alert bar.
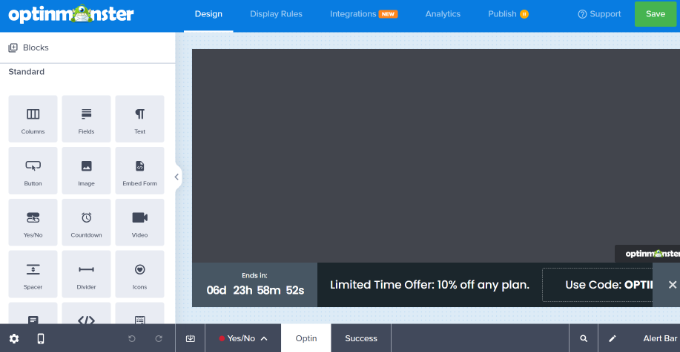
You will note that your alert bar seems on the backside of your display by default.
To maneuver it to the highest of the display, you have to click on ‘Floating Bar Settings’ on the left-hand aspect. Subsequent, simply click on the slider to maneuver the floating bar to the highest of the web page.

To vary the textual content on the floating bar, merely click on on the realm you need to change and kind in any textual content you need.
It’s also possible to change the font, the dimensions and shade of the textual content, and extra.

To vary the countdown settings, merely choose the timer.
Then go forward and enter your required finish date and time. OptinMonster additionally helps you to select the countdown kind. You possibly can choose the ‘Static’ kind should you’d like to indicate a typical timer together with your specified finish date and time.
Then again, there’s a ‘Dynamic’ countdown kind. The timer will work based mostly on every person’s habits in your web site. The countdown is ready individually for every customer to your web site.

As soon as you might be proud of the design of your alert bar, don’t neglect to click on the ‘Save’ button on the prime of your display.
Subsequent, you have to go to the ‘Show Guidelines’ tab to pick when and the place your alert bar will show in your web site. The default rule is in your alert bar to show after the customer has been on the web page for five seconds.
We’re going to change this to 0 seconds in order that the alert bar seems immediately. To do this, simply change the ‘sec’ worth to 0.

Apart from that, you too can choose the place the alert bar will seem. You should use the default setting, which is the ‘present URL path is any web page’. This fashion, your alert bar will seem on all of the pages of your WordPress web site.
Then, click on the ‘Subsequent Step’ button to alter the Motion settings. You possibly can go away the ‘present the marketing campaign view’ settings as Optin and choose whether or not you’d prefer to play a sound impact when the alert bar seems.

After you will have made your adjustments, go forward and click on the ‘Subsequent Step’ button as soon as extra.
Right here, you will note a abstract of your show guidelines. You can also make remaining edits and adjustments to your alert bar marketing campaign.

As soon as you might be completely satisfied, merely click on the ‘Save’ button on the prime of the display.
After that, you may go to the Publish tab on the prime and alter the Publish Standing to ‘Publish’. As soon as that’s finished, you have to to click on the ‘Save’ button and shut the marketing campaign builder.

Subsequent, you will note the Marketing campaign Output Settings.
The ultimate step is to activate the marketing campaign in your web site itself. Merely change the Standing from ‘Pending’ to ‘Printed’.
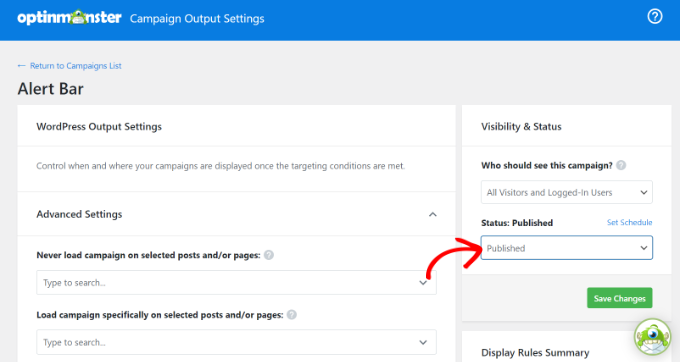
Don’t neglect to click on the ‘Save Adjustments’ button when you find yourself finished.
Now, merely go to any web page in your web site, and you will note your marketing campaign in motion.

Methodology 2: Creating an Alert Bar Utilizing Thrive Leads
One other means you may add alert bars to your WordPress web site is through the use of Thrive Leads. It’s a part of the Thrive Themes suite and helps you generate leads by way of alert bars, lightboxes, slide-in popups, and extra.
First, you have to to go to the Thrive Themes web site and join an account. Merely click on the ‘Begin Now’ button to get began.

Subsequent, you have to to put in and activate the Thrive Product Supervisor plugin in your web site. For extra particulars, please see our information on find out how to set up a WordPress plugin.
You could find the Thrive Product Supervisor plugin in your account space.

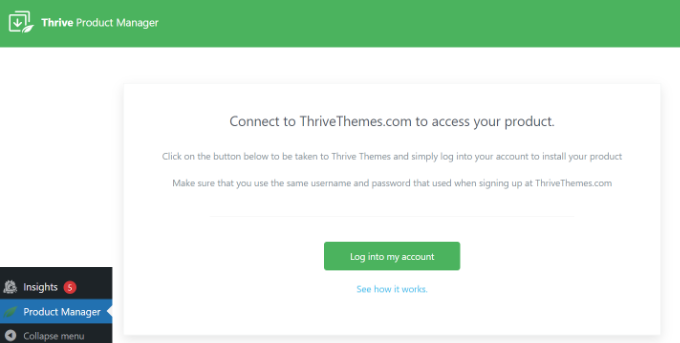
After you have put in the plugin, merely go to the Product Supervisor web page out of your WordPress admin space.
From right here, go forward and click on the ‘Log into my account’ button.
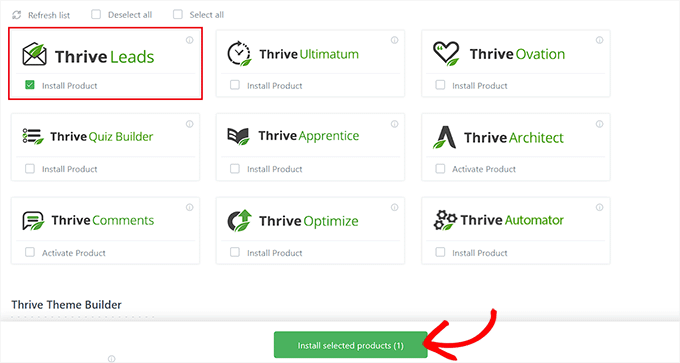
After logging in to your account, you will note completely different plugins and instruments supplied by Thrive Themes.
Merely choose the Thrive Leads plugin after which click on the ‘Set up chosen merchandise’ button on the backside.
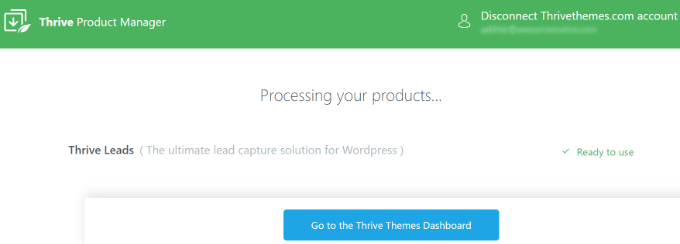
When Thrive Leads is able to use, you will note successful message.
You possibly can then click on the ‘Go to the Thrive Themes Dashboard’ button.
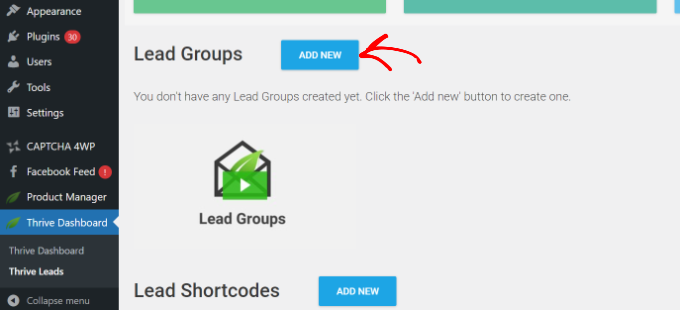
Subsequent, you have to to go to Thrive Dashboard » Thrive Leads from the WordPress admin panel.
Subsequent to the Lead Teams heading, merely click on the ‘Add New’ button.
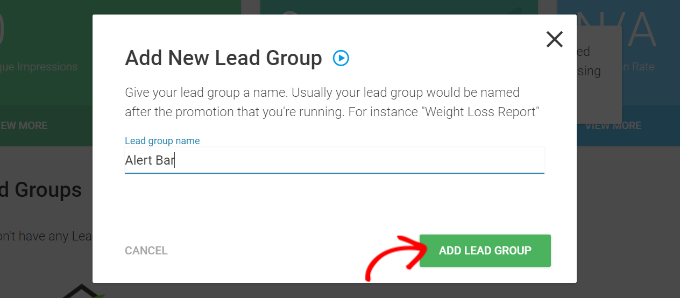
After that, a popup window will now open.
You possibly can enter a reputation in your new lead group and click on the ‘Add Lead Group’ button.
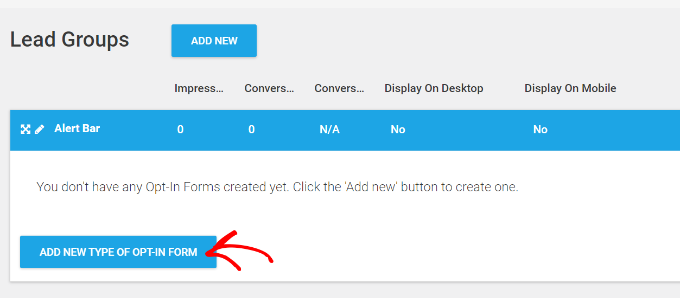
Subsequent, you have to to create a brand new opt-in kind.
Go forward and click on the ‘Add New Sort of Decide-in Kind’ button.
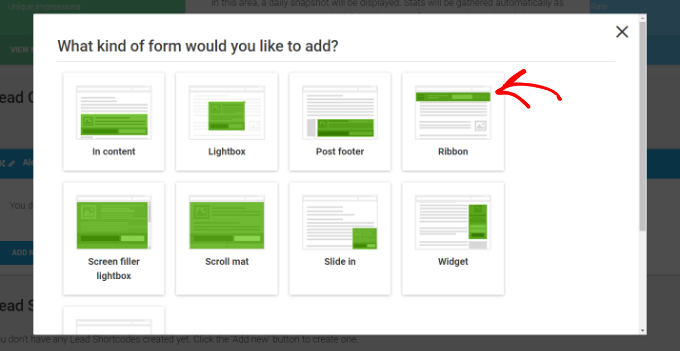
After that, Thrive Leads will ask you to pick a kind kind.
You possibly can choose the ‘Ribbon’ kind so as to add an alert bar to your web site.
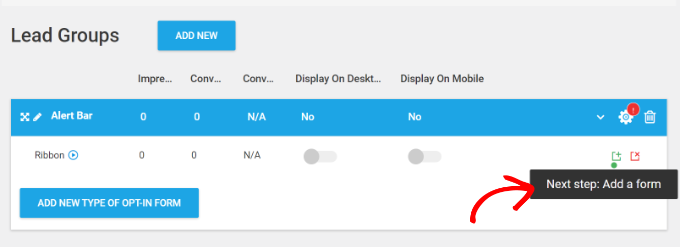
After including the Ribbon opt-in kind kind, you’ll now want so as to add a kind.
Merely click on the ‘Add a kind’ choice underneath Lead Teams.
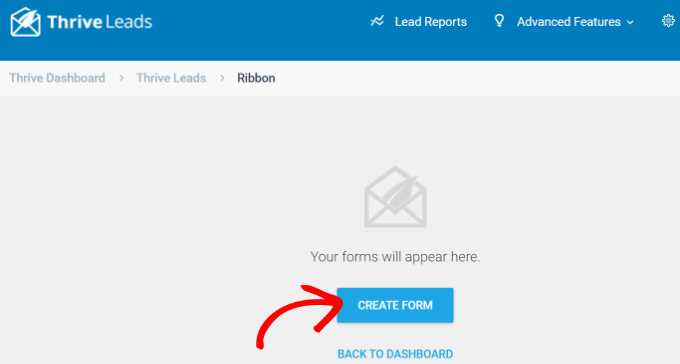
On the following display, you may select from any of your present varieties.
Since that is your first time making a kind, go forward and click on the ‘Create Kind’ button.
Now, you will note a popup window seem in your display.
You possibly can enter a reputation in your kind and click on the ‘Create Kind’ button.

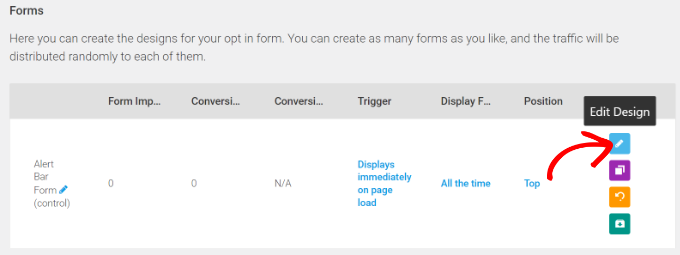
Your kind might be added to the Ribbon lead group.
To edit the design of the shape, simply click on the pencil icon.
Subsequent, Thrive Leads will present a number of templates to select from.
Merely choose a template and click on the ‘Select Template’ button on the backside.

It will launch the visible builder with a stay preview, the place you may customise your alert bar.
For example, you may choose the textual content within the template and alter it in accordance with your wants. Or click on on the picture within the alert bar and alter it.
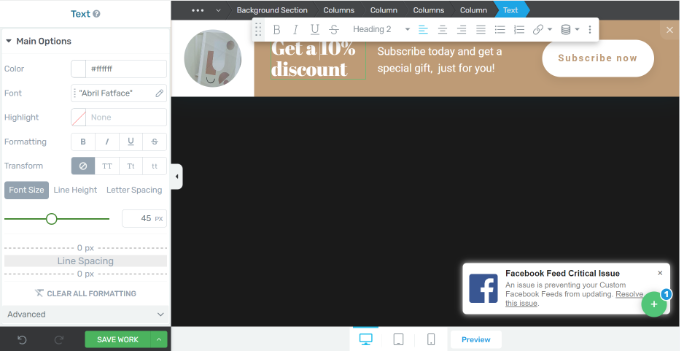
As soon as you might be finished enhancing, click on the ‘Save Work’ button on the backside.
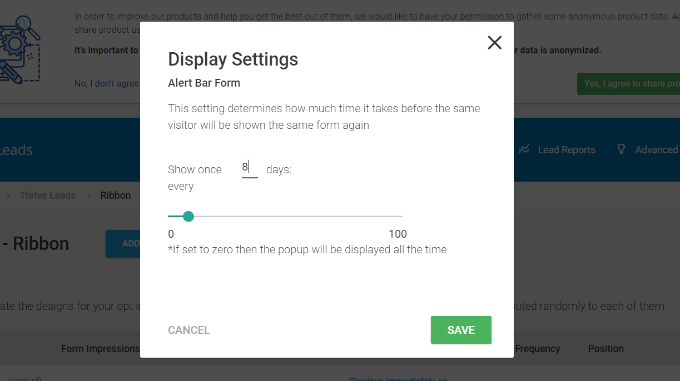
Now you can shut the visible editor and head again to the shape settings. Right here, you will note choices for settings the alert bar set off, show frequency, and place.
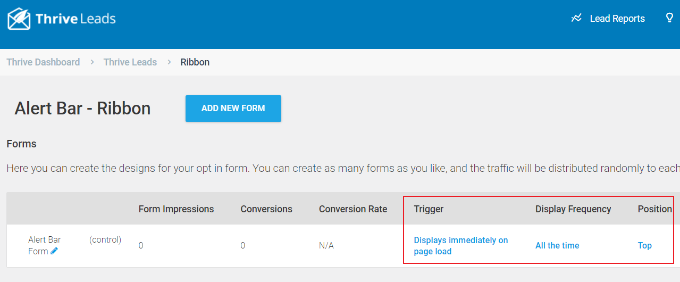
By default, the alert bar will seem on the prime when a web page masses. Nonetheless, you may change these settings.
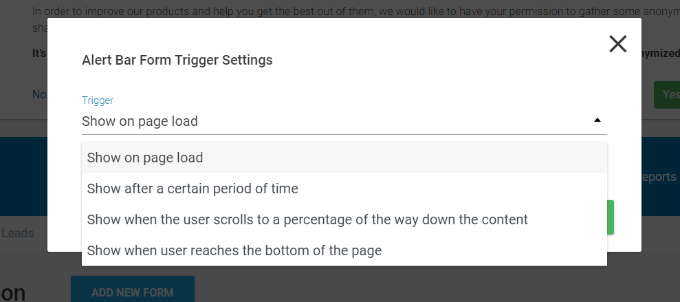
For example, should you click on the Set off choice, you’ll see extra choices, like exhibiting the alert bar after a sure time, when a person scrolls down a specific amount, or when a person reaches the underside of the web page.
Apart from that, you too can change the show frequency. The alert bar will seem on a regular basis by default to all of the customers.
Nonetheless, you may edit this and show your alert bar to the identical customer after a sure variety of days.
Subsequent, you may head again to the Thrive Leads web page out of your WordPress dashboard.
After that, merely click on the cog icon to open the Show Settings.
From right here, you may select which posts and pages the alert bar will seem on.
For example, you may present it solely on the entrance web page or select all posts and pages. There may be additionally an choice to exclude some pages and posts from exhibiting your alert message.
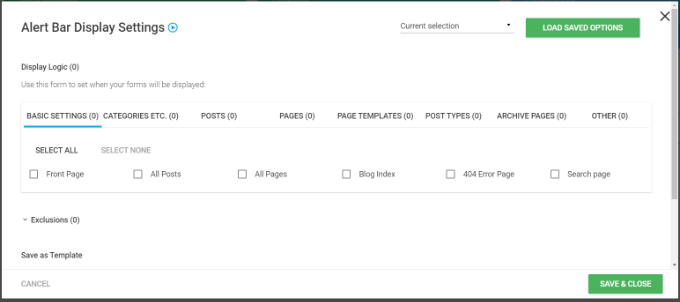
When you’re finished, merely click on the ‘Save & Shut’ button.
The final step is to click on the toggles to show your alert bar on desktop and cellular units.
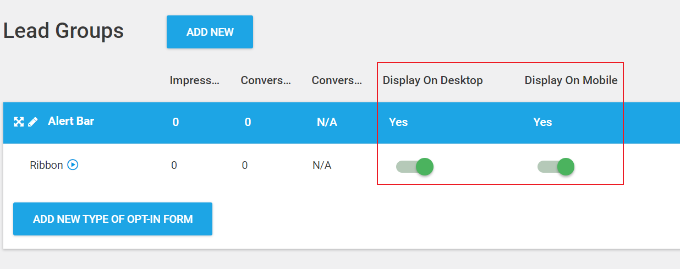
As soon as that’s finished, your alert bar is now prepared to gather person e-mail addresses and construct your e-mail listing.
You possibly can go to your web site to see it in motion.

Methodology 3: Manually Create an Alert Bar Utilizing Customized HTML/CSS
What should you don’t need to use OptinMonster or Thrive Leads? On this technique, we’ll present you find out how to create a notification bar utilizing HTML and CSS code.
Be aware: We don’t suggest this technique for inexperienced persons. In case you are new to WordPress or don’t really feel assured including code to your web site, then we propose utilizing both of the strategies above as an alternative.
First, you have to to repeat the next customized CSS code for the alert bar:
.alertbar {
background-color: #ff0000;
shade: #FFFFFF;
show: block;
line-height: 45px;
top: 50px;
place: relative;
text-align: heart;
text-decoration: none;
prime: 0px;
width: 100%;
z-index: 100;
}
</pre>
A straightforward means so as to add CSS code to your web site is through the use of WPCode. It’s the finest code snippet plugin for WordPress that helps you add customized code to your web site.
Be aware: WPCode is one in every of WPBeginner’s personal plugins. We created it to make it very easy so as to add scripts, HTML code, and extra to your web site pages. It comes with options like a built-in code snippets library, conditional logic, conversion pixels, and extra.
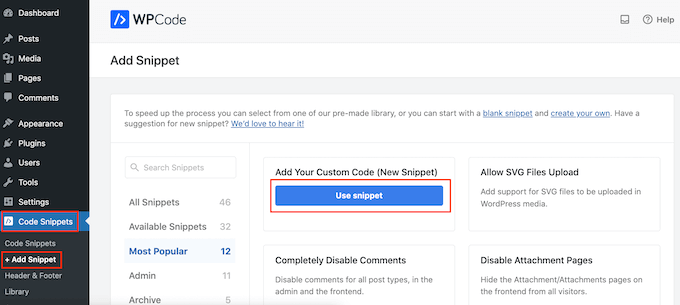
First, you have to to put in and activate the free WPCode plugin. For extra particulars, please see our information on find out how to set up a WordPress plugin.
Upon activation, you have to head to Code Snippets » + Add Snippet from the WordPress dashboard and choose the ‘Add Your Customized Code (New Snippet)’ choice.
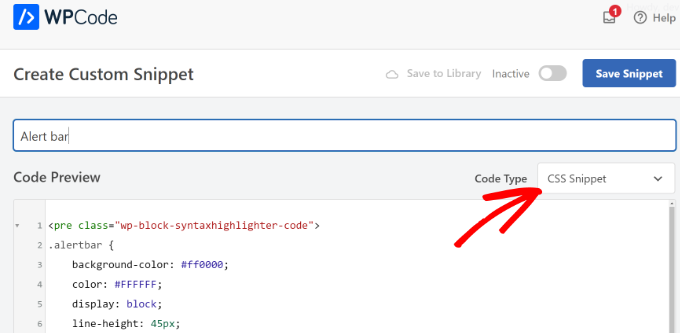
After that, enter a title in your snippet on the prime and paste the CSS code into the Code Preview space.
Additionally, you will want to alter the Code Sort to the ‘CSS Snippet’ choice.
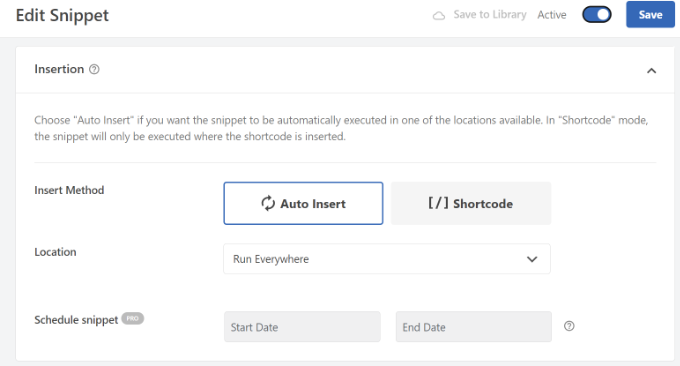
Subsequent, you may scroll right down to the Insertion part. That is the place you may select the place the code will run.
Since we would like the alert bar to look throughout all the web site, you need to use the default ‘Auto Insert’ technique. It’s also possible to hold the ‘Run In every single place’ setting.
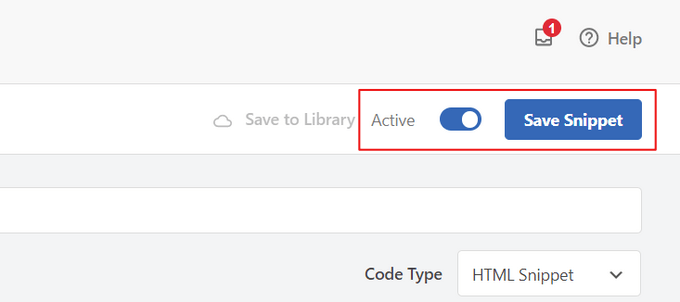
As soon as that’s finished, you may click on the ‘Save Snippet’ button on the prime.
Additionally, you will have to click on the toggle on to activate the code.
After that, go to Code Snippets » Headers & Footer in your WordPress admin dashboard.
Simply copy and paste the next line of HTML code into the ‘Header’ field:
Right here’s how that code ought to look within the ‘Header’ field in WPCode:

You possibly can change the alert textual content to the rest you want. Don’t neglect to click on the ‘Save Adjustments’ button on the prime of the web page as soon as you might be finished.
Now, you may go to your WordPress weblog to see the alert bar. It ought to seem on the prime of each web page like this:

Tip: In a number of WordPress themes, your alert bar might overlap your menu. You possibly can alter the peak of the bar to 40px or 30px to keep away from this. Additionally, you will want to scale back the road top accordingly in order that your textual content stays centered vertically within the bar.
Bonus: Add Customized Alert Messages to WordPress Pages
If you wish to add customized alert messages to completely different components of your web site, equivalent to product pages, checkout pages, and store pages, then you need to use SeedProd. It’s the finest web site builder and touchdown web page builder for WordPress.
The plugin affords a drag-and-drop builder to create a customized theme and web site pages with out enhancing code. It additionally affords an Alert block that you could place wherever in your web site.
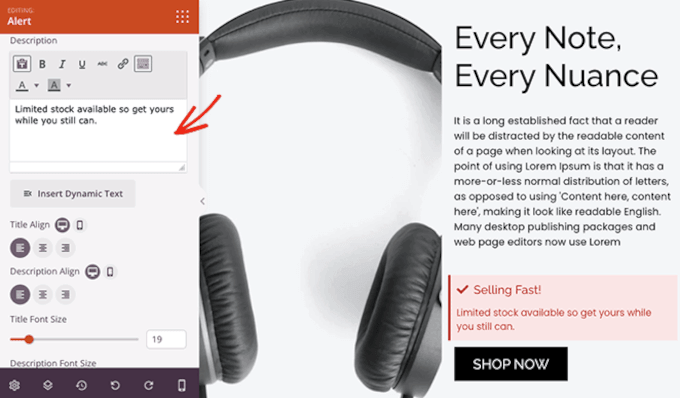
This Alert block can warn prospects that your inventory is working low, explicit objects are on sale, or different time-sensitive warnings.
You possibly can merely add the Alert block to your web page after which add a title and outline. The plugin additionally helps you to add dynamic content material, which lets you insert dates and different question parameters.
There are additionally extra customization choices for the Alert block. For example, you may change its alignment, modify the font measurement, and edit the icon.
To be taught extra about utilizing SeedProd, you may see this information on find out how to create customized pages in WordPress.
We hope this text helped you learn to create an alert bar in WordPress. You might also need to see our information on the most effective WordPress drag and drop web page builders that can assist you additional customise your web site and the most effective WooCommerce plugins to develop your retailer gross sales.
If you happen to appreciated this text, then please subscribe to our YouTube Channel for WordPress video tutorials. It’s also possible to discover us on Twitter and Fb.
The publish The best way to Create an Alert Bar in WordPress (3 Simple Methods) first appeared on WPBeginner.

