

Do you need to carry out a Consumer Expertise (UX) audit of your WordPress web site?
Consumer expertise is a crucial issue within the success of a web site. An excellent consumer expertise can result in extra conversions and gross sales, whereas a poor UX can value you cash.
On this article, we’ll present you easy methods to simply do a UX audit of your WordPress web site step-by-step.
Here’s a fast overview of all of the steps we’ll cowl to carry out a UX audit in your WordPress web site:
What Is UX, and Why Is It Essential?
Consumer expertise or UX describes the emotions and opinions that customers have whereas utilizing your web site.
A nice consumer expertise means customers discover your web site simple to make use of and useful.
In contrast, a poor consumer expertise means customers discover your web site tough to make use of and might’t do what they need to do.
Creating a great consumer expertise means that you can assist customers take advantage of out of your web site. This ultimately results in conversions, gross sales, and enterprise progress.
Then again, a detrimental consumer expertise may cause guests to depart your web site with out signing up or shopping for one thing in your on-line retailer. This causes you to lose potential gross sales and clients.
Carry out a UX Audit of Your Web site
As a enterprise proprietor, you have to commonly examine your web site to make it possible for it gives a great consumer expertise.
This apply known as a UX audit. You possibly can carry out a UX audit by your self utilizing a mix of instruments (it’s possible you’ll already be utilizing a few of them).
Throughout this course of, you’ll search for points that will negatively have an effect on consumer expertise in your web site. Once you discover an issue, you possibly can doc it after which begin fixing it.
Prepared? Let’s get began.
Step 1: Outline Consumer Objectives and Aims
First, you have to put your self into customers’ sneakers to grasp what they’re in search of once they attain your web site.
For example, in case your web site is a web-based retailer promoting pet toys, your viewers’s aim is probably going to have a look at pet toys, learn buyer evaluations for these merchandise, and make a purchase order.
Equally, should you run a how-to weblog, then your viewers’s aim can be to learn a tutorial and discover ways to do one thing.
Understanding what your customers need to obtain will help you assist them higher.
The best means to do that is by creating consumer personas on your target market.
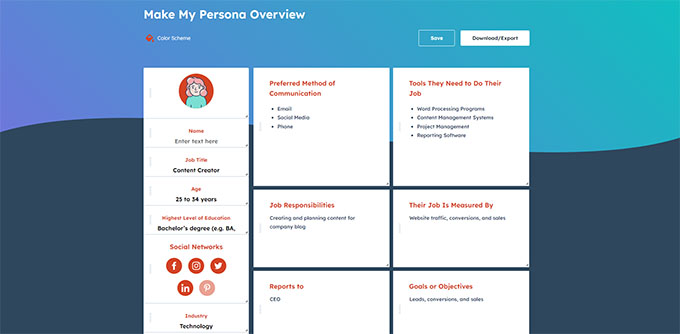
This train means that you can higher perceive customers and their expectations of your web site. Most significantly, it helps you determine the targets and aims of your target market.
You possibly can then analyze your web site utilizing these personas to see how shortly your content material, merchandise, and providers may help these customers.
Step 2: Check Your Web site for Usability Points
Testing your web site for usability helps you shortly discover issues that would destroy the consumer expertise.
Nevertheless, many points usually go unnoticed by web site directors till a consumer experiences them. Customers usually tend to swap to your competitor’s web site than let you know about points in your website.
Fortunately, there are many wonderful instruments that you should utilize to shortly detect doubtlessly dangerous usability points in your web site.
PageSpeed Insights (Free)
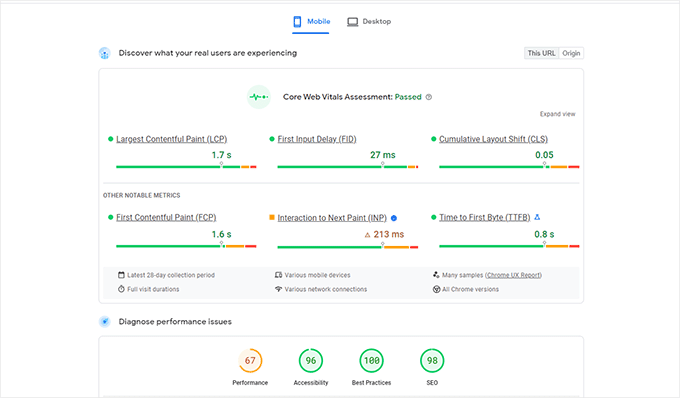
Google’s PageSpeed Insights device enables you to shortly study a URL for efficiency and usefulness points.
It runs checks in your web site after which presents the outcomes for each cell and desktop gadgets by assigning every one a rating.
This rating is given in 4 classes:
Efficiency
Accessibility
Finest Practices
web optimization
It additionally checks for Core Internet Vitals, that are a set of web site efficiency metrics that Google considers important to a web site’s general consumer expertise.
Once you run the take a look at, the language could initially sound too technical. Nevertheless, additionally, you will discover hyperlinks to sources explaining these ideas in beginner-friendly phrases with tips about resolving every problem.
You may as well learn our information on easy methods to optimize your web site for Google’s Core Internet Vitals.
Google Search Console
PageSpeed Insights is a helpful device to shortly search for URLs.
Nevertheless, you’ll have to manually run the checks, and you’ll’t discover which pages in your web site are having points till you particularly take a look at them.
What should you may automate this course of, shortly discover the pages with usability points, and get alerts when a brand new drawback is detected?
That is the place Google Search Console is available in.
It’s a free device offered by Google for web site directors who need to see how their web sites are performing in search.
Consumer expertise is a necessary metric for search rankings. That is why Google desires to alert web site homeowners when a usability problem is detected.
First, you have to to go to Google Search Console and add your web site as a property. For directions, you possibly can observe our tutorial on easy methods to add your web site to Google Search Console.
Upon getting added your web site, it could take some time for Google to gather some knowledge and begin displaying experiences.
After that, you will note your website’s efficiency and usefulness experiences within the ‘Expertise’ part.
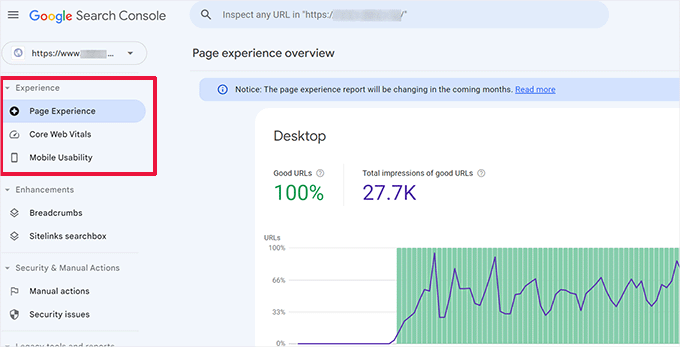
You possibly can click on on every report and drill down to search out the pages the place usability points are detected.
For instance, on this demo web site, we discovered 4 pages within the ‘Cellular Usability’ part that have been having points.
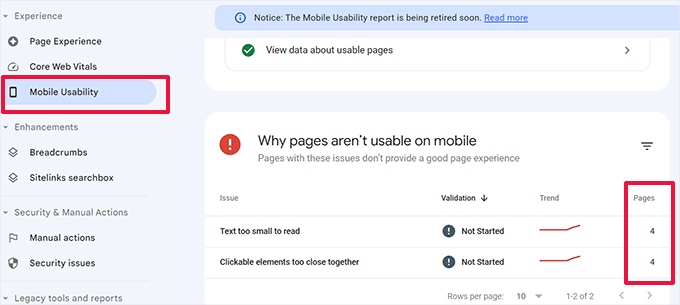
You possibly can click on on every row to search out the precise pages the place the problems have been detected.
Google Search Console will even warn you by e mail when a brand new crawling or usability problem is detected.
In addition to usability and crawling points, Google Search Console is a treasure trove of invaluable knowledge. To study extra, you possibly can see our skilled tips about utilizing Google Search Console to get extra visitors.
Step 3: Discover the Pages Performing Poorly
Automated instruments may help you catch many issues. Nevertheless, they don’t seem to be excellent and will not be capable of establish many widespread UX issues.
If in case you have a small web site, you possibly can go to every web page to manually evaluate it your self. Nevertheless, it’s unattainable for many medium to massive web sites to do that manually.
So, how do you discover pages with poor UX?
One simple method to discover these pages is through the use of MonsterInsights. It’s the greatest Google Analytics plugin in the marketplace that means that you can see the place your customers are coming from and the way they work together along with your web site.

First, you have to set up and activate the MonsterInsights plugin. For extra particulars, see our tutorial on easy methods to set up a WordPress plugin.
Notice: There may be additionally a free model of MonsterInsights that you may attempt. Nevertheless, we advocate upgrading to the paid model and unlocking the total potential of the plugin.
Upon activation, the plugin will run the setup wizard and assist you to join WordPress along with your Google Analytics account.
For extra particulars, you possibly can see our tutorial on easy methods to set up Google Analytics in WordPress.
As soon as you’re linked, MonsterInsights will begin monitoring your web site guests.
Subsequent, you have to arrange the plugin to simply observe conversions.
Allow eCommerce Conversion Monitoring
In case you use an eCommerce platform in your WordPress web site, MonsterInsights may help you simply observe conversions.
Google Analytics comes with enhanced eCommerce monitoring, which works for many eCommerce web sites, together with WooCommerce, Simple Digital Downloads, MemberPress, and extra.
Nevertheless, you have to to allow it on your web site manually.
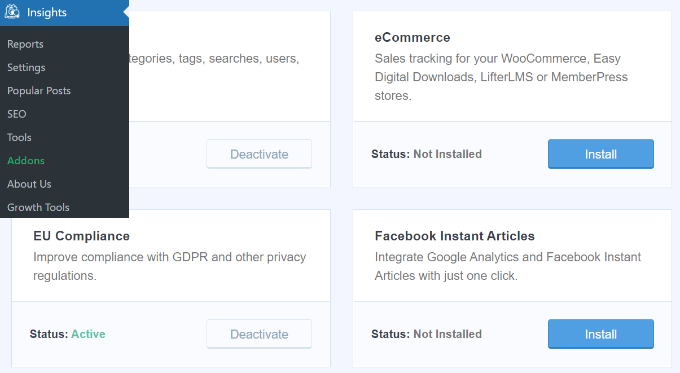
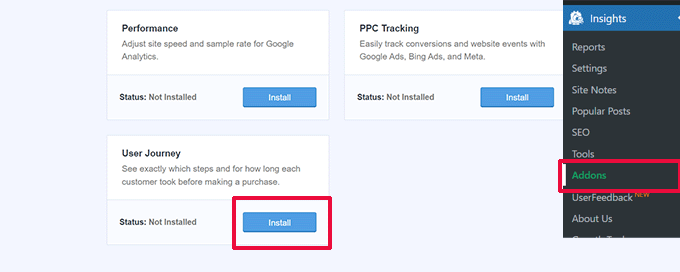
Begin by visiting the Insights » Addons web page in your WordPress admin dashboard to put in and activate the eCommerce addon.
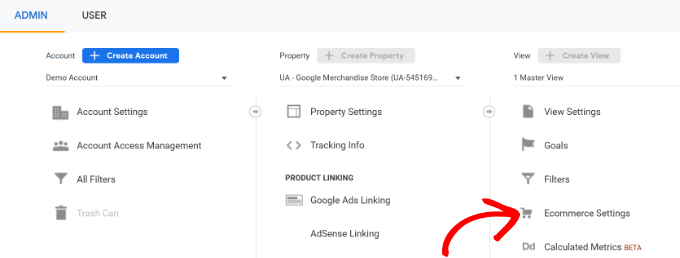
Subsequent, you have to allow enhanced eCommerce monitoring in your Google Analytics account. Go to your Google Analytics dashboard and choose your web site.
From right here, click on on the ‘Admin’ button within the backside left nook.

On the following display, you will note totally different Google Analytics settings.
Below the ‘View’ column, simply click on the ‘Ecommerce Settings’ hyperlink.
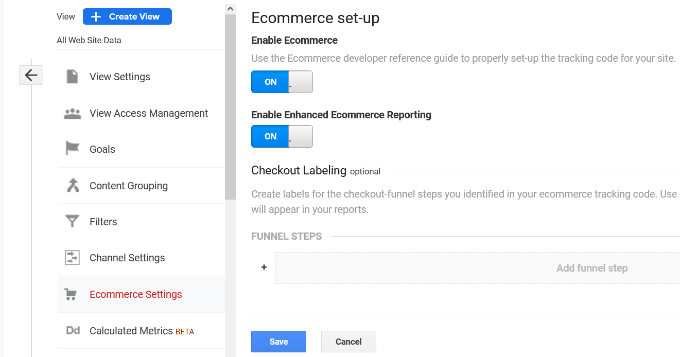
On the following display, merely activate the toggles subsequent to the ‘Allow Ecommerce’ and ‘Allow Enhanced Ecommerce Reporting’ choices.
Don’t overlook to click on the ‘Save’ button if you find yourself executed.
Examine Low Conversion Pages for UX Points
Poor consumer expertise is likely one of the important causes for low conversions, deserted carts, and excessive bounce charges.
You possibly can view your conversion monitoring experiences in MonsterInsights to search out pages with low conversions and better bounce charges.
Merely go to the Insights » Studies web page contained in the WordPress admin space after which swap to the ‘eCommerce’ tab.
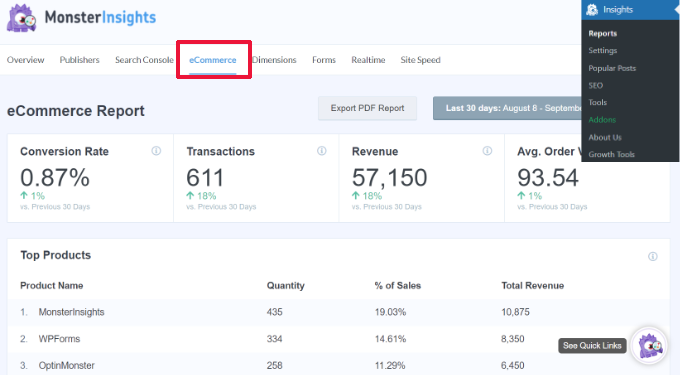
From right here, you possibly can see an outline of your top-performing merchandise and conversion sources.
For superior experiences, you have to swap to your Google Analytics account and go to the Engagement » Pages and screens tab.
From right here, you possibly can type the pages by conversion price to see the pages with the least conversions.
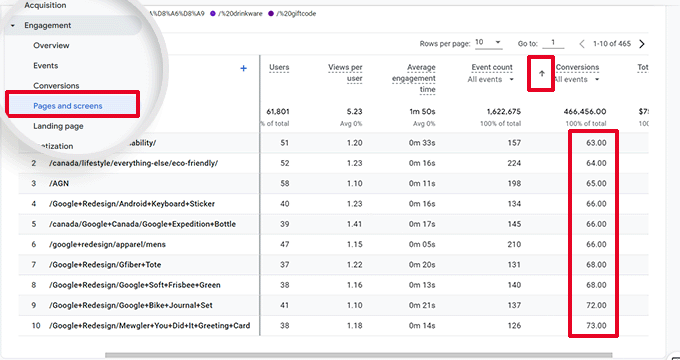
Utilizing Google Analytics, you can too observe pages with the very best bounce charges, the least period of time spent on them, and extra.
For extra conversion monitoring choices, you possibly can see our full information on WordPress conversion monitoring. It’ll additionally present you easy methods to observe kind conversions, affiliate hyperlink conversions, and extra.
Step 4: Ask For Consumer Suggestions
As you possibly can see, many UX audit actions contain automated instruments, analytics experiences, and guide testing.
Your complete level of the UX audit train is to enhance consumer expertise. So, why not simply ask your customers what they suppose?
Asking for consumer suggestions can get you correct enter from actual guests about your web site. It may possibly assist you to discover particular issues and repair them extra simply.
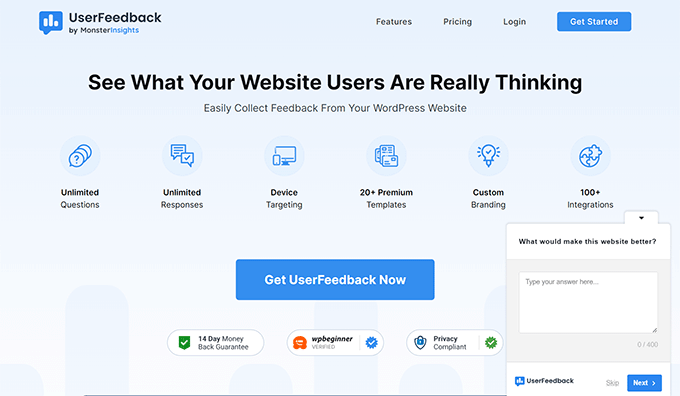
That is the place UserFeedback is available in.
Notice: There may be additionally a free plugin referred to as UserFeedback Lite that you may attempt. We advocate upgrading to the Professional model to unlock the total potential of the plugin.
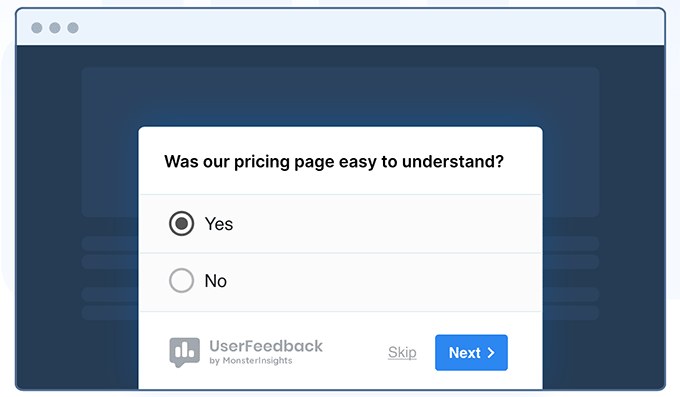
UserFeedback means that you can shortly run surveys and acquire consumer suggestions in your web site. It additionally enables you to present the surveys to the precise customers on the proper time.
For instance, you possibly can present surveys to customers on the pages with fewer conversions or show a suggestions kind to customers on cell gadgets.
For extra info, you possibly can see our UserFeedback announcement publish.
Step 5: Optimize Your Web site Pace & Efficiency
Web site velocity is a serious contributor to consumer expertise. Sluggish websites trigger poor UX and forestall customers from transferring ahead and accessing your content material.
The instruments we talked about earlier, like PageSpeed Insights and Core Internet Vitals, may help you consider the efficiency of your web site.
Nevertheless, if you’re utilizing MonsterInsights, then you can too run a web site velocity take a look at inside your WordPress admin space.
Merely swap to the Insights » Studies web page after which open the ‘Web site Pace’ tab.
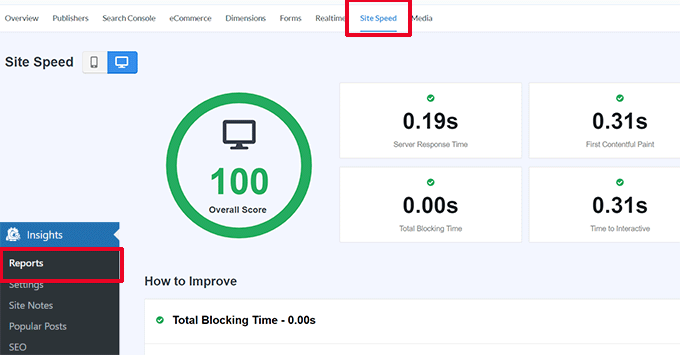
The report will run the identical checks as PageSpeed Insights and present you a report. It’ll additionally offer you sensible ideas to enhance web site efficiency.
Fixing Efficiency and Pace Points
The best method to repair most efficiency points is by merely putting in a WordPress caching plugin.
We advocate utilizing WP Rocket, which is one of the best WordPress caching plugin in the marketplace. It enables you to simply optimize your WordPress web site with out studying the technical stuff.

First, you have to set up and activate the WP Rocket plugin. For particulars, see our tutorial on easy methods to set up a WordPress plugin.
Upon activation, WP Rocket will begin caching your web site’s content material.
In contrast to different caching plugins that generate a cache when a consumer visits your web site, WP Rocket mechanically begins making a cache within the background.
This implies every new consumer in your web site will see a cached model that hundreds a lot faster and improves consumer expertise.
You possibly can study extra by studying our tutorial on establishing WP Rocket with extra detailed directions.
If caching doesn’t instantly repair your web site velocity, we advocate following our full WordPress velocity and efficiency information. It contains step-by-step directions on easy methods to optimize your web site velocity.
Step 6: Consider Web site Navigation
Customers count on your website to have a navigation menu with the hyperlinks they should discover the data they need.
Typically, a web site could not have a navigation menu that helps customers attain the web page they need. This results in a poor consumer expertise, and guests could go away and take a look at another web site.
You must make it possible for your web site has a simple navigation menu that takes customers to the essential areas of your web site.
Including a search bar to your web site’s header or navigation menu may enhance consumer expertise. If customers can’t discover a hyperlink shortly, then they’ll attempt looking in your web site.
Nevertheless, the default WordPress search just isn’t superb.
As a substitute, we advocate utilizing SearchWP. It’s the greatest WordPress search plugin in the marketplace and shortly improves the search expertise in your web site.
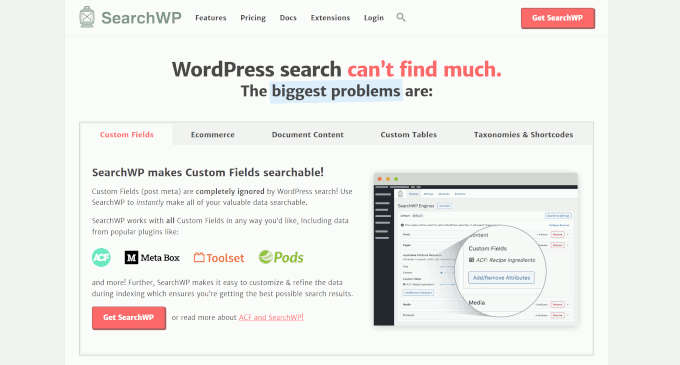
SearchWP means that you can make every little thing in your web site searchable, together with customized fields, eCommerce attributes, customized tables, classes, tags, and extra.
First, you have to set up and activate the SearchWP plugin. For extra particulars, see our tutorial on easy methods to set up a WordPress plugin.
Upon activation, you have to go to the SearchWP » Algorithm web page and swap to the ‘Engines’ tab.
From right here, you possibly can regulate the search engine settings for the totally different content material sorts by scrolling to the Posts, Pages, and Media sections.
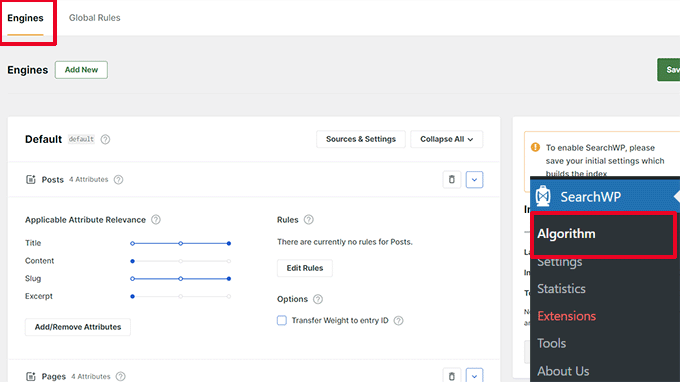
Right here, you possibly can select which attributes are searchable in your web site. You may as well select their relevance.
Don’t overlook to click on on the ‘Save’ button to retailer your settings.
SearchWP will now change your default WordPress search characteristic with its personal customized search engine.
For extra particulars, you possibly can see our tutorial on easy methods to enhance WordPress search with SearchWP.
Step 7: Check Conversion Parts
Lots of the time, poor consumer expertise is prompted on the finish of a conversion path.
For example, you may need customers making an attempt to submit your lead seize kind, however one thing is stopping them from doing so.
Fortunately, you possibly can run cut up checks and manually take a look at components in your web site to establish and repair issues.
Run A/B Cut up Exams to Determine Out UX Points
A straightforward method to take a look at your conversion components is by operating A/B cut up checks.
An A/B cut up take a look at means that you can create two or extra variations of a web page with slight variations. It then exhibits customers a special model randomly.
You possibly can then evaluate the outcomes to search out out which variation of the web page carried out one of the best amongst your customers.
The best method to run these checks in your WordPress web site is through the use of Thrive Optimize. It enables you to shortly create and run A/B checks in your WordPress web site.
First, you have to to put in and activate Thrive Optimize plugin. You should buy the plugin with Thrive Architect or get it with Thrive Suite bundle.
Subsequent, set up and activate the Thrive Product Supervisor plugin in your web site. You possibly can obtain it out of your Account Dashboard on the Thrive Themes web site.
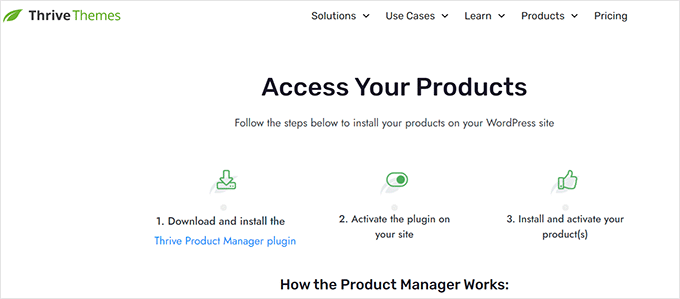
Upon activating the plugin, you have to go to the Product Supervisor web page within the WordPress admin space.
Subsequent, you have to examine the ‘Set up Product’ field below the Thrive Optimize and Thrive Architect merchandise.
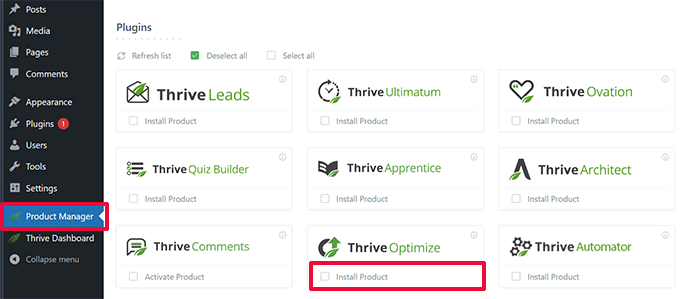
After that, click on on the ‘Set up Chosen Merchandise’ button to proceed.
After putting in the plugins, you have to to create or edit a publish/ web page after which click on on the ‘Launch Thrive Architect’ button on the prime.

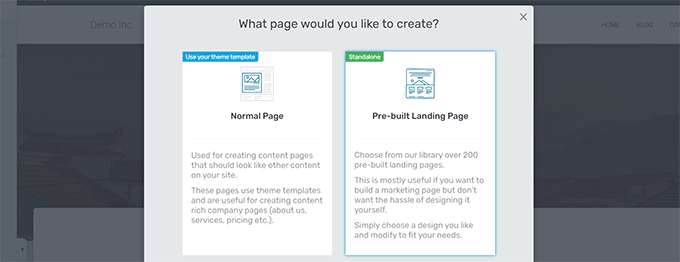
It will present a popup the place you possibly can select easy methods to edit the web page.
You possibly can edit the web page as a daily web page utilizing your theme template or as a touchdown web page with a customized template.
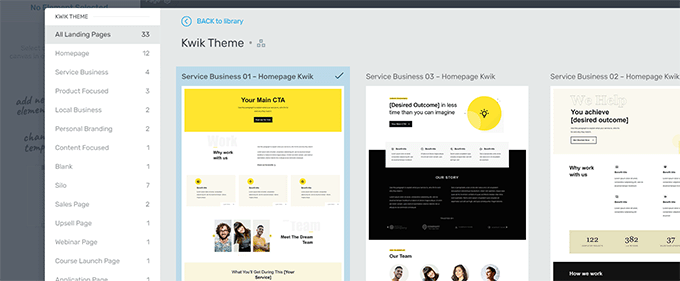
In case you select a pre-built touchdown web page, then you’ll be requested to decide on a template.
Thrive Architect comes with dozens of gorgeous templates for numerous niches to select from.
After that, it is possible for you to to edit your web page in Thrive Architect’s web page builder.
It’s an intuitive design device the place you possibly can level and click on on any ingredient to edit it or click on on the ‘+’ button to insert new components.
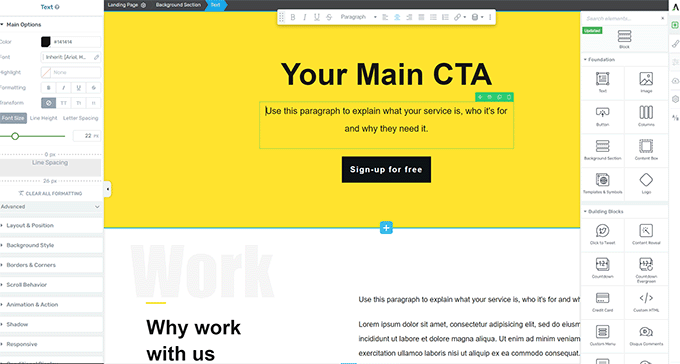
Upon getting completed enhancing your web page, don’t overlook to click on the ‘Save Work’ button to retailer your adjustments.
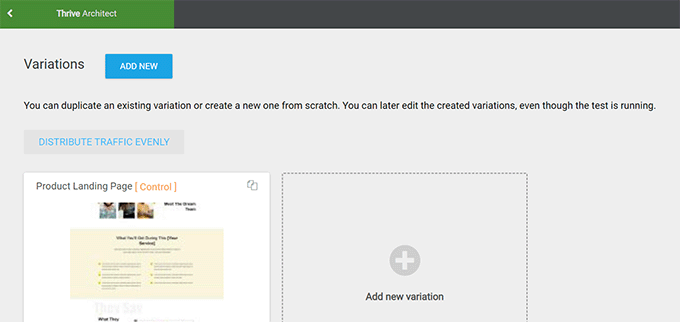
After that, click on on the ‘A/B’ button in the precise column to create a brand new A/B take a look at.

To run your A/B take a look at, you have to have at the least two variations of a web page.
On the following display, click on on the Add New Variation button to create a brand new model of your touchdown web page.
It’ll now create a brand new variation, and you can begin enhancing it utilizing the Thrive Architect.
Make the adjustments to the web page you suppose will work higher than the earlier model.
After that, merely click on on the ‘Save Work’ button to retailer your adjustments, after which click on on the ‘A/B’ button once more.
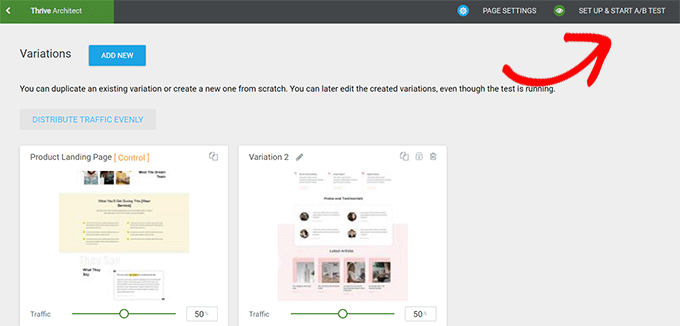
You possibly can select how a lot visitors you need to ship to every web page variation after which click on on the ‘Set Up & Begin A/B Check’ button on the prime.
It will carry up a popup the place you possibly can configure the A/B take a look at settings.
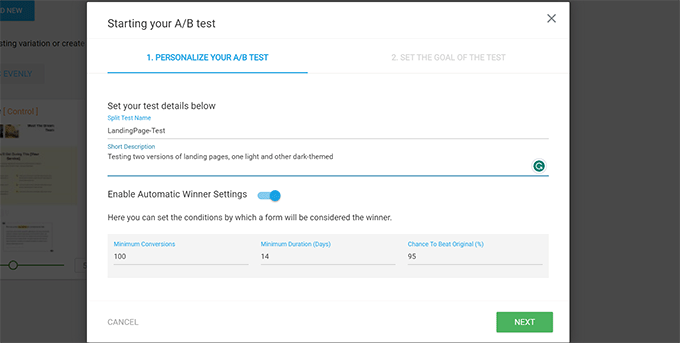
You must give your take a look at a title and outline. Afterward, you possibly can activate Computerized Winner settings and set minimal necessities for a variation to win.
Click on on the ‘Subsequent’ button to proceed.
Lastly, you’ll be requested to decide on a aim for the take a look at. For instance, if it’s a product web page, then it’s possible you’ll need to select ‘Income’.
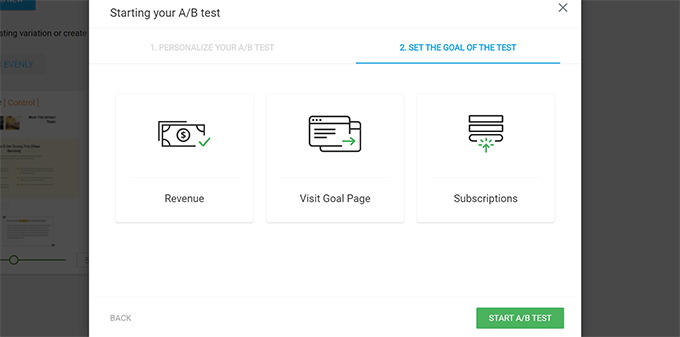
Lastly, click on on the ‘Begin A/B Check’ button to complete the setup.
Thrive Optimize will now begin displaying the 2 variations of the web page to your customers and maintain observe of consumer interactions on the web page.
You possibly can view the take a look at outcomes anytime by visiting the Thrive Dashboard » Thrive Optimize web page.
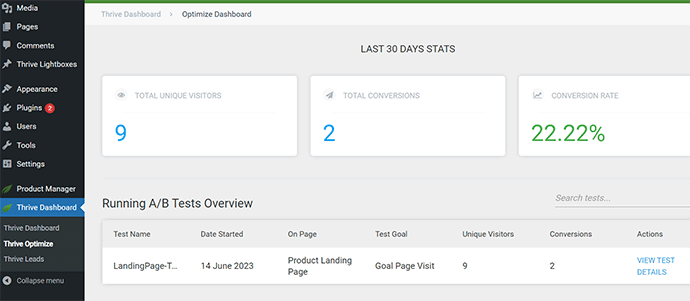
As soon as the take a look at has run its length, you possibly can see which web page has carried out higher for conversions or the targets you set through the take a look at. You’ll then be capable of make adjustments to enhance the UX in your web site.
For extra particulars, you possibly can see our information on easy methods to run A/B checks in your WordPress web site.
Manually Check Conversion Parts
Lots of time, it’s possible you’ll not be capable of run A/B cut up checks for all of your pages. Fortunately, there are different methods to check whether or not conversion components in your pages are working.
Web site homeowners are sometimes simply wanting on the static illustration of their web site and never interacting with it like an actual consumer would. That’s why many interactive failures go unnoticed for a very long time.
That is when you have to to do some guide work. You possibly can attempt to imitate a consumer journey as greatest as attainable to finish a conversion.
For example, should you run an eCommerce retailer, you can begin from the web page the place your customers often land. Afterward, take a look at product pages, add gadgets to the cart, and full the checkout.
Inside your UX audit, you have to take a look at all of your types, cart performance, and checkout expertise by interacting with these components like a buyer.
Plus, don’t overlook to check these components on each cell and desktop environments.
Step 8: Check Consumer Flows to Discover Bottlenecks
A consumer stream is a buyer’s journey throughout your web site. A consumer will often take a predictable path to totally different areas of your web site till they purchase one thing or submit a kind.
The easiest way to trace consumer flows is through the use of MonsterInsights. It comes with a Consumer Journey addon that means that you can see each step of a buyer’s journey all through your website, together with the pages and merchandise they checked out and the way lengthy they have been there.
Merely set up and activate the MonsterInsights plugin.
Notice: You will have at the least the Professional plan of the plugin to make use of the Consumer Journey addon.
After establishing MonsterInsights, you have to go to the Insights » Addons web page. From right here, find the Consumer Journey addon after which set up and activate it.
Subsequent, you have to set up and activate the eCommerce addon. It will assist you to observe buyer journeys on in style eCommerce platforms for WordPress like WooCommerce, Simple Digital Downloads, MemberPress, and extra.
Now, MonsterInsights will present the consumer’s journey on particular person orders. For instance, in WooCommmerce, you possibly can go to WooCommerce » Orders web page and click on on a person order.
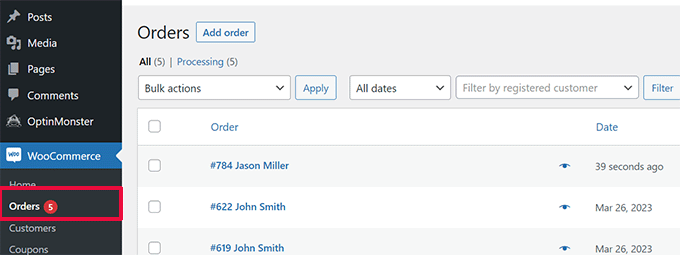
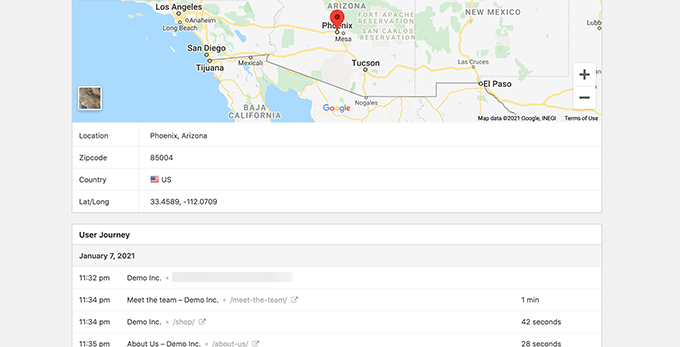
On the order particulars web page, scroll right down to the MonsterInsights Consumer Journey part.
It will present you all of the consumer interactions in your website with their instances and durations.

For extra particulars, you possibly can see our information on easy methods to allow buyer monitoring in WooCommerce.
If you’re not utilizing an eCommerce platform, then you possibly can nonetheless observe the consumer journey on your WordPress types.
If you’re utilizing WPForms to seize leads, then it comes with consumer journey monitoring that helps you observe which path a consumer took to submit the shape.
Like conversion components, different areas of your web site may disrupt consumer stream and block the trail that leads them to turn out to be a buyer.
You will have to manually consider consumer paths in Google Analytics to see the place their journey abruptly ends. You may as well simulate the consumer paths to see should you can come throughout a usability problem stopping the consumer from going ahead.
Step 9: Consider Web site Content material High quality
Visible components usually are not the one issues that create a great or unhealthy consumer expertise.
Your web site content material performs a major function in convincing customers to remain in your WordPress weblog or web site and go searching. It additionally helps search engines like google discover your content material extra simply and ship extra guests to your website.
We advocate performing an entire web optimization audit of your web site and optimizing your content material for web optimization.
To do this, you have to All in One web optimization for WordPress. It’s the greatest WordPress web optimization plugin in the marketplace that means that you can simply enhance your content material for search rankings and consumer expertise.
All in One web optimization comes with built-in web optimization evaluation, a headline analyzer, and site-wide web optimization audit instruments. All these options assist you to enhance the standard and discoverability of your content material.
Additionally, you will want to judge your content material. For instance, if a selected web page just isn’t rating or changing properly, then take into account making it extra complete by including extra useful content material.
For extra particulars, you possibly can see our information on easy methods to repair content material decay in WordPress.
Don’t overlook to examine your content material for spelling and grammar errors. They might make your web site appear unprofessional and create a nasty consumer expertise.
We advocate utilizing Grammarly. It’s the greatest AI-powered writing device that helps you mechanically appropriate spelling and grammar errors.

Grammarly additionally has a free ceaselessly plan with spelling and grammar checks. Nevertheless, we advocate shopping for a paid plan to unlock extra highly effective options.
We hope this text helped you discover ways to do a UX audit of your WordPress web site. You may additionally need to see our information on easy methods to do an web optimization audit of your website or our skilled picks for one of the best e mail advertising providers to develop your web site.
In case you appreciated this text, then please subscribe to our YouTube Channel for WordPress video tutorials. You may as well discover us on Twitter and Fb.
The publish Do a UX Audit of Your WordPress Web site first appeared on WPBeginner.

