
Are you searching for one of the simplest ways to assemble helpful suggestions about your WooCommerce retailer out of your lively prospects?
Consumer surveys might help you get worthwhile info so you should use it to make data-driven selections. For instance, they might help you learn how to enhance your gross sales funnel or why your prospects purchased a selected product.
On this article, we are going to present you learn how to simply create submit buy surveys in WooCommerce.
Why Use Publish Buy Surveys in WooCommerce?
When you’ve got a WooCommerce retailer, then you definitely could also be questioning what your prospects consider your merchandise and on-line retailer. There’s no simple strategy to discover out with out truly asking them.
Fortunately, you should use a WordPress survey plugin to gather actual person suggestions shortly and simply. This suggestions will show you how to uncover the ‘why’ behind each web site customer’s motion. That is one thing you may’t study from Google Analytics alone.
When creating your buyer survey, be sure you don’t add any pointless questions. The questions you ask ought to get you essentially the most worthwhile info and insights.
Listed here are some examples of questions you may ask your prospects after checkout:
How lengthy have you ever been a buyer?
How did you uncover us?
Was our pricing web page simple to grasp?
Which of our merchandise have you ever used?
How glad are you with our merchandise?
Have you ever wanted to contact customer support?
Do you have got any extra feedback or strategies?
By asking for person suggestions after every WooCommerce buy, you’ll study methods you may enhance your gross sales funnel to spice up person expertise and improve gross sales.
When you understand the why or the intent behind customers’ actions, you may simply work out why your guests purchase or don’t purchase your merchandise.
With that being mentioned, let’s check out learn how to simply create submit buy surveys in WooCommerce. We are going to cowl two completely different strategies:
Technique 1: Creating Publish Buy Surveys Utilizing UserFeedback
UserFeedback is an easy-to-use survey plugin by the MonsterInsights staff. It permits you to ask your web site guests questions and accumulate their suggestions in actual time. It additionally makes it simple so as to add the survey to particular WooCommerce pages, such because the order affirmation web page.
UserFeedback features a Publish Buy Evaluate template to provide you a head begin in creating your survey. Plus, you may customise how your popup surveys look in order that they utterly match your model and web site design.
First, you might want to set up and activate the UserFeedback plugin. For step-by-step directions, you may observe our tutorial on learn how to set up a WordPress plugin.
Observe: There’s a free model of UserFeedback that you should use to get began. Nonetheless, you will want the options of the Professional model to create a submit buy survey.
Setting Up the UserFeedback Plugin
As soon as the plugin is activated, the setup wizard will mechanically launch. Click on the ‘Begin’ button to start the setup.

Subsequent, you’ll be prompted to create your first survey to point out you what the plugin is able to.
We gained’t be utilizing this instance survey, so you may go forward and use the default solutions.

You may select from a couple of pre-written questions or create your individual query. Additionally, you will be capable to change your questions at any time.
For this tutorial, you need to merely click on the ‘Subsequent Step’ button to proceed.

Subsequent, you will notice the choice to allow particular UserFeedback options, relying in your license degree.
Go forward and allow the options you need or that your license degree permits.

Upon getting achieved that, you might want to click on the ‘Subsequent Step’ button on the backside of the web page.
Now, you may enter the e-mail handle the place you need the survey responses to be despatched.

Since we gained’t be utilizing this survey, you don’t must make any modifications and might merely click on the ‘Subsequent Step: Publish’ button.
Within the ultimate step of the setup wizard, the options and addons you allow will probably be put in.

Then, you may click on on the ‘Exit to dashboard’ button on the backside of the web page.
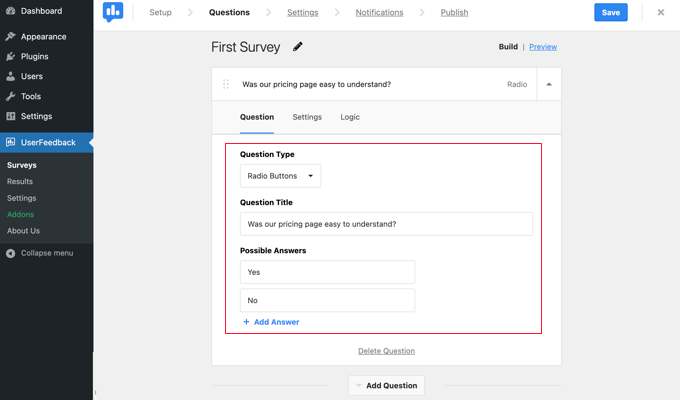
You will notice the pattern ‘First Survey’ that you just created with the wizard.

Now you may unlock the Professional options of the plugin. You must enter the license key that was emailed to you while you bought a UserFeedback plan.
You have to to navigate to UserFeedback » Settings within the WordPress admin space. As soon as there, merely paste your license key into the sphere and click on the ‘Confirm’ button.
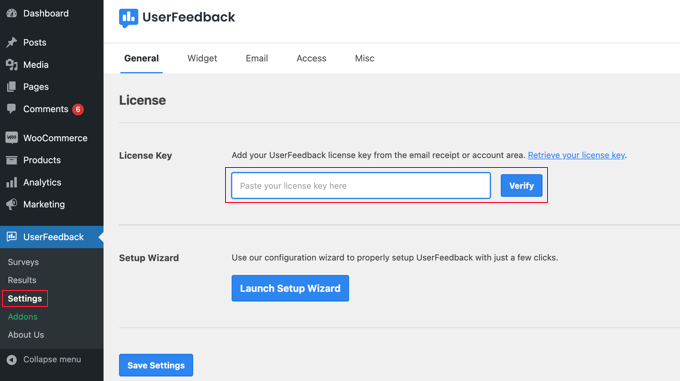
Be sure to click on the ‘Save Settings’ button upon getting achieved this.
After that, you may allow the Professional options by going to the UserFeedback » Addons web page.
For every addon, you will want to click on the ‘Set up Addon’ button, adopted by the ‘Activate’ button that seems.
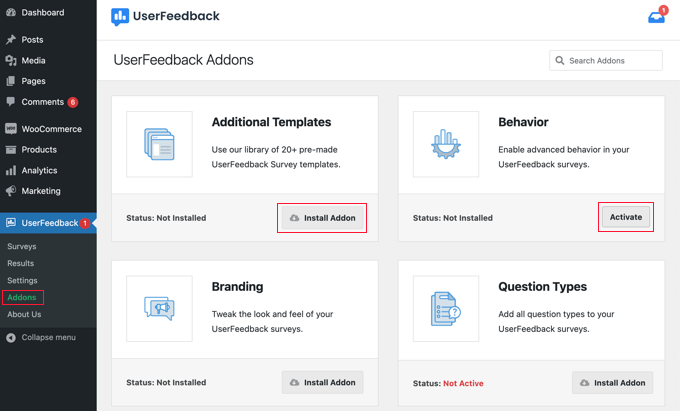
That is essential for the reason that Extra Templates addon features a Publish Buy Evaluate template, and the Query Sorts addon lets you add star scores and extra. Different addons help you additional customise your survey kind.
Now that you’ve efficiently put in the UserFeedback plugin and its addons, you’re able to create your submit buy survey.
Making a Publish Buy Survey Utilizing UserFeedback
To create a brand new survey, you might want to return to the UserFeedback » Surveys web page and click on the ‘Create New’ button.
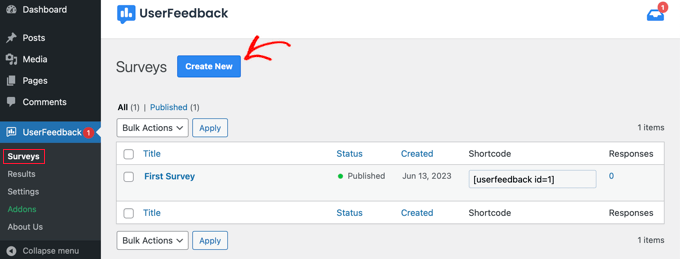
It will present you dozens of survey templates that you should use as a place to begin.
You must scroll down till you discover the Publish Buy Evaluate template after which click on it.
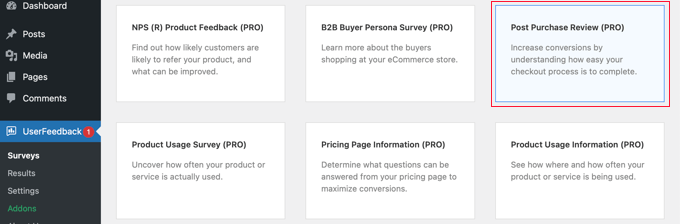
A brand new survey will probably be created for you. Some useful questions have already been added.
You may change any query’s kind and title by merely pointing and clicking.
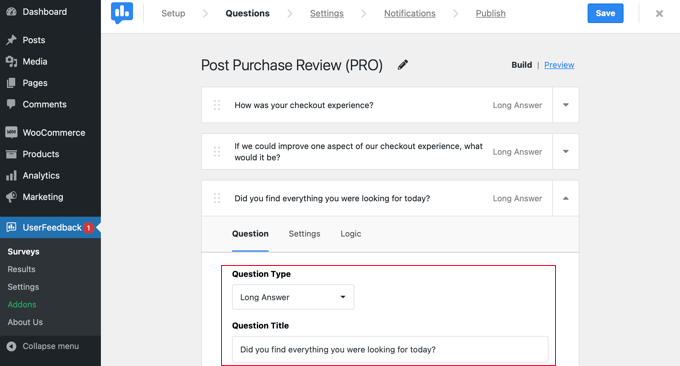
Every query has a Settings tab the place you may set the query as ‘Required’. The Logic tab permits you to present or cover the query primarily based on the client’s earlier solutions.
With UserFeedback, you may ask limitless questions and obtain limitless responses. You may ask all forms of questions, together with multiple-choice and free-form questions, and even seize emails and accumulate star scores.
You would possibly like so as to add a number of the questions we listed at first of this text. So as to add a query to your survey, merely click on the ‘Add Query’ button after the final query.

Once you select a query kind from the dropdown menu, a brand new query will probably be added.
After that, it is possible for you to so as to add a query title. Relying on the query kind, you may then customise the query in different methods, reminiscent of labeling checkboxes or radio buttons.
Tip: The ‘Preview’ hyperlink on the prime of the web page doesn’t simply preview the shape but in addition lets you customise its colours.
You can even create a customized thanks message and redirect customers after their submissions.
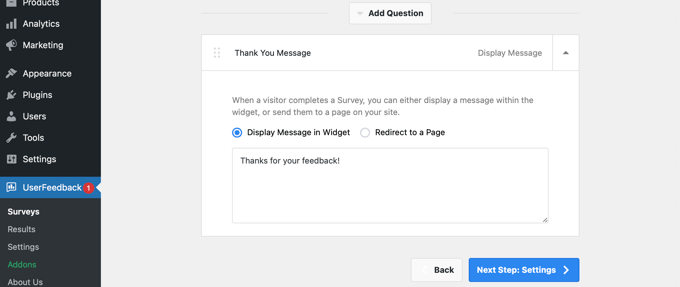
When you have got completed enhancing your survey questions, simply hit the ‘Subsequent Step: Settings’ button. It will open the Settings web page, the place you may customise your survey much more.
Within the ‘Monitoring’ part, you may allow or disable Google Analytics monitoring in case you have MonsterInsights put in.
Subsequent, within the ‘Concentrating on’ part, you may choose what forms of gadgets and pages you need your survey to look on. You may show the survey on all gadget varieties or create completely different surveys that focus on desktop and cellular customers.
Subsequent, you may scroll right down to the Pages setting space. That is essential as a result of it lets you select the place the survey will probably be displayed.
The default setting is ‘All Pages’. It will show the survey on each web page of your on-line retailer. Nonetheless, we solely need to survey prospects after they’ve made a purchase order.
On this case, we must always show the survey on the order affirmation web page that’s displayed after checkout. This web page is often known as the WooCommerce thanks web page.
To focus on this web page, you will want to pick ‘Web page url is’ from the dropdown menu. After that, you need to kind ‘order-received’ within the subsequent discipline.
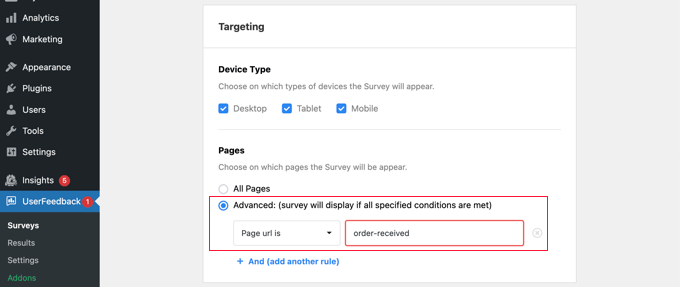
This works as a result of the setting matches partial URLs. The complete URL will change with every transaction however will at all times include the characters ‘order-received’.
You can even scroll right down to the ‘Habits’ part. Right here, you may configure settings like:
Show Timing – When the survey will seem on the web page.
Show Size – How typically the survey will seem to web site guests.
Survey Run Time – How lengthy the survey will seem on the designated pages.
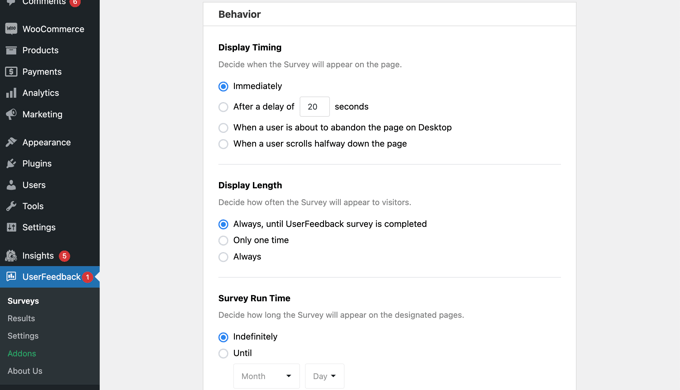
As well as, you may allow or disable the ‘Begin Survey Minimized’ choice.
This shows a much less seen model of your survey as an alternative of mechanically opening the primary query.

As soon as you’re achieved altering the settings, you may click on the ‘Subsequent Step: Notifications’ button.
It will take you to the Notifications web page, the place you may select to ship your self an e mail with every new response to the survey. Merely go away the ‘Ship Electronic mail’ toggle switched on after which enter a number of e mail addresses.
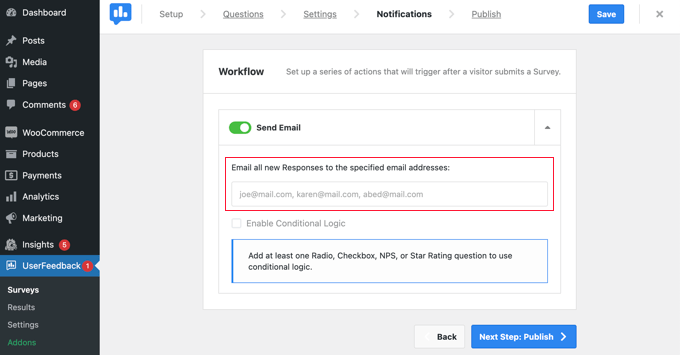
You can even allow conditional logic to set off e mail notifications when guests reply to your questions in a sure means.
For instance, you would possibly solely need to obtain an e mail if the person checks a field labeled ‘Would you like a callback?’
For this to work, your survey must include not less than one query with a radio, checkbox, NPS, or star ranking query.
After that, click on on the ‘Subsequent Step: Publish’ button to proceed.
Publish Your Survey
Lastly, there’s an choice to schedule the survey for a later date and time.
In case you are able to publish your survey instantly, then go forward and click on the ‘Save and Publish’ button.

That’s it! You’ve efficiently created a survey kind.
Now when your prospects buy gadgets out of your retailer, your survey will pop up on the order affirmation web page.
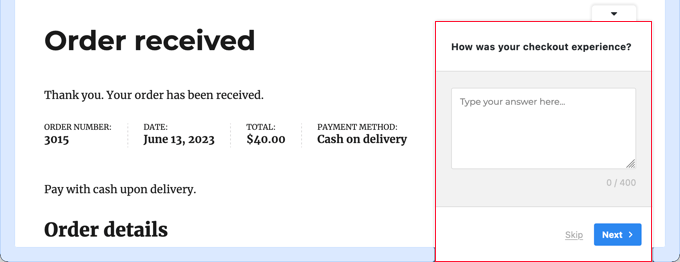
Tip: You could not see the client survey if you end up logged into WooCommerce. You have to to open your on-line retailer in a brand new incognito window or a unique internet browser.
Viewing Your Survey Type Outcomes
When you begin getting responses, you may analyze them proper out of your WordPress admin dashboard utilizing easy-to-read experiences.
Merely navigate to UserFeedback » Outcomes to see the entire responses, impressions, and extra particulars.

Technique 2: Creating Publish Buy Surveys Utilizing WPForms
WPForms is the finest WordPress contact kind plugin in the marketplace. It comes with a robust surveys and polls addon, which lets you shortly create highly-engaging survey types.
It permits you to mix the Surveys and Polls addon with highly effective WPForms options like conditional logic, multi-page types, customized notifications, e mail integrations, and extra.
Observe: You have to the Professional plan as a result of it consists of the WPForms Surveys and Polls addon. WPBeginner customers can use our WPForms coupon to get 50% OFF on all WPForms licenses.
Setting Up the WPForms Plugin
The very first thing you might want to do is set up and activate the WPForms plugin. For extra particulars, see our step-by-step information on learn how to set up a WordPress plugin.
As soon as the plugin is activated, you might want to go to the WPForms » Settings web page and enter your license key. You’ll find this info in your account on the WPForms web site.

Don’t neglect to click on the ‘Confirm Key’ button.
Upon getting achieved that, you need to head over to the WPForms » Addons web page and scroll right down to the Surveys and Polls addon.
Go forward and click on on the ‘Set up’ addon button to put in and activate the addon.

Now you’re able to create the submit buy survey kind.
Making a Publish Buy Survey Utilizing WPForms
You must go to the WPForms » Add New web page to create a brand new kind. It will launch the WPForms kind builder interface, and you’ll select from completely different pre-built kind templates.
First, you need to present a title to your survey kind on the prime of the web page.
After that, you might want to select a template. Begin by clicking on ‘Addon Templates’ to listing templates which are appropriate with the Surveys and Polls addon.
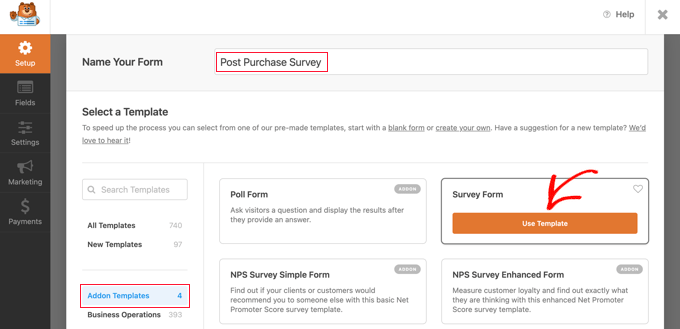
Then you might want to click on the ‘Use Template’ button on the Survey Type template. It will load a pattern buyer suggestions kind template with a number of fields already added to it.
You may simply level and click on to edit the fields, rearrange them with drag and drop, or take away them from the shape. You can even add new kind fields from the left column.

WPForms helps all commonly-used kind fields, together with dropdown, radio buttons, checkboxes, Likert scale, textual content enter, ranking scale, and lots of extra. This makes it tremendous simple so that you can construct highly-interactive survey types.
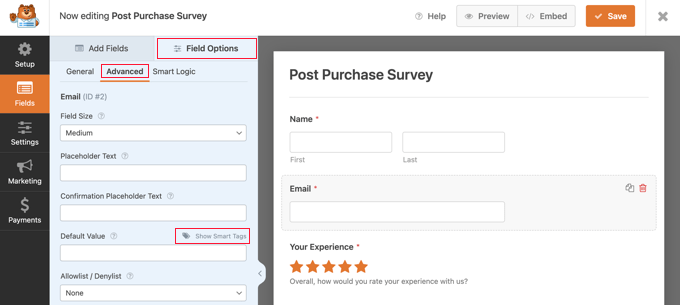
There may be some conditional logic already constructed into the shape. For instance, the ‘How can we enhance?’ discipline will solely seem if a person selects 1 or 2 stars within the ‘Your Expertise’ discipline.

You may see this by deciding on the ‘How can we enhance?’ discipline after which clicking the ‘Area Choices’ tab on the left, as seen within the picture above.
If a few of your prospects log in to your on-line retailer, then you can also make their life simpler by auto-filling a few of their info from their person profiles.
For instance, to auto-fill their e mail handle, you might want to click on on the Electronic mail discipline, then click on the ‘Area Choices’ tab on the left. As soon as there, simply click on on the ‘Superior’ tab to point out the superior discipline choices.
You’ll discover a discipline the place you may set a Default Worth for the e-mail discipline.
You may enter info from their profile mechanically by clicking on ‘Present Sensible Tags’.
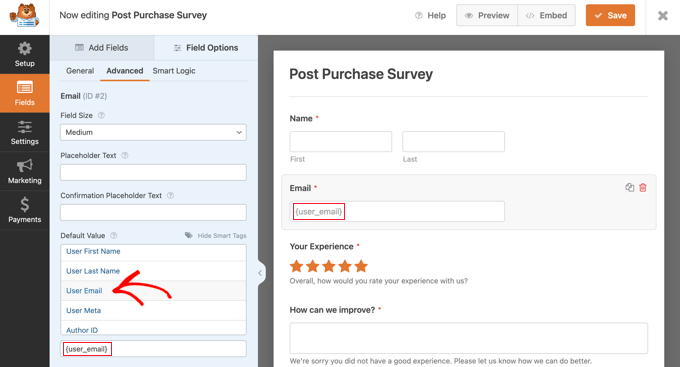
Now you merely click on the ‘Consumer Electronic mail Listing’ choice, and the {user_email} good tag will probably be entered into the sphere. It will mechanically add the e-mail handle for logged-in customers.
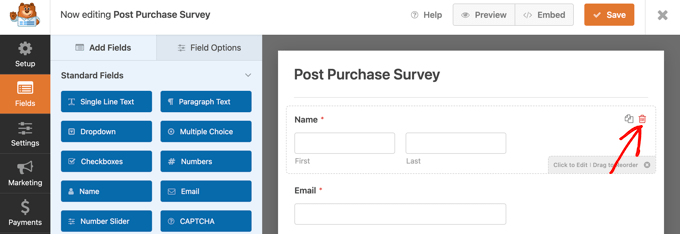
You can even simply take away any fields that you just don’t want on the shape.
For instance, if you want to take away the ‘Identify’ discipline, then you need to level at that discipline together with your mouse after which click on the purple Trash icon that seems on the prime proper of the sphere.
If you want so as to add extra questions, reminiscent of those we listed at first of this text, merely drag a brand new discipline onto the web page after which customise it.
Upon getting created the shape, you might want to click on the orange ‘Save’ button on the prime of the web page to retailer your kind settings.
Subsequent, you may go to the Settings tab and choose ‘Confirmations’ within the WPForms kind builder.

Right here, you may select whether or not to point out a message or a web page and even redirect customers to a URL once they submit the survey kind.
Moreover that, the WPForms Notifications tab permits you to edit the notification settings so that you just get e mail alerts when a person fills out your survey.

Now you can click on on the shut button to exit the shape builder.
Including the Survey Type to a Customized Thank You Web page
When you’ve got gone by means of the difficulty of making a customized WooCommerce thanks web page, then you may simply add your submit buy survey to it utilizing a shortcode or a block.
Observe: Whether or not you’re utilizing the default thanks web page or a customized one, it’s also possible to show the survey as a popup utilizing a plugin. See the subsequent part for particulars.
You’ll find the shortcode you want by visiting the WPForms » All Kinds web page.

You may then use the shortcode so as to add the shape to your customized thanks web page by following our information on learn how to add a shortcode in WordPress.
Alternatively, in the event you created your customized thanks web page utilizing the block editor or a web page builder plugin like SeedProd, then all you might want to do is drag the WPForms widget onto the web page after which decide the survey kind you simply created from a dropdown menu.
Upon getting saved your customized thanks web page, your prospects will see the survey after trying out.
Routinely Displaying a Survey Popup Utilizing OptinMonster
You would possibly want to have the survey pop up mechanically over the order affirmation web page, just like what occurs with the UserFeedback plugin in Technique 1.
The very first thing you might want to do is set up the free OptinMonster plugin. For extra particulars, see our step-by-step information on learn how to set up a WordPress plugin.
Observe: On this tutorial, we are going to use the free OptinMonster plugin as a result of it does all the things we want. Nonetheless, with a Development subscription, the premium model of OptinMonster has a lot stronger integration with WooCommerce.
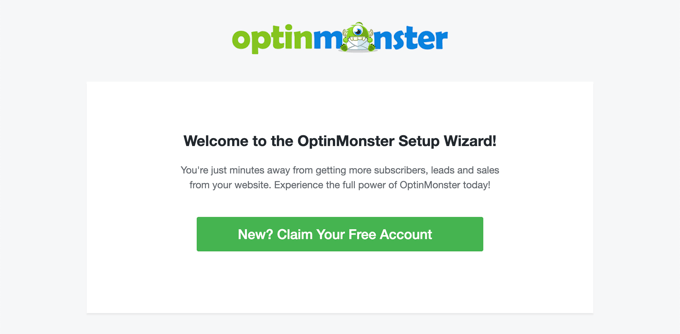
Upon activation, the OptinMonster setup wizard will begin.
Merely observe the onscreen directions to arrange OptinMonster in your web site and create a free account.
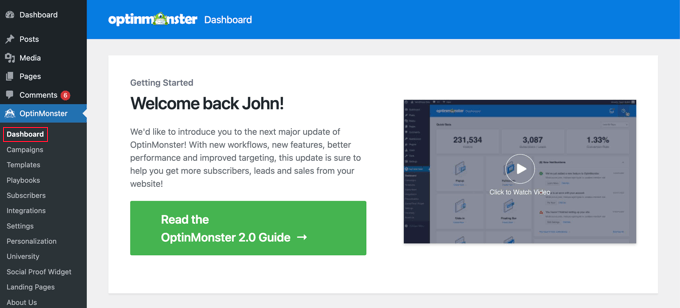
When you full the setup, you will see your self on the OptinMonster dashboard.
You will notice a welcome message, a hyperlink to the OptinMonster person information, and a video that will help you get began.
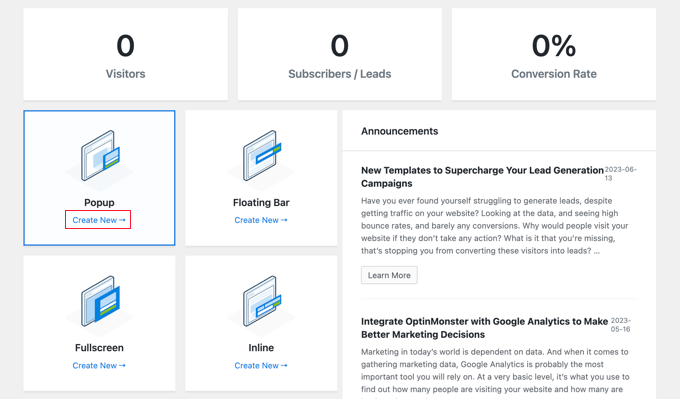
Now you will want to scroll down till you discover a field the place you may create a brand new popup.
Merely click on the ‘Create New’ hyperlink.
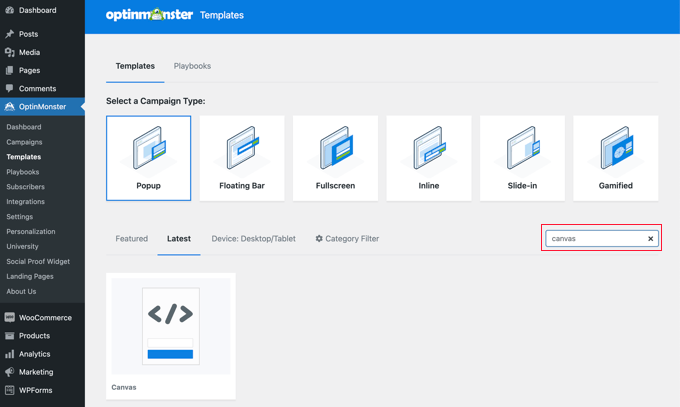
You’ll now see a set of popup templates. Since our popup will simply include our submit buy survey, we are going to use the minimal Canvas template.
You will discover this template by typing ‘canvas’ into the search discipline.
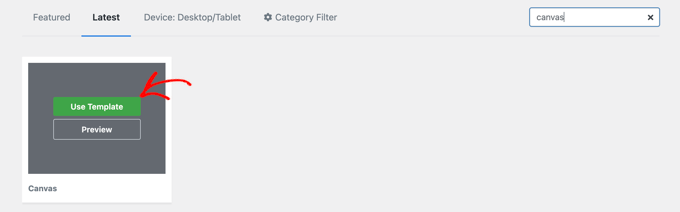
Once you level your mouse over the Canvas template, two buttons will seem.
You may create your popup by clicking the ‘Use Template’ button.
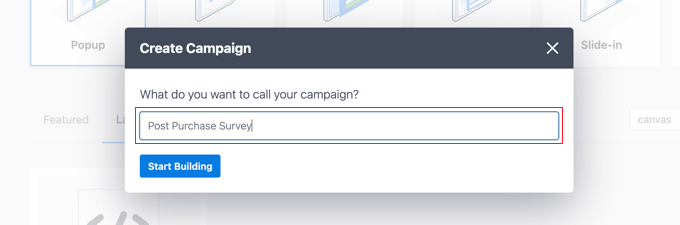
You will notice a popup asking you to provide the marketing campaign a reputation.
You may kind in ‘Publish Buy Survey’ after which click on the ‘Begin Constructing’ button.
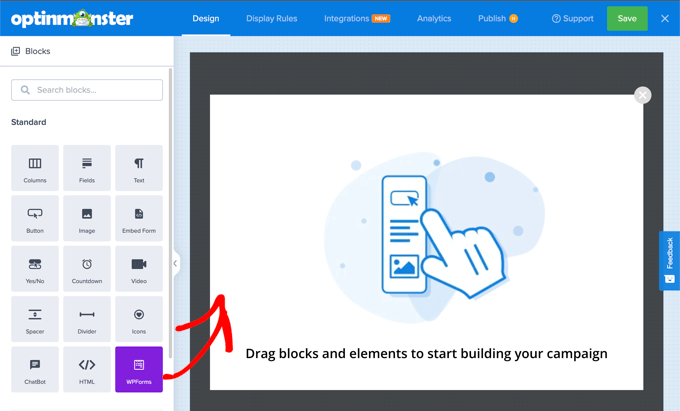
The OptinMonster builder will open together with your chosen template. You may see a preview of the popup on the correct, and there are blocks on the left that you could add to the popup.
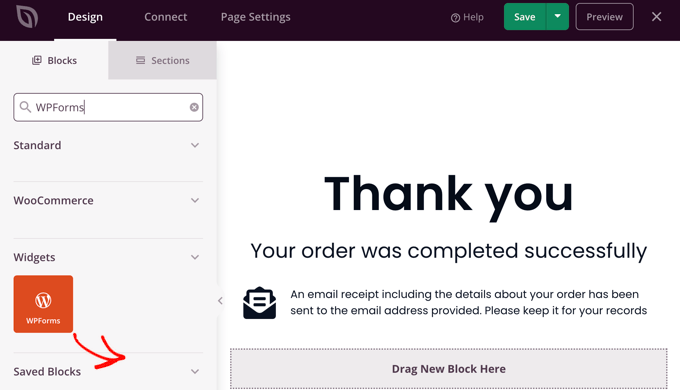
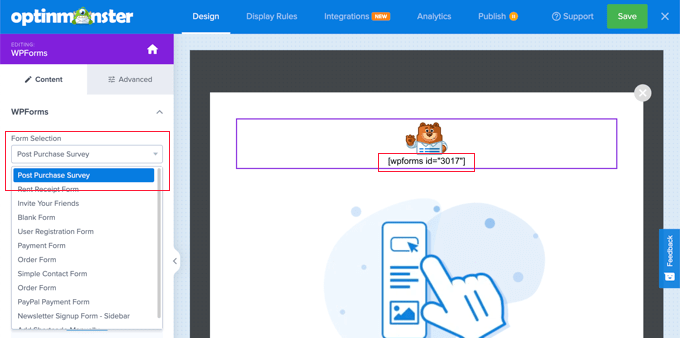
You must discover the WPForms block and drag it onto the web page.
Now you can choose the survey you need to add.
Merely click on on the identify of the WPForms submit buy survey that you just created earlier. The WPForms shortcode will probably be added to your popup.
There may be nonetheless a placeholder picture and textual content block on the web page. These could be safely deleted.
Once you hover your mouse over the picture, a purple toolbar will seem. You may delete the picture by clicking the Trash icon. You may be requested to verify the deletion.
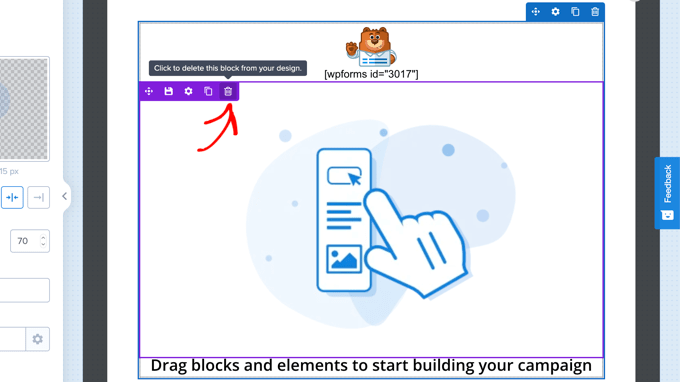
You may delete the textual content block that claims ‘Drag blocks and components to start out constructing your marketing campaign’ in the identical means.
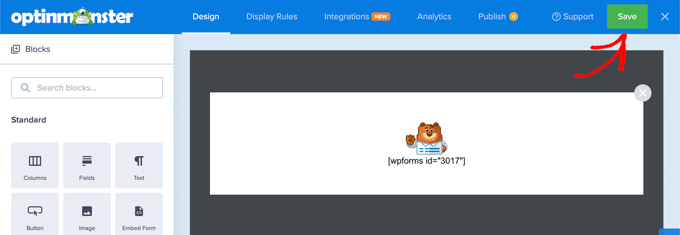
Your completed popup ought to embrace simply the WPForms shortcode. This can be a good time to save lots of your work by clicking the ‘Save’ button on the prime of the display screen.
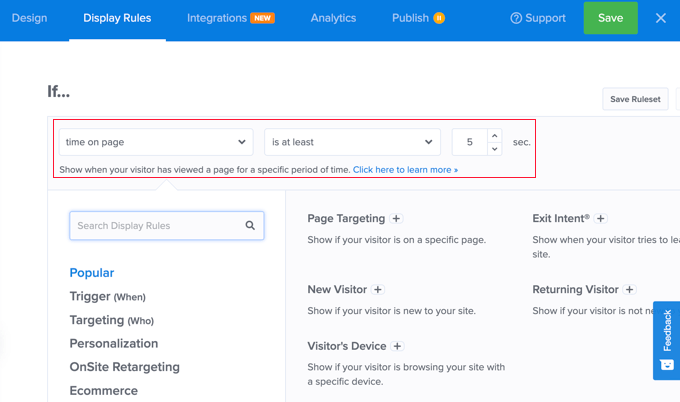
Your subsequent job is to click on the ‘Show Guidelines’ tab and set how and the place the popup will probably be displayed.
The primary rule determines when the popup will probably be proven. The default worth is after you have got been on the web page for five seconds. It will work for many on-line shops, however you may change the worth in the event you like.
Now you might want to scroll right down to the second rule, which you will see just under the ‘AND’ label.
The default worth is to show the popup on each web page of your WordPress web site. You must change this in order that it solely shows the submit buy survey on the order affirmation web page.
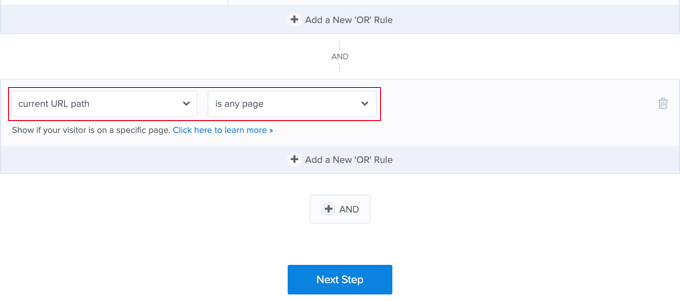
To do that, you might want to click on the dropdown menu for ‘is any web page’ and choose ‘incorporates’ as an alternative.
One other discipline will seem, and you might want to kind ‘order-received’ right here.
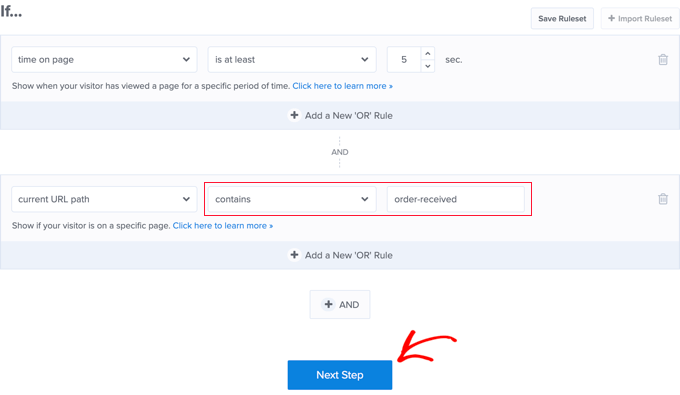
This rule will match the affirmation web page URL. Though the URL modifications with each transaction, it would at all times include the characters ‘order-received’.
Now you may click on the ‘Subsequent Step’ button to find out what occurs when the circumstances in these two guidelines are met.
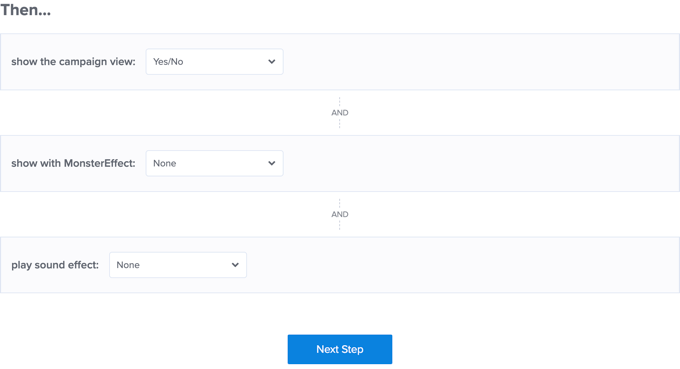
The default settings right here will show the popup with none results or sound. If you want so as to add an impact or sound, simply use the dropdown menus.
As soon as you’re completed, you might want to click on on the ‘Subsequent Step’ button. You will notice a abstract of the show guidelines you simply created.
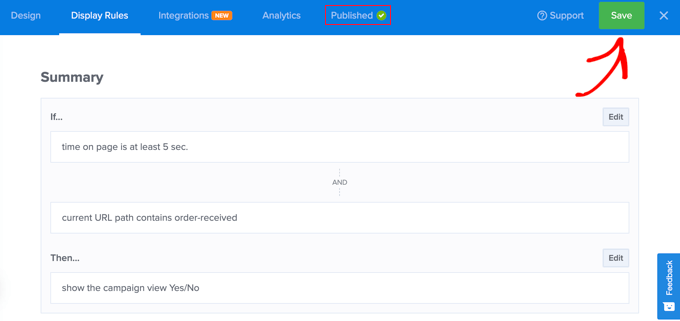
Be sure to click on the ‘Save’ button to retailer your settings.
Lastly, you may click on the ‘Publish’ tab on the prime of the display screen after which click on the ‘Publish’ button underneath ‘Publish Standing’. It will push the popup dwell in your on-line retailer.
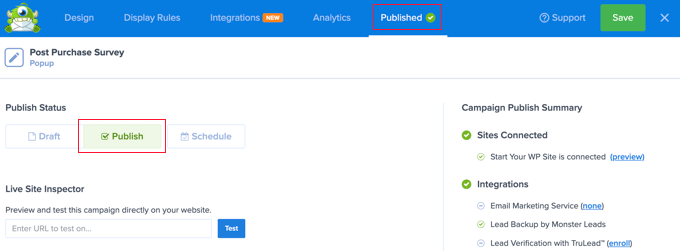
Now you can shut the OptinMonster builder by clicking the ‘X’ icon within the prime proper nook.
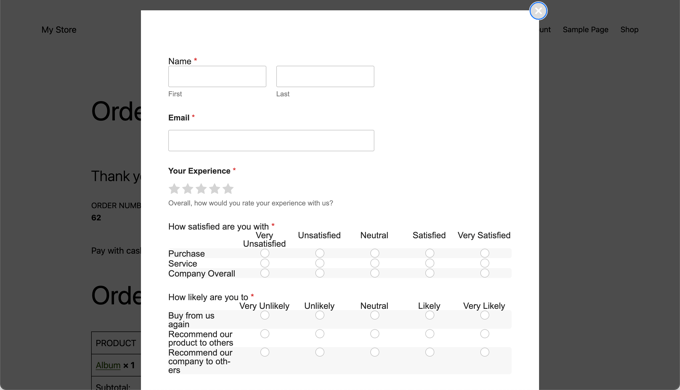
Your prospects will now see the submit buy survey every time they end trying out. Right here’s the way it appears to be like in our demo retailer.
Viewing Your Survey Type Outcomes
WPForms reveals survey ends in lovely charts and graphs. You can even print survey outcomes and export them to your favourite spreadsheet software program.
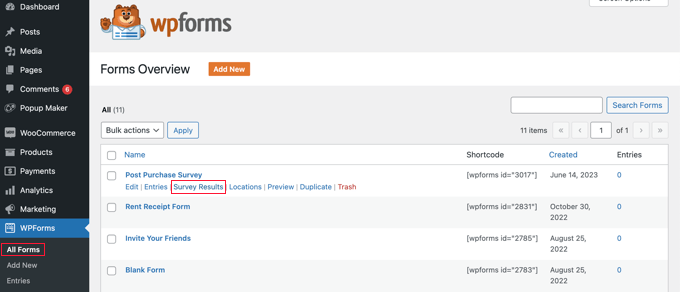
To view your survey outcomes, you might want to go to the WPForms » All Kinds web page and click on on the ‘Survey Outcomes’ hyperlink under your survey kind.
On the outcomes web page, you will notice your survey responses displayed in an interactive chart and tables.
You may export responses to a single query and all the survey.

On the highest, you will notice choices to modify to completely different chart varieties and export choices.
It can save you particular person survey ends in JPEG, PDF, and Print codecs to simply share them on presentation slides, weblog posts, or social media.
We hope this tutorial helped you discover ways to create submit buy surveys in WooCommerce. You might also need to see our information on learn how to create good coupons in WooCommerce or our knowledgeable picks for the very best WooCommerce plugins to your retailer.
In case you appreciated this text, then please subscribe to our YouTube Channel for WordPress video tutorials. You can even discover us on Twitter and Fb.
The submit Learn how to Simply Create Publish Buy Surveys in WooCommerce first appeared on WPBeginner.

