

Do you need to allow Imagick in your WordPress web site?
More often than not, WordPress will mechanically use Imagick to handle all of your website’s pictures. Nonetheless, by tweaking the default Imagick settings you would enhance your website’s efficiency, or present higher-quality pictures to guests.
On this article, we’ll present you find out how to allow Imagick in your WordPress web site, after which customise its settings to enhance the customer expertise.
How Does WordPress Use the Imagick Software program?
Each time you add, edit, or show a picture, WordPress optimizes that picture behind the scenes. This course of makes positive your pictures look nice and cargo shortly.
By default, WordPress makes use of Imagick or GD Library to optimize pictures. These are libraries, or collections of pre-written code anybody can use. They permit WordPress to show, create, convert, and edit pictures.
WordPress additionally makes use of these libraries to resize and crop pictures, compress picture recordsdata, and convert them into totally different codecs.
Thanks to those libraries, it’s also possible to change how pictures look by modifying the distinction, growing or lowering the brightness, or including content material equivalent to watermarks and textual content.
They could be related, however Imagick does have some benefits over GD Library, because it helps over 200 picture codecs and usually offers you higher-quality pictures. For that motive, WordPress tends to make use of the Imagick library if it’s obtainable on the server.
Why You Ought to Customise Imagick on Your WordPress Web site
More often than not, you don’t have to fret about Imagick, as WordPress makes use of it by default wherever doable.
Nonetheless, because it usually creates higher-quality pictures, Imagick can improve the scale of your picture recordsdata. This will likely sluggish your web site down, notably if it has a number of giant, high-resolution graphics.
In case your website is taking longer to load and reply, then that is dangerous information to your WordPress website positioning. It’s additionally a poor customer expertise, which can have an effect on your conversion charges and gross sales.
There are many methods to spice up WordPress pace and efficiency, together with altering your Imagick settings.
Some web sites have the other downside.
Photographers, artists, and different content material creators could need to present the highest-quality pictures to guests, even when it slows their website. Despite the fact that it usually offers sharper pictures in comparison with GD Library, Imagick should optimize pictures in a method that impacts their high quality.
Irrespective of whether or not you need to prioritize website pace or picture high quality, there’s no built-in solution to change how Imagick manages your pictures.
With that stated, nevertheless, you may examine to see whether or not Imagick is put in and activated in your website, after which customise its settings utilizing a free plugin.
How you can Allow Imagick on Your WordPress Website
The best solution to customise Imagick is by utilizing ImageMagick Engine. This plugin means that you can change how Imagick processes your pictures. For instance, you may usually enhance your website’s loading speeds by telling it to deal with optimizing the picture’s measurement.
The plugin also can disable and allow Imagick with just some clicks. That is excellent if Imagick isn’t already activated in your server.
First, you’ll want to put in and activate the plugin. When you need assistance, then please see our information on find out how to set up a WordPress plugin.
Upon activation, go to Settings » ImageMagick Engine. At this level, you may even see a warning that ‘ImageMagick Engine shouldn’t be enabled.’
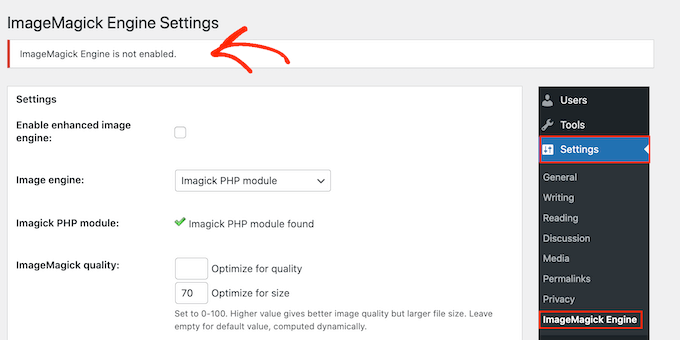
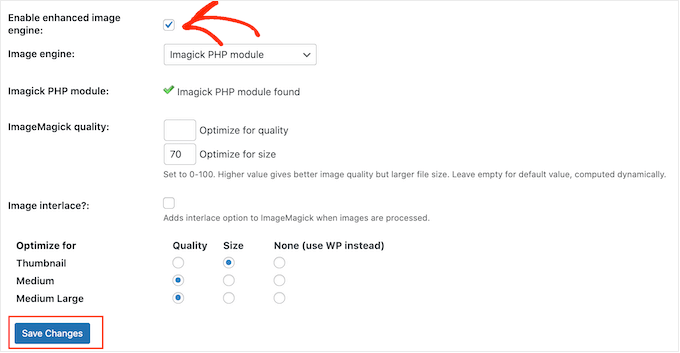
When you get this message, you then’ll must activate Imagick by checking the field subsequent to ‘Allow enhanced picture engine.’
Then, click on on ‘Save Modifications.’
The ‘not enabled’ warning ought to now disappear, which implies you’re able to customise the Imagick settings.
Observe: Do you see an ‘ImageMagick PHP module not discovered’ warning as an alternative? This implies the ImageMagick module isn’t put in in your server. For detailed directions on find out how to add the module, take a look at the FAQs on the finish of this information.
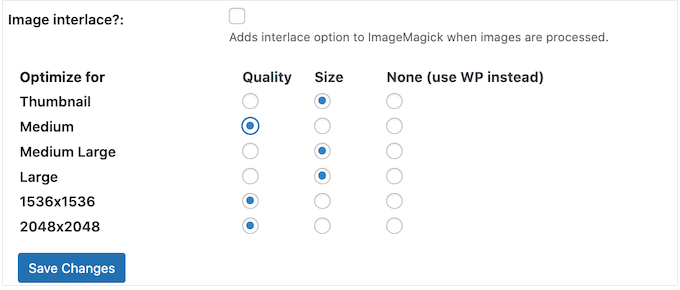
On this display, you’ll see all of the totally different picture sorts that WordPress helps equivalent to thumbnail, medium, and enormous. Now you can select whether or not ImageMagick Engine ought to prioritize high quality or measurement for every picture sort.
If you wish to attempt totally different high quality/measurement settings, then sort some numbers into the ‘Optimize for high quality’ and ‘Optimize for measurement’ packing containers.
You should use any quantity between 0-100. The next ‘Optimize for high quality’ worth will give sharper, higher-resolution pictures however could end in larger recordsdata.
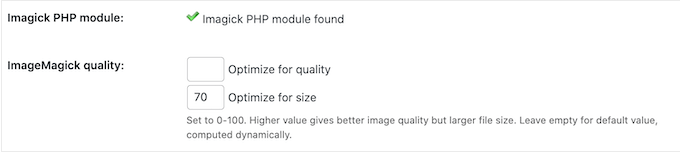
When you’re undecided, then merely depart these packing containers empty and ImageMagick will assign the perfect values to every picture mechanically.
Once you’re proud of how the plugin is about up, click on on ‘Save Modifications.’
By default, ImageMagick will solely apply these settings to new pictures you add to the WordPress media library.
If you wish to replace your present pictures, you then’ll must regenerate them by checking all of the packing containers within the ‘Regenerate Pictures’ part. Then, go forward and click on on ‘Regenerate.’
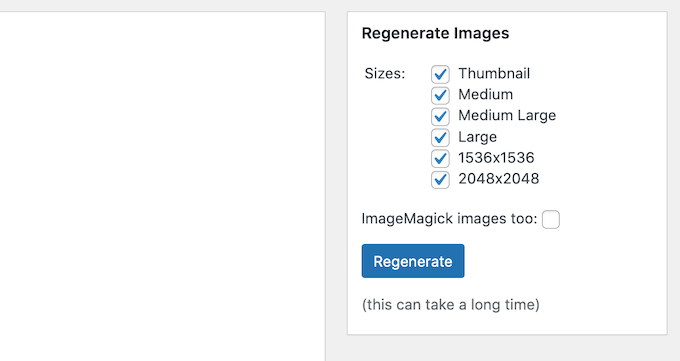
ImageMagick will now regenerate all of your previously-uploaded pictures with the brand new settings.
For extra data on this subject, please see our information on find out how to regenerate thumbnails or new picture sizes in WordPress.
FAQs: How you can Allow Imagick on Your WordPress Website
More often than not, Imagick ought to work within the background with none issues. Nonetheless, it’s nonetheless helpful to know a bit extra about this picture optimization device, and the way it works in your WordPress weblog or web site.
With all that in thoughts, listed here are a number of the most regularly requested questions on utilizing Imagick in your WordPress web site.
What’s the Distinction Between ImageMagick and Imagick?
You’ll usually examine ImageMagick and Imagick in the identical guides, and it’s straightforward to get them combined up.
ImageMagick is a command-line utility for processing, modifying, and managing pictures. It’s obtainable for all totally different sorts of working techniques and can be utilized as a standalone software or a library.
In the meantime, Imagick is a PHP extension of ImageMagick. It makes use of a number of code from ImageMagick and permits customers to work with pictures utilizing the ImageMagick API.
You’ll be able to see the complete Imagick class over within the official PHP documentation.
How Do I Set up the ImageMagick PHP Module on My Server?
When you get an ‘ImageMagick PHP module not discovered’ error, you then’ll want to put in the ImageMagick module on the server. When you don’t have entry to the server, you then’ll must ask the server administrator to put in the module for you.
When you do have entry, then you may set up the module your self.
The method of putting in a brand new module will range relying in your internet hosting supplier. Nonetheless, many of the finest WordPress internet hosting suppliers publish detailed documentation on find out how to customise the server, so it’s at all times price checking their assist guides and web site for extra data.
Relying on the model of PHP you’ve put in in your web site, you’ll want to put in barely totally different modules.
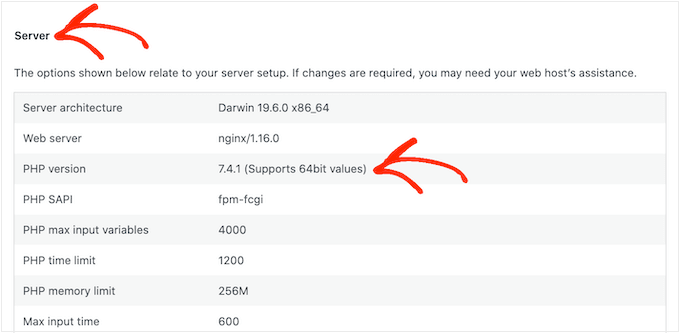
To get your PHP model, merely head over to Instruments » Website Well being within the WordPress dashboard. Then, click on on the ‘Information’ tab.

Right here, discover the ‘Server’ part and click on to broaden.
You’ll discover the data you want underneath ‘PHP Model.’
After getting this data, you’re prepared to put in the ImageMagick PHP module. Usually, this entails logging into the server as root and utilizing SSH instructions.
SSH is brief for ‘safe shell’ which is an encrypted protocol that means that you can hook up with the server utilizing command line instruments. In case you have a Home windows pc then you should use PuTTy, whereas Mac and Linux customers can hook up with the server utilizing Apple’s Terminal app.
To begin, you’ll want the login data for an account that has shell entry. You may get this data out of your internet hosting account’s cPanel dashboard, or by asking your webhosting server supplier.
When you’re logged into the server as a root person, you may set up the module utilizing SSH instructions. You’ll want to make use of totally different instructions relying in your model of PHP, and the bundle supervisor that’s put in in your server.
When you’re undecided in regards to the bundle supervisor, then we suggest contacting your internet hosting supplier for assist.
For example, let’s see how one can set up Imagick for PHP 8.1, utilizing the Superior Bundle Instrument. Within the Terminal or PuTTy window, you’ll must sort within the following command:
Then, press the ‘Enter’ key in your keyboard to run the command.
As soon as it’s completed, you’ll must reload PHP-FPM, which clears the cache. Merely use the next command:
When you’ve executed that, Imagick ought to now be put in in your server. Now you can go forward and allow Imagick in your WordPress web site utilizing the ImageMagick Engine plugin, as described above.
We hope that this text helped you discover ways to allow Imagick in your WordPress website. Subsequent, you could need to see our comparability of the perfect e-mail advertising providers, or see our professional decide of the perfect Instagram WordPress plugins.
When you favored this text, then please subscribe to our YouTube Channel for WordPress video tutorials. You can too discover us on Twitter and Fb.
The submit How you can Allow Imagick on Your WordPress Website first appeared on WPBeginner.

