

Are you searching for a approach to handle adverts in WordPress with AdSanity?
Promoting promoting house is without doubt one of the greatest methods to earn cash on-line. Nonetheless, creating, including, and monitoring your adverts can change into time-consuming and complex.
On this article, we are going to present you how one can simply handle adverts in WordPress utilizing the AdSanity plugin.
Why Handle Adverts in WordPress Utilizing the AdSanity Plugin?
Like billboard homeowners, many web site and weblog homeowners earn cash on-line by promoting promoting house. Nonetheless, WordPress doesn’t include a simple approach to handle your adverts.
Most WordPress themes don’t even have house the place you may present commercials. By default, you’ll need to edit your theme recordsdata to insert advert code into WordPress.
That’s the place AdSanity is available in.
This superior WordPress advert administration plugin means that you can present adverts anyplace in your web site utilizing ready-made blocks, widgets, and shortcodes. You possibly can even inform AdSanity to point out a random advert to guests with out writing a single line of code.
AdSanity comes with built-in reporting and scheduling. It additionally helps self-hosted adverts, HTML5 adverts, and exterior advert networks like Google Adsense.
With that being mentioned, let’s see how one can earn cash on-line by managing adverts with the AdSanity WordPress plugin.
Step 1: Set Up the AdSanity Plugin
First, you’ll need to put in and activate AdSanity. Should you need assistance, then please see our information on the way to set up a WordPress plugin.
Upon activation, it is advisable go to AdSanity » Settings in your WordPress admin dashboard. Right here, choose the ‘Licenses’ tab.
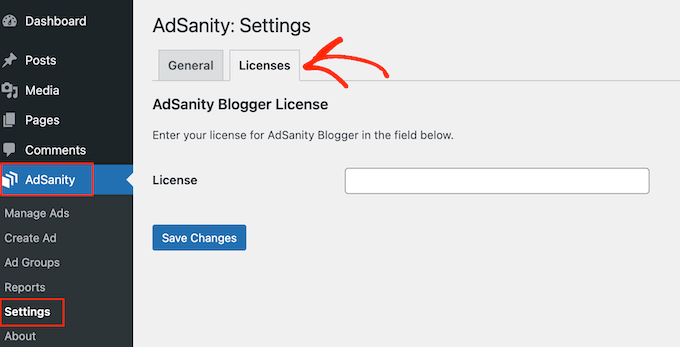
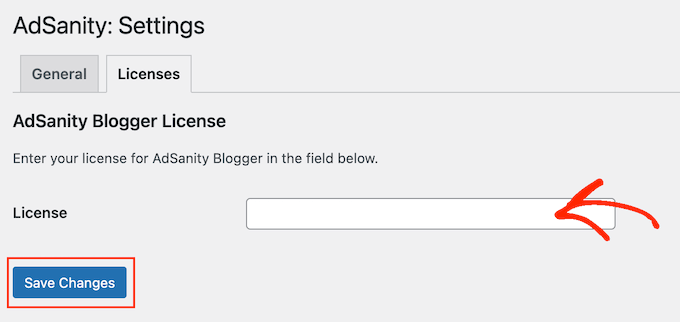
Now you can go forward and add your key to the ‘License’ area. Yow will discover this info underneath your account on the AdSanity web site.
With that finished, click on on ‘Save Modifications’.
Now, you might be able to create adverts to your WordPress web site. To get began, go to AdSanity » Create Advert.
To begin, you’ll need so as to add a title by typing it into the sphere that reveals ‘Give this advert a title’. Guests gained’t see this info, so it’s to your reference solely.
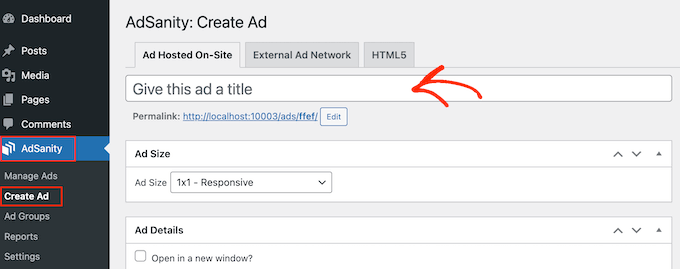
Subsequent, it’s time to decide on an advert sort. Your choices are Advert Hosted On-Web site, Exterior Advert Community, and HTML5.
In case you are simply getting began, then it’s a good suggestion to strive various kinds of adverts. You possibly can then have a look at the outcomes and prioritize the categories that take advantage of cash.
With that in thoughts, let’s have a look at every possibility intimately.
Advert Hosted On-Web site
To begin, it’s possible you’ll need to construct and host your personal advert in your web site. By promoting adverts in your WordPress weblog, you get to maintain all of the income.
You too can use self-hosted adverts to advertise your personal content material. This consists of merchandise you promote in your on-line retailer or your upcoming webinars, conferences, and different occasions.
To create a self-hosted advert, choose the ‘Advert Hosted On-Web site’ tab. After that, you may open the ‘Advert Dimension’ dropdown and select a measurement from the listing.
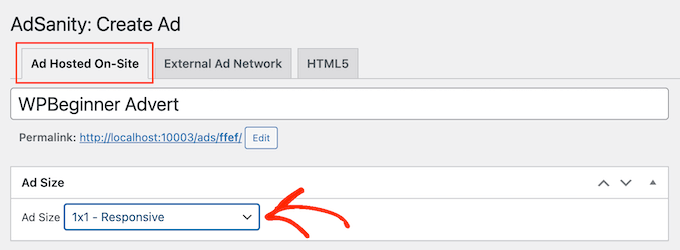
Bigger commercials usually tend to catch the customer’s consideration however also can distract out of your website’s content material.
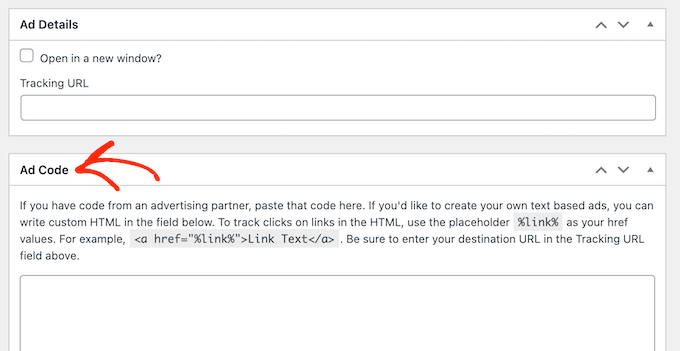
After making a choice, you’ll need to sort a URL into the ‘Monitoring URL’ area. That is the place guests will go once they click on the advert.
By default, the URL will open in the identical browser tab. Nonetheless, it’s possible you’ll need to open it in a brand new tab, notably if the commercial is linking to another person’s web site.
For instance, in case you are linking to an affiliate internet marketing associate, then you’ll usually need to verify the ‘Open in a brand new window’ field.
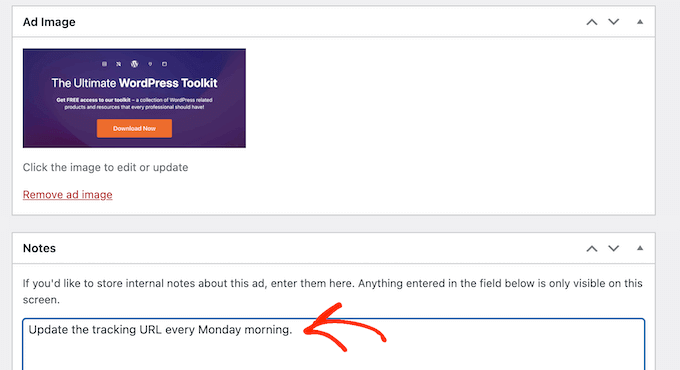
After getting finished that, it’s time to add the picture that AdSanity will present to guests.
Merely choose ‘Set a picture’ after which add a banner or different advert graphic.
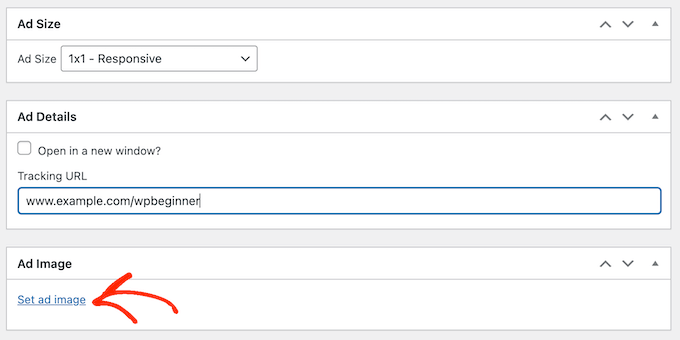
Lastly, it’s possible you’ll need to sort some info into the ‘Notes’ area.
These notes will solely be seen to individuals who have entry to the WordPress dashboard, so it’s good for writing fast reminders.
Should you run a multi-author WordPress weblog, then you may even use the ‘Notes’ area to speak with different customers.
Exterior Advert Community
Whilst you can promote promoting house on to different companies, many web site homeowners use an promoting community as an alternative. These networks are sometimes hassle-free since you don’t need to take care of advertisers or fear about gathering cash.
As a substitute, the community decides which adverts to position in your website, collects the cost, takes their administration price, after which sends you the remaining.
In case you are utilizing an promoting community, then click on on the ‘Exterior Advert Community’ tab.
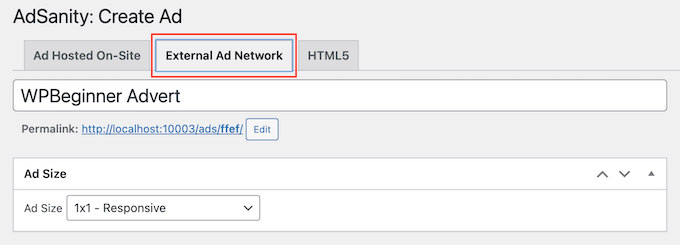
Now you can sort a title into the ‘Title’ area.
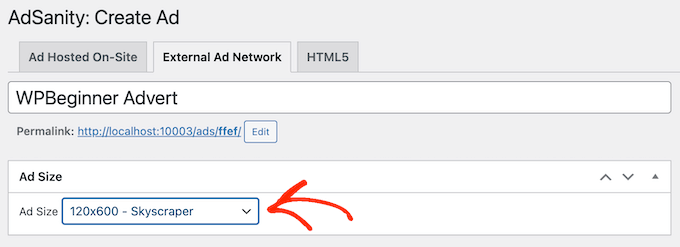
After that, you may select a measurement to your adverts. In case you are utilizing Google AdSense, then it’s possible you’ll need to see our information on the highest-performing Google AdSense banner sizes and codecs.
You too can see our information on the way to optimize your AdSense income in WordPress.
After getting finished that, it’s time to repeat the commercial code offered by your community. The steps will differ relying on the community you might be utilizing, however you’ll typically discover the advert code by logging into the account you could have created with that community.
In case you are utilizing Google AdSense, then see our information on the way to correctly add Google AdSense to your WordPress website.
When you could have the code, merely paste it into the ‘Advert Code’ field.
Lastly, you may sort any additional info into the ‘Notes’ area.
HTML5 Ads
If you wish to create multimedia adverts that includes a mixture of animations, audio, video, and different content material, then AdSanity has full assist for HTML5. This implies you may create partaking, interactive adverts utilizing HTML5 after which add these recordsdata to AdSanity.
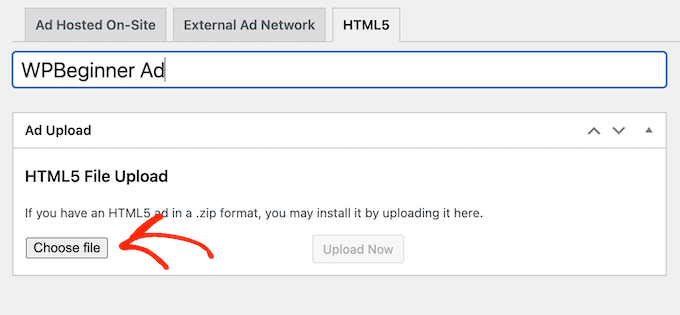
So as to add an HTML5 advert to your WordPress weblog or web site, merely choose the ‘HTML5’ tab.
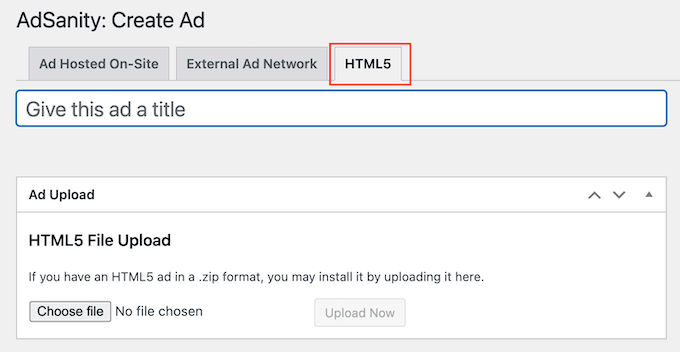
Now you can sort in a title for the advert.
After that, click on on ‘Select File’ after which choose the HTML5 file you need to use.
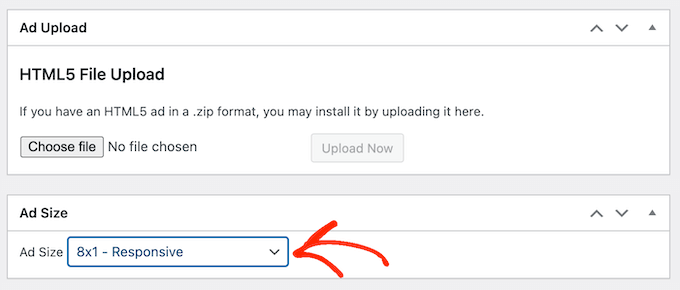
With that finished, it is advisable open the ‘Advert Dimension’ dropdown and select how massive or small the HTML5 advert needs to be.
When creating an HTML5 commercial, we suggest utilizing one of many ‘Responsive’ measurement choices, as these are inclined to look the most effective.
Lastly, it’s possible you’ll need to add some notes by typing them into the ‘Notes’ field.
Step 2: Set up Your Ads Into Advert Teams
As you create self-hosted, exterior community, or HTML5 adverts, it’s a good suggestion to arrange these commercials into teams.
For instance, you may create a ‘vacation commercials’ group for all of the campaigns you run in the course of the vacation season. This may make it simpler to discover a particular advert, even when you have created a number of commercials for WordPress.
To create an advert group, click on on the ‘Add New Group’ hyperlink. Now you can sort within the title for it.
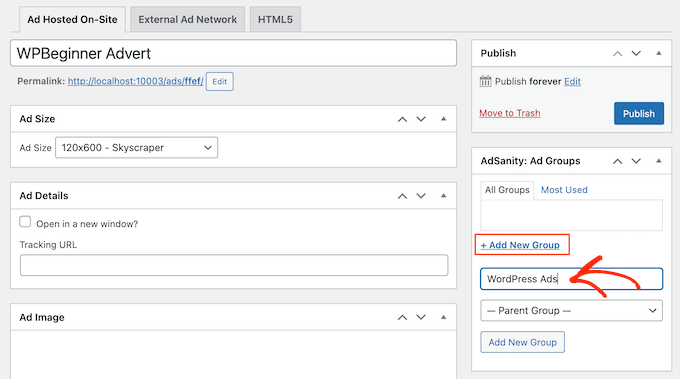
Identical to WordPress classes and subcategories, you may organize your commercial teams into parent-child relationships.
By default, all of AdSanity’s teams are father or mother teams. If you wish to create a toddler group as an alternative, then merely open the dropdown that reveals ‘Father or mother Group’ by default.
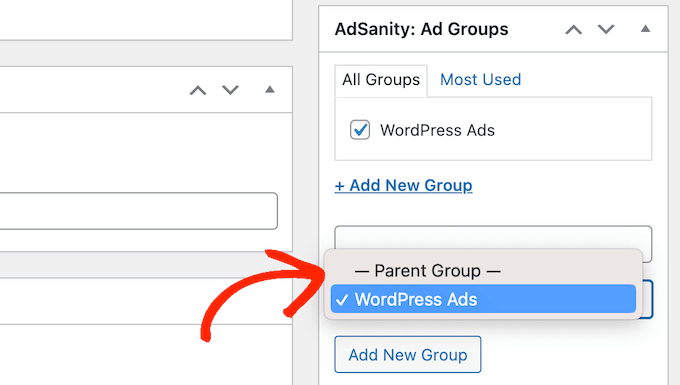
You possibly can then choose the group you need to use because the father or mother.
If you find yourself proud of how your commercial group is about up, click on on the ‘Add new Group’ button to avoid wasting your modifications.
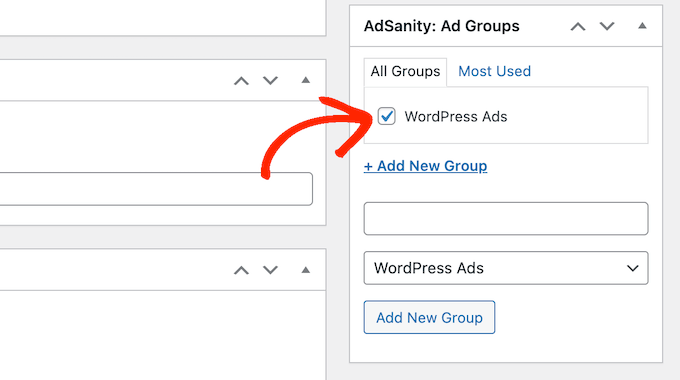
So as to add a self-hosted, exterior, or HTML5 advert to a bunch, merely verify that group’s field.
Step 3: Publish or Schedule a WordPress Advert With AdSanity
If you find yourself completely happy together with your advert, it’s time to make it dwell. If you wish to present the advert immediately, then merely click on ‘Publish’.

Another choice is to schedule the advert so that it’s going to seem in your website routinely later. This lets you schedule all of your campaigns upfront, which is a good possibility should you run a number of campaigns or you’re a busy enterprise proprietor with restricted time.
To schedule an advert, click on on the ‘Edit’ hyperlink subsequent to ‘Publish ceaselessly.’

Now you can set the date and time when the advert will go dwell.
You too can select when the advert will get eliminated out of your web site.
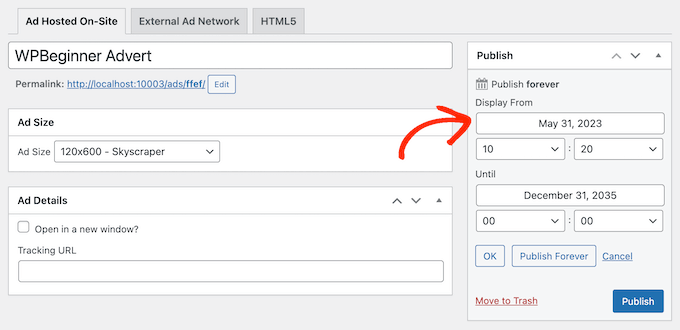
If you wish to preserve the advert in your website indefinitely, then click on on the ‘Publish Endlessly’ button.
If you find yourself completely happy together with your schedule, merely click on ‘Publish.’
Step 4: Putting the Advert on Your WordPress Web site
The subsequent step is putting the advert in your on-line market, retailer, or web site. You should utilize shortcode, however utilizing the ready-made AdSanity blocks is usually simpler.
So as to add an commercial to a web page or publish, merely open that publish or web page for enhancing. Then, click on on the ‘+’ button.
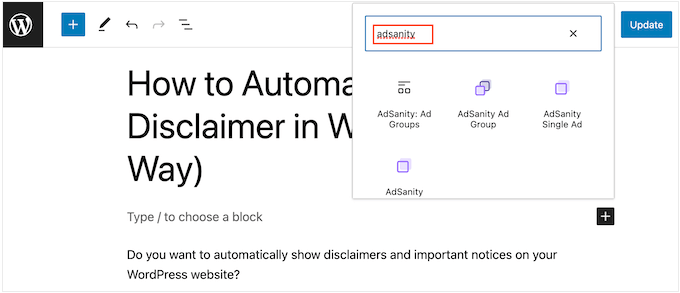
To begin, sort in ‘AdSanity.’
You’ll now see all of the completely different AdSanity blocks that you should use.
So as to add a particular advert, choose AdSanity Single Advert.
Now you can open the ‘Choose an advert’ dropdown and select the commercial that you just need to present. You too can change the advert’s alignment utilizing the ‘Align’ settings.

Another choice is to point out commercials from the identical advert group. This lets you show a number of associated adverts on the identical web page or publish.
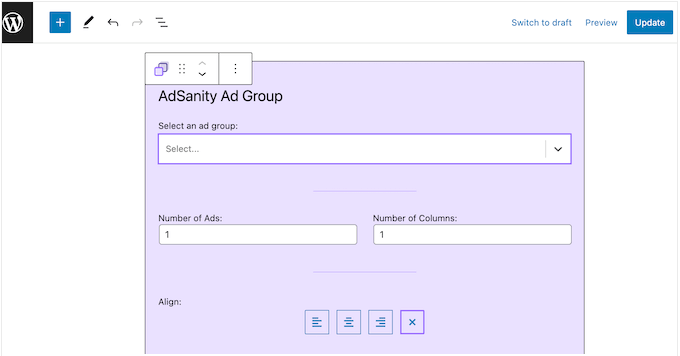
To do that, click on on ‘AdSanity Advert Group’, which provides the block to your format.

You possibly can then open the ‘Choose an advert group’ dropdown and select the group you need to use.
You too can choose what number of adverts to point out within the block and what number of columns to make use of within the promoting space.
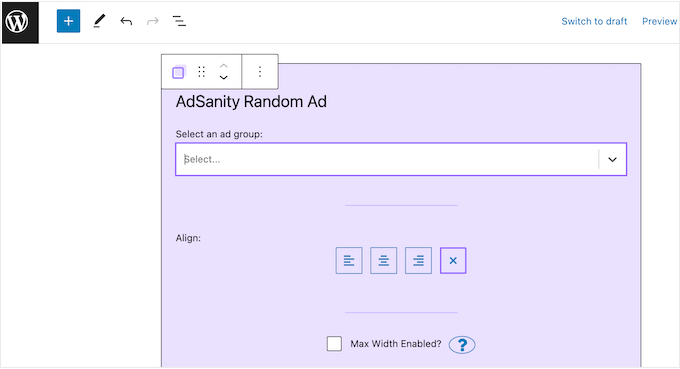
Lastly, you may present a random commercial from a specific group utilizing the AdSanity Random Advert block. That is helpful when you have created many alternative adverts however have restricted promoting house in your web site.
Within the popup, merely click on the ‘AdSanity Random Advert’ block.
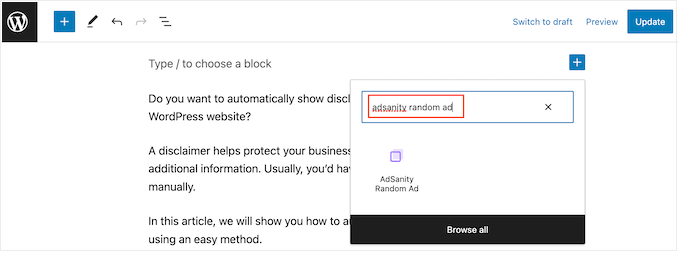
Now you can open the ‘Choose an advert group’ dropdown menu and select the group that you just need to use.
As soon as once more, you may change the commercial’s alignment utilizing the small icons within the ‘Alignment’ part.
If you find yourself proud of how the web page or publish appears to be like, both click on on ‘Publish’ or ‘Replace’ to make the commercial dwell.
You too can add the AdSanity blocks to any widget-ready space in your WordPress theme. For step-by-step directions, please see our information on the way to add and use widgets in WordPress.
Are you utilizing a block-based theme? You too can use the full-site editor so as to add an AdSanity block anyplace in your web site.
Lastly, you may embed a single advert on any web page, publish, or widget-ready space utilizing a shortcode. Merely head over to AdSanity » Handle Adverts and discover the advert that you just need to present.
You possibly can then go forward and click on on ‘[shortcode]’. It will copy the advert’s shortcode to your laptop’s clipboard.
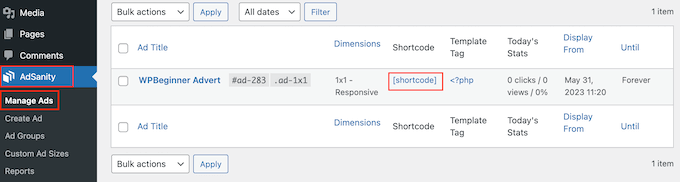
Now, you simply want so as to add the shortcode to your web site. For step-by-step directions, please see our information on the way to add a shortcode in WordPress.
Step 5: Monitor Your WordPress Adverts Utilizing AdSanity and MonsterInsights
After publishing a number of adverts, it’s essential to do conversion monitoring. This lets you see what’s working and what isn’t. By repeatedly monitoring and fine-tuning your adverts, it is best to get extra clicks and conversions.
In case you are exhibiting HTML5 adverts or adverts from an exterior promoting community, then you’ll need to arrange AdSanity’s Google Analytics Monitoring Addon. This lets you observe views and clicks on these commercials.
Merely set up and activate the plugin, after which comply with the onscreen directions to arrange the add-on. In case you are utilizing MonsterInsights, then the AdSanity Addon will acknowledge the connection as quickly as you authenticate your Google account, which makes the setup course of a lot simpler.
For extra info, please see our information on the way to set up Google Analytics in WordPress.
For self-hosted adverts, you may merely go to AdSanity » Experiences in your WordPress dashboard.
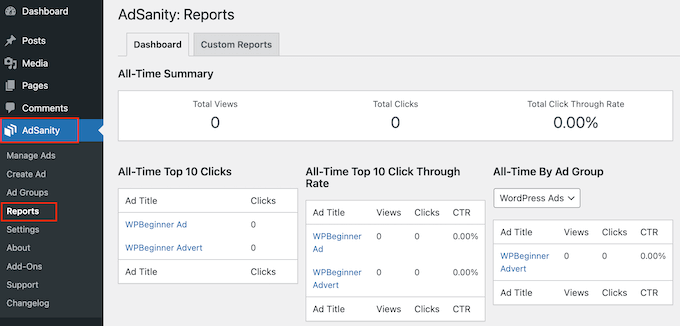
Right here, you can find the next info:
All-Time Abstract: The entire views and clicks throughout all of your adverts, plus the whole click-through fee.All-Time Prime 10 Clicks: The ten adverts that have gotten essentially the most clicks.All-Time Prime 10 Click on By Fee: The ten adverts which have the very best interplay fee based mostly on their show fee. Right here additionally, you will discover the whole views, clicks, and the click-through fee.All-Time By Advert Group: The ten best-performing adverts in every advert group, based mostly on views, clicks, and click-through fee.
We hope this text helped you learn to handle adverts in WordPress with the AdSanity plugin. You might also need to try our information on the way to enhance your weblog site visitors and our professional picks for the most effective WordPress popup plugins.
Should you preferred this text, then please subscribe to our YouTube Channel for WordPress video tutorials. You too can discover us on Twitter and Fb.
The publish Learn how to Handle Adverts in WordPress with Adsanity Plugin first appeared on WPBeginner.

