
When you’ve ever tried constructing an internet group in your WordPress web site, you know the way exhausting it’s to maintain individuals engaged. At first, some members join and put up a number of updates, however earlier than lengthy, exercise drops off and the group goes quiet. 📉
The difficulty isn’t your content material or thought. It’s the expertise. Most individuals don’t wish to preserve opening a browser simply to see what’s new or reply to messages.
I wished to repair this drawback, so I attempted BuddyBoss, a software that may flip any WordPress web site right into a cellular app.
Inside about an hour, I had the app absolutely configured and able to undergo the app shops. It got here with push notifications, instantaneous messaging, and all of the options members truly wish to use.
The engagement increase was rapid and noticeable. And after seeing how effectively it labored, I’m assured it could actually make it easier to get higher outcomes, too.
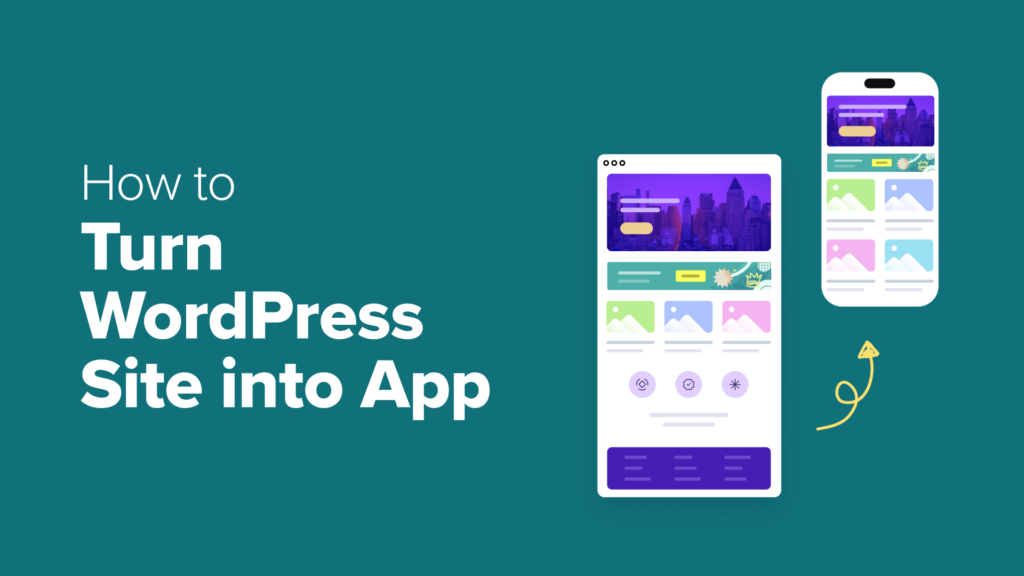
On this information, I’ll present you precisely easy methods to flip your WordPress web site into an app, with no coding or technical expertise required.
Notice: The technical setup on this information takes about an hour. Please remember the fact that getting your app reside includes ready for approval from Apple and Google. This will take a number of days, so it’s good to plan for that ready time.
💡Fast Abstract: What You Have to Flip Your WordPress Website into an App
In a rush and simply need the brief model? Right here’s what you’ll want:
A WordPress group web site (for instance, a discussion board or membership web site).
The BuddyBoss App, which converts your web site into native iOS and Android apps — no coding or developer required.
You may discover different strategies like Progressive Net Apps (PWAs) or full {custom} app growth, however these take extra time and price much more.
For many WordPress customers, BuddyBoss is the quickest and most beginner-friendly answer.
Why Flip Your WordPress Group Web site right into a Cell App?
Turning your WordPress group web site right into a cellular app can immediately increase engagement and preserve members coming again.
Apps make it simpler for customers to remain linked, particularly on their telephones, the place most on-line interactions occur right now.
A cellular app outperforms a daily web site as a result of it presents:
🔔 Push notifications that allow you to attain members immediately with updates or messages.
📶 Offline entry in order that customers can browse or learn some content material even with out the web.
📤 Simple content material sharing to encourage extra interplay and visibility.
🎯 Personalised in-app experiences that make your group really feel extra dynamic
Let’s see how a cellular app compares to an ordinary web site and why it makes such a huge impact:
Key takeaway: In case your web site isn’t getting a lot exercise, then turning it right into a cellular app can improve engagement. Plus, you get to spice up retention and construct stronger loyalty throughout your membership, social, or eLearning platform.
Completely different Methods to Construct a WordPress App (and the One That Works Finest)
There are a number of methods to show your WordPress web site right into a cellular app, however not all of them are beginner-friendly or definitely worth the effort.
After testing totally different strategies, I discovered that BuddyBoss App presents the perfect steadiness of simplicity, options, and outcomes.
Right here’s a fast have a look at your choices and what to anticipate from every:
Why I Advocate BuddyBoss App

BuddyBoss is essentially the most highly effective WordPress group platform on the market. It’s constructed for creating membership websites, social networks, and on-line studying platforms, multi function place.
The BuddyBoss App takes that have to cellular. It allows you to flip your WordPress web site right into a native iOS and Android app with out writing any code. The whole lot, together with your customers, content material, programs, and personal messages, syncs routinely between your web site and the app.
Right here’s what makes it stand out:
No coding required: The BuddyBoss workforce handles the whole app construct for you.
On the spot syncing: Retains your WordPress content material, customers, and options updated in actual time.
Constructed-in group instruments: Consists of messaging, course integrations, and push notifications.
Simple customization: Use the drag-and-drop builder to design your app’s look and structure.
In brief, BuddyBoss App offers you all the advantages of a custom-built cellular app with out the fee, complexity, or coding complications.
✅Earlier than You Start: Setup Guidelines + Prices
Earlier than I present you easy methods to flip your WordPress group right into a cellular app, I wish to ensure you’ve obtained the whole lot prepared. That’s why I’ve put collectively a guidelines and a practical breakdown of the primary prices so you already know precisely what to anticipate earlier than getting began.
You’ll want the next earlier than you start:
💰 Value Breakdown: How A lot Does It Value to Construct a BuddyBoss Group App?
When you haven’t constructed your group web site but, then check out our step-by-step tutorial on easy methods to create your individual personal group in WordPress.
If you have already got one, then your most important new prices will simply be the BuddyBoss App subscription and developer accounts.
Whereas the BuddyBoss App subscription is a big funding, it’s essential to keep in mind that hiring a developer to construct an app prices hundreds of {dollars}.
For many enterprise house owners, utilizing a software like BuddyBoss is a a lot sooner and extra reasonably priced approach to get an expert app.
Tips on how to Create a Cell App Utilizing BuddyBoss
Now that you’ve got the whole lot prepared, let’s soar into the precise methodology I’ve examined for making a group app from a WordPress web site.
Step 1: Set up and Join the BuddyBoss App Plugin
Earlier than your group can go cellular, that you must hyperlink your WordPress web site to the BuddyBoss App. Consider it as connecting your web site and cellular app to allow them to work collectively.
To do that, set up and activate the BuddyBoss App plugin. Remember that you’ll be able to solely entry this software after you buy your BuddyBoss App subscription.
To get the BuddyBoss App, log in to your BuddyBoss account and change to the ‘Downloads’ tab within the left column. Then, click on the ‘Obtain’ button subsequent to the plugin.
As soon as downloaded, you’ll be able to set up it in your WordPress web site similar to some other software. For particulars, see our tutorial on putting in WordPress plugins.

Upon plugin activation, head over to the BuddyBoss App » Join web page in your WordPress dashboard.
Right here, that you must add your BuddyBoss App ID and App Key to attach the platforms.

To search out these, return to your BuddyBoss account and change to the ‘Apps’ tab.
Then, click on the ‘Handle’ button subsequent to the BuddyBoss App that you just simply downloaded.

It will open a immediate displaying your App ID and App Key.
Merely copy them and paste them into your WordPress dashboard to finish the connection.

As soon as that’s completed, change to the ‘Configure’ tab on the prime.
Right here, you’ll be able to enter a reputation on your app within the ‘App Icon Identify’ subject. That is the title that can seem alongside your app icon within the Apple App Retailer and Google Play Retailer.
Select a reputation that’s related, straightforward to recollect, and immediately recognizable to your viewers.

Step 2: Configure iOS Settings (Apple Developer Account)
As soon as your WordPress web site is linked to the BuddyBoss App, it’s time to get your iOS settings prepared. This step is essential if you need your group app to seem within the Apple App Retailer.
Essential: Remember that you’ll be creating a number of particular codes referred to as API keys, IDs, and secrets and techniques. Don’t fear, it’s simpler than it sounds.
Consider these as distinctive digital passkeys that permit your BuddyBoss app, your WordPress web site, and the Apple App Retailer discuss to one another securely.
When you solely plan to create an Android app, you’ll be able to skip this step.
1. Create an Apple Developer Account
First, you want an Apple Developer Account. This allows you to publish apps, handle updates, and entry Apple’s instruments.
I had to enroll myself when testing this methodology, and it’s fairly simple. You simply have to observe the onscreen prompts to produce your private particulars and make contact with particulars. Remember that approval can take one or two days.

2. Join Apple Developer Account to BuddyBoss
Subsequent, you’ll join your Apple Developer account to BuddyBoss. For that, go to the BuddyBoss App » Configure » iOS web page out of your WordPress dashboard.
Right here, you’ll add your Issuer ID, Key ID, and add the API key that you just generate in Apple’s App Retailer Join.

To get these, log in to your Apple Developer account and change to ‘App Retailer Join’ tab from the left column.
It will take you to a brand new display the place you need to click on ‘Customers and Entry.’

On the following web page, change to the ‘Keys’ tab.
You’ll now see an inventory of lively keys. Go forward and click on the + icon to create a brand new one.
It will open a popup in your display, the place you can begin by giving a reputation to your API key. I recommend utilizing an simply identifiable title like “BuddyBoss” or the title of your app so you’ll be able to acknowledge the API key should you ever wish to edit or delete it.
After that, select ‘App Supervisor’ from the ‘Entry’ dropdown and click on the ‘Generate’ button.

Upon era, the API key will likely be displayed within the record of lively keys. From right here, click on the ‘Obtain API Key’ button.
Then, copy the Key ID from the identical row. You can too discover the Issuer ID on the prime of this web page.

Now, return to your WordPress dashboard and paste the Issuer ID and Key ID.
After that, add the API key file, and click on the ‘Join Account’ button. As soon as that is completed, your iOS account is linked to your BuddyBoss App.

3. Configure Bundle ID, Signing Certificates & Provisioning Profiles
Now that you must arrange your Bundle ID, signing certificates, and provisioning profiles. These could sound technical, however right here’s a easy approach to perceive them:
Bundle ID is like your app’s passport — it offers it a singular identification.
Signing certificates act as your digital signature to show that the app was created by you.
Provisioning profiles are like entry passes that inform Apple which gadgets can set up or take a look at your app.
Fortunately, BuddyBoss simplifies this course of by offering a video tutorial immediately in your dashboard. It walks you step-by-step via including all this info.
I discovered this tremendous useful when establishing my very own app, because it guides you precisely the place to click on and what to enter.

4. Create Your App in App Retailer Join
After finishing that, you’ll want so as to add your app info. Go to your Apple developer account and change to the App Retailer Join » My Apps web page.
As soon as you’re on the brand new display, click on the + icon to create a brand new app.
A popup will now seem, the place you should enter the app title, choose iOS because the platform, select a main language, and add your Bundle ID.
You additionally need to set consumer entry to Full Entry. Then, merely click on the ‘Create’ button.

5. Add App ID and Shared Secret in BuddyBoss
As soon as your app is created, click on on it to open its settings on the web page.
From right here, change to the ‘App Data’ tab and duplicate your App ID.

Then, change to the ‘Supervisor’ tab from the left column.
Go forward and click on the ‘App-Particular Shared Secret’ button. It will open a immediate from the place you’ll be able to simply generate and duplicate the important thing.

After that, paste your App ID and App-Particular Shared Secret into your WordPress dashboard, and click on ‘Save Adjustments.’
6. Register Your iOS Gadget for Testing
As soon as that’s completed, it’s time so as to add your iOS system.

This step is essential as a result of registering your iPhone or iPad with Apple allows you to take a look at the app on an actual system earlier than it goes reside.
With out this, you’ll be able to’t be sure the whole lot works correctly on your group members.
Merely change to the ‘iOS Gadgets’ tab in your BuddyBoss dashboard. Right here, you’ll have to register your iOS system in your Apple Developer account.

BuddyBoss makes this simpler by offering a step-by-step video tutorial proper in your dashboard.
You may observe this information to register your system and guarantee the whole lot is about up accurately for testing.
Step 3: Set Up Android Configuration (Google Play Console)
If you need your app to be accessible on the Google Play Retailer, then you definately’ll additionally have to configure your Android app settings in BuddyBoss. Begin by switching to the ‘Android Settings’ tab on the prime of your BuddyBoss dashboard.
Right here, you’ll have to add your Service Account key. It’ll join your Google Developer account to BuddyBoss so your app can sync accurately.

1. Create Your App in Google Play Console
To do that, go to your Google Play Developer Account dashboard.
Right here, click on the ‘Create app’ button to start out constructing your app.

You’ll now be taken to a brand new display the place you need to give your app a reputation — this title will seem on Google Play, so make it clear and recognizable.
Subsequent, select the default language on your app and set it to ‘Free’ so everybody can obtain it. When you ever wish to begin incomes out of your app, you’ll be able to simply change these settings later.
After checking the declarations packing containers, click on ‘Create App.’

As soon as your app is created efficiently, go to the Settings » API Entry web page from the left column and choose the ‘Create New Mission’ button.
Go forward and click on the ‘Hyperlink Mission’ button on the backside of the web page.

2. Create Your Service Account in Google Cloud Platform
To create the service account, first log in to your Google Cloud Platform dashboard. As soon as you’re there, change to the ‘Service Accounts’ tab within the left column.
Go forward and click on the ‘+ Create Service Account’ button.

As soon as you’re on a brand new web page, give your account a reputation (I like to recommend utilizing your app title), and add an outline if you need.
Then, click on the ‘Create’ button.

Within the subsequent step, you should choose the consumer roles that can have entry to this service account.
Merely choose Proprietor, then click on Proceed. Lastly, click on the ‘Executed’ button.

3. Generate and Obtain the JSON API Key
Your account will likely be created and proven in a row on the Service Accounts web page. Now it’s time to construct an API key for it.
To do that, simply click on the three-dot icon beneath Actions and choose ‘Handle Keys.’

It will take you to a brand new display the place you need to click on the ‘Add Key’ button.
As soon as a immediate opens up, select ‘JSON’ as your key sort and click on the ‘Create’ button. Upon creation, your JSON key will routinely obtain to your pc.

4. Join JSON Key With BuddyBoss
Now return to your WordPress dashboard and add this JSON key to the Service Account Key subject.
It will simply join your Google Developer Account with BuddyBoss.

5. Add Software ID
Upon getting efficiently linked, scroll down so as to add your Software ID. This can be a distinctive identifier on your app — consider it like your app’s official ID within the Google Play Retailer.
You’ll have to sort it your self, and it should observe an ordinary ‘reverse area title’ format. This normally appears to be like like com.yourcompany.yourappname.
For instance, if your organization is ‘My Superior Group’, you may use com.myawesomecommunity.app.
Guarantee your app follows the factors listed within the app configuration part to allow Google Play to acknowledge it accurately.

6. Generate KeyStore and Full Setup
Subsequent, you’ll add your KeyStore info. It is sort of a digital certificates on your app that proves you’re the proprietor and ensures any future updates are acknowledged as coming from you.
With out it, Google Play gained’t enable updates to your app.
With BuddyBoss, you’ll be able to simply add your KeyStore info. Simply click on the ‘Generate KeyStore’ button beneath the Import part.

You’ll be directed to a brand new web page the place you need to scroll right down to the ‘Certificates Data’ part.
Fill in your first and final title, your group (you need to use your app title), and some other required information. Then click on ‘Generate’.

As soon as your KeyStore is created, obtain the file to your pc.
Return to the KeyStore part in BuddyBoss, add the file, and click on the ‘Save Adjustments’ button. Your Android developer account is now absolutely linked with BuddyBoss.

Step 4: Configure Firebase to Ship Push Notifications With Your App
The most effective methods to maintain customers coming again to your app is thru push notifications. They’re these little reminders that permit your group learn about new posts, messages, or occasions.
To make this work on each iOS and Android, you’ll have to combine your BuddyBoss app with Google Firebase. It’s a free software from Google that handles real-time push notifications.
First, change to the Google Firebase tab from the highest of your BuddyBoss dashboard. You’ll now want so as to add your Firebase Server Key to attach it along with your BuddyBoss App.

1. Create Your Firebase Mission
To get that key, go to the Firebase Console and create a free account.
When you try this, click on the ‘Get began by establishing a Firebase mission’ button.

Firebase will now ask you to call your mission. I like to recommend utilizing your app’s title so you’ll be able to simply acknowledge it later. Then, click on ‘Proceed.’
Subsequent, Firebase will ask if you wish to allow Google Analytics for this mission. This may be useful if you wish to observe app utilization.

2. Entry Firebase Cloud Messaging Settings
As soon as the mission is about up, open it and click on the gear icon on the prime left nook to entry its settings. Then change to the ‘Cloud Messaging’ tab.
Right here, you’ll discover your Server Key. Merely copy it and paste it into your BuddyBoss settings web page to hyperlink the 2 platforms.

3. Register Your Cell Apps in Firebase
Subsequent, return to your Firebase Mission Overview and open the ‘Normal’ tab. Scroll right down to the ‘Your Apps’ part. That is the place you’ll register your cellular apps.
You’ll have to create 4 apps in complete: one most important and one take a look at model for each Android and iOS. Ensure the bundle IDs and package deal names match those you utilized in your BuddyBoss and developer account settings.
You’ll see platform icons right here. Click on the ‘Android’ icon so as to add your Android app and the ‘iOS’ icon to create your Apple app.

4. Create iOS and Android App Entries
When you’re making a Firebase iOS app, enter your iOS Bundle ID, App Nickname, and App Retailer ID (you will discover these in your Apple Developer account).
Then click on the ‘Register App’ button.

Firebase will ask you to obtain a configuration file. Go forward and reserve it to your pc.
You’ll then repeat this course of to create one other iOS app, however this time add .take a look at on the finish of the Bundle ID (for instance: com.yourappname.take a look at). Register and obtain that one as effectively.
Observe the identical steps on your two Android apps — one for manufacturing and one for testing — and obtain each configuration information.

5. Add iOS APN Authentication Key
When you’ve created all 4 apps, return to the ‘Cloud Messaging’ tab in Firebase. You’ll now see your iOS apps listed beneath the server key part.
To ship push notifications to Apple gadgets, you’ll additionally want so as to add your APN authentication key. You may obtain this key out of your Apple Developer account after which add it right here to Firebase.

💡 Professional Tip: Earlier than transferring ahead, double-check your Bundle IDs (for iOS) and Package deal IDs (for Android). In the event that they don’t match precisely, Firebase will present errors, and your push notifications gained’t work.
6. Add Firebase Config Information to BuddyBoss
Lastly, return to your WordPress dashboard and add all of your iOS and Android configuration and take a look at information that you just downloaded earlier. Then click on ‘Save Adjustments.’
That’s it — Firebase is now efficiently linked, and your BuddyBoss app can begin sending push notifications to your customers on each iOS and Android.

Step 5: Customise Your App Settings and Notifications
When you’ve arrange push notifications with Firebase, it’s time to regulate some essential app settings inside your BuddyBoss dashboard.
Go to the BuddyBoss App » Settings web page. Right here, scroll down and examine the ‘Allow Registration’ field to permit non-members to create new accounts immediately from the app.
Then, choose your registration web page from the dropdown. When you haven’t created a registration web page with BuddyBoss but, you’ll be able to watch the tutorial linked there.

After that, examine the field to ship a affirmation e-mail to customers upon profitable registration.
Subsequent, examine the ‘Privateness’ choice to make your app accessible solely to logged-in members. Which means solely registered and logged-in members will have the ability to view your group.

Subsequent, open the ‘Suggestions’ tab. When you’d like customers to share their ideas immediately from the app, examine the ‘Ship Us Suggestions’ choice.
Ensure to additionally enter the e-mail tackle the place you wish to obtain these messages.

You can too allow a ‘Report a Bug’ menu so customers can simply flag issues.
I additionally recommend including the ‘Fee This App’ choice for each iOS and Android.

After that, change to the ‘Good Banner’ tab. When this selection is turned on, guests shopping your web site on a cellular system will see a small banner that promotes your app.
You may allow it for each iOS and Android. When you want, you can even prohibit this banner so it solely seems to logged-in members. Don’t overlook to click on ‘Save Adjustments’ when you’re completed.

Lastly, head over to the ‘Push Notifications’ tab. Right here, you’ll be able to select which actions will set off notifications.
For instance, when a member is talked about in a put up, invited to affix a gaggle, or receives a reply. Simply examine the packing containers for the notifications you wish to allow and click on ‘Save Adjustments’ once more.

Step 6: Customise the Branding and Design of Your App
Now it’s time to make your group app actually really feel like your model. For this, go to the BuddyBoss App » Branding web page in your WordPress dashboard.
BuddyBoss offers you full management over how your app appears to be like on cellular. You may add logos on your house display, login display, launch display, and extra.
I like to recommend utilizing the identical emblem or icon that you just use in your web site in order that your group members immediately acknowledge your model once they open the app.
For the login display, you can even add a {custom} background picture.
Select one thing that displays your model’s colours and magnificence — it’s a small contact that helps make your app extra memorable {and professional}.
Subsequent, change to the ‘Colours’ tab from the highest.
From right here, you’ll be able to set your app’s background, alternate background, button, and accent colours. You can too customise colours on your navigation menu, prime bar, buttons, and textual content to match your model’s coloration palette.

Then, open the ‘Typography’ tab. Right here, you’ll be able to select totally different fonts on your physique textual content, headings, prime bar, and menus.
You may even regulate the default font dimension to make your textual content straightforward to learn. While you’re completed, don’t overlook to click on ‘Save Adjustments’ to use your design.

After that, head over to the ‘High Bar’ web page. That is the primary navigation bar that seems on the prime of your app.
I like to recommend including your most essential pages right here, such because the Dwelling, Profile, or Account web page.

Then, change to the ‘Extra Display screen Construction’ from the dropdown menu. Right here, you’ll be able to add the remainder of your pages — like Weblog, Notifications, Exercise, and Boards. These will seem when customers faucet the Extra icon in your app.
You may construction your app’s navigation similar to you’ll create a menu in WordPress. When you need assistance, try our tutorial on easy methods to create a navigation menu in WordPress for steerage.

Step 7: Create Pages for Your App
As soon as your branding is prepared, it’s time to start out constructing the precise pages of your app.
Head over to the BuddyBoss App » App Pages display out of your WordPress dashboard and click on the ‘Add New’ button.

It will open the acquainted WordPress block editor, the place you’ll be able to simply drag and drop blocks from the left column to design your cellular app web page.
When you scroll down, you’ll additionally discover particular BuddyBoss blocks for issues like Programs, Discussions, Boards, Teams, Members, Exercise, Notifications, and Fast Hyperlinks.
For instance, in case your group web site already has an lively discussion board, you’ll be able to merely add the ‘Discussion board’ block so it seems proper inside your app.

You can too use some other common WordPress blocks, embed movies, add pictures, or embody textual content—similar to you’ll when creating a standard web page.
When you’re proud of the way it appears to be like, click on the ‘Publish’ or ‘Replace’ button to save lots of your adjustments. Now you can repeat the method to create as many app pages as you want.
Step 8: Construct and Check Your Cell App
You are actually able to construct your app.
Go to the BuddyBoss App » Construct web page out of your WordPress dashboard and click on the ‘Request Construct’ button.

It will open a brand new display the place that you must choose iOS and Android as your platforms.
Then, select Launch App and Check App because the construct varieties. This principally tells BuddyBoss to create 4 variations of your app — a take a look at and a launch model for each iOS and Android.
The take a look at app model is the one that may be immediately put in in your cell phone utilizing a QR code. It helps you see how your app appears to be like and performs earlier than you submit it to the app shops.
The discharge model, however, is the one you’ll add to the Apple App Retailer and Google Play Retailer.
As soon as completed, click on the ‘Subsequent Step’ button.

Subsequent, BuddyBoss will present a abstract of your app info.
Overview it fastidiously to verify the whole lot appears to be like proper, and click on the ‘Ship Construct Request’ button.

Your submission will now go to the BuddyBoss workforce, who will use their specialised system to generate your app builds. As soon as the method is full, the standing on this web page will change to Accomplished.
When that occurs, click on the ‘Set up Check App’ button. A popup will seem with a QR code that you would be able to scan in your system to put in and take a look at your app immediately.

🔍 What to Verify in Your Check App (Earlier than Submitting to App Shops)
When you’ve put in the take a look at model of the app in your telephone, listed below are a number of essential issues I like to recommend checking to verify the whole lot is working correctly:
Are you able to log in and register for a brand new account efficiently?
Do core group options (just like the exercise feed, boards, teams, or programs) load accurately?
Are push notifications working? (You may take a look at this by sending a message from one other account or system.)
Does the app’s branding match your settings? Verify your emblem, colours, and app icon to verify they seem precisely the way you designed them.
Is the navigation clean with no damaged hyperlinks or lacking icons?
Ensuring this stuff are functioning accurately will make it easier to keep away from rejections throughout the app retailer submission course of.
Step 9: Submit Your App to the App Shops
Now that your app is constructed and examined, it’s time to add it to the Apple App Retailer and Google Play Retailer.
To do that, change to the ‘Publish’ tab on the prime of your Construct web page. Then, select Apple App Retailer and choose the discharge model of your app from the dropdown menu.
Click on the ‘Add Construct’ button to start the submission course of.

You may observe the identical steps for Android by switching to the ‘Google Play Retailer’ tab.
Earlier than you add your app, ensure you’ve ready the whole lot the app shops require — together with your app description, screenshots, and key phrases.
These things will likely be proven in your public app itemizing and play a significant function in serving to customers uncover your app via search.
Within the Google Play Console, you’ll be able to enter this info by going to your dashboard, choosing your app, and opening the ‘Retailer Itemizing’ part.
From there, you’ll have the ability to add screenshots, write your app description, and add key phrases within the app particulars fields.

When you’re utilizing the Apple App Retailer, you’ll enter this info in App Retailer Join. Merely go to ‘My Apps’ and choose your app.
Right here, you’ll be able to add your screenshots, add your app description, and embody related key phrases to enhance visibility within the App Retailer search outcomes.

As soon as submitted, your app will undergo a assessment course of. It normally takes 2 to 7 days, however it could actually fluctuate relying on the shop’s assessment queue and your app’s complexity.
Don’t fear in case your app doesn’t get accepted the primary time. It’s widespread for brand new builders to obtain suggestions or minor change requests. Each Apple and Google present clear directions on what wants fixing, and you may merely replace your app and resubmit it.
After approval, your app will go reside and be accessible for everybody to obtain.
💡 Bonus Tip: Preserve Your App Up to date
Publishing your app just isn’t a one-time course of. Similar to your WordPress web site, your app wants ongoing upkeep to remain suitable, safe, and user-friendly.
With BuddyBoss, minor adjustments you make in your WordPress web site, comparable to updating content material, posts, programs, or group exercise, will sync to the app routinely. You do not want to republish your app for a lot of these updates.
Nonetheless, suppose you make structural adjustments that have an effect on the app’s performance, comparable to enabling new BuddyBoss options, updating APIs, altering your app branding, or including new plugins that combine with the app.
In that case, you’ll need to generate a brand new construct and resubmit it to the Apple App Retailer and Google Play Retailer.
This ensures your customers at all times get the most recent model and the app doesn’t break as a consequence of unsupported adjustments.
Regularly Requested Questions About Turning a WordPress Web site into an App
Now that you already know the total technique of turning a group web site right into a cellular app, listed below are some widespread questions I typically hear from newcomers such as you:
How lengthy does it take to construct an app?
Creating an app out of your WordPress web site utilizing BuddyBoss will take round one hour for the preliminary setup and configuration. Nonetheless, the whole course of from begin to end, together with ready for Apple and Google to assessment and approve your app, can take a number of days.
Can I take advantage of the BuddyBoss App with any WordPress theme?
Sure, you need to use different WordPress themes, however the BuddyBoss App works greatest with the BuddyBoss Theme. It’s designed to totally sync your group options, programs, and content material with the app. Utilizing one other theme could trigger lacking options or damaged performance.
What occurs if I cancel my BuddyBoss App subscription?
When you cancel, your app will cease receiving updates, and also you gained’t have the ability to publish new variations. Present app installations will proceed working, however any new options, bug fixes, or retailer integrations will not be accessible.
How are content material updates dealt with in my WordPress app?
Content material updates in your WordPress web site routinely sync along with your BuddyBoss App. This contains posts, pages, programs, boards, and group exercise. This retains your app at all times updated with none further work.
Do I would like coding data to create a cellular app for my WordPress web site?
No coding is required. BuddyBoss handles the heavy lifting, and also you simply have to arrange your app within the dashboard, configure iOS and Android settings, and customise your branding. This makes it accessible for anybody, even newcomers.
I hope this text helped you discover ways to simply flip your WordPress web site right into a cellular app. You may additionally wish to see our newbie’s information on easy methods to add a non-public messaging system in WordPress and our comparability of BuddyBoss vs. Circle, vs. Mighty Networks.
When you appreciated this text, then please subscribe to our YouTube Channel for WordPress video tutorials. You can too discover us on Twitter and Fb.

